
Are you looking to enhance the functionality and style of your cabinet? Adding shelves is a fantastic DIY project that can optimize your storage space and reflect your personal preferences. In this comprehensive guide, We will walk you through the step-by-step process Of adding shelves to your cabinet, From gathering the necessary tools And materials to measuring And installing the shelves correctly. With our helpful tips And detailed instructions, You’ll be able to transform your cabinet into A well-organized and visually appealing storage solution that perfectly suits your needs. Get ready to unlock the full potential of your cabinet and embark on this rewarding DIY journey!
What Are Cabinet Shelves?

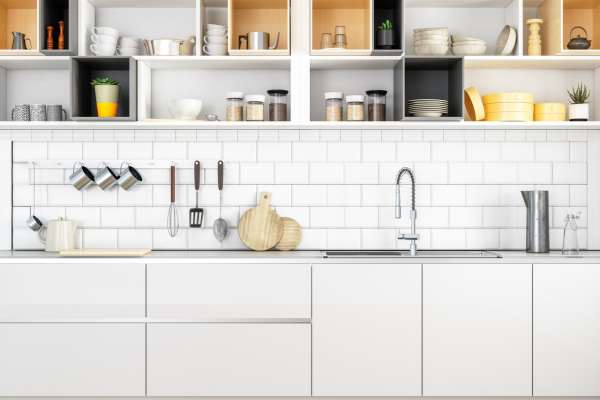
Cabinet shelves are horizontal surfaces or platforms installed within cabinets to create storage compartments or divisions. These shelves provide additional space and organization options, allowing for the efficient arrangement of items such as dishes, cookware, food containers, and other kitchen or household essentials. Cabinet shelves are typically made of materials like wood, laminate, or metal, and they can be adjustable or fixed in position. Adjustable shelves offer flexibility, allowing you to customize the height and spacing to accommodate various items. They can be found in kitchen cabinets, bathroom cabinets, closets, And other storage units, providing functional And accessible storage solutions for different areas Of the home Or office. Cabinet shelves play a vital role in maximizing storage capacity, improving organization, and maintaining a tidy and clutter-free living or working environment.
The Benefit Of Adding Shelves
- Increased storage space: Shelve provide additional surfaces to store and organize various items, maximizing the use of available vertical space in a room.
- Improved organization: By adding shelves, you can create designated areas for specific items, making it easier to locate and access them when needed.
- Enhanced aesthetics: Well-placed shelve can contribute to the overall aesthetics Of a room, allowing you to display decorative items, books, Or personal collections, Adding a sense Of style and personality to the space.
- Utilization of unused space: Shelves can be installed in underutilized areas such as corners or high walls, transforming them into functional storage spaces and preventing wastage of valuable square footage.
- Easy customization: Shelve can Be customized to fit your specific needs And preferences. They come in various sizes, shapes, And materials, Allowing you to create a storage solution that suits your space And complements your existing decor.
- Improved accessibility: With shelves, items are easily visible and within reach, eliminating the need to dig through cluttered drawers or cabinets. This saves time and effort when searching for frequently used items.
- Efficient use of small spaces: Shelves are particularly useful in smaller spaces where floor space is limited. They provide an efficient way to store items without overcrowding the room, helping you maintain a neat and organized environment.
- Protection and display of valuable items: Shelve can be used to showcase and protect delicate or valuable items, such as collectibles, art pieces, or fragile possessions, keeping them safe from potential damage while also highlighting their beauty.
- Versatility: Shelve can Be used in various rooms And settings, including living rooms, bedrooms, kitchens, offices, And garages. They serve a wide range of purposes, from storing books and displaying decor to holding kitchenware or organizing tools.
The Cabinet And Planning
1. Examining The Cabinet Structure And Dimensions
Examining the Cabinet Structure and Dimensions: Evaluate the internal structure and dimensions of the cabinet. Take accurate measurements of the height, width, and depth to determine the available space for installing shelve. Consider any obstructions like hinges or plumbing that may affect shelf placement.
2. Determining The Desired Number And Placement Of Shelves
Assess your storage needs and plan the number and placement of shelve accordingly. Consider the height requirements of items and design the shelves to accommodate them effectively. Allow for ample space between shelve to accommodate taller items.
3. Considering Weight Capacity And Materials For Shelves

Take into account the weight capacity of the shelve to ensure they can safely support the intended items. Choose appropriate materials, such as sturdy wood or metal, that can withstand the weight and usage demands. Consider the durability and moisture resistance of the materials to ensure longevity.
Gathering Materials And Tools

1. List Of Necessary Materials (e.g., Shelves, Brackets, Screws)
To add shelves to your cabinet, You will need the following materials: shelve (pre-made Or custom-cut to fit your cabinet dimensions), brackets (either adjustable or fixed, depending on your preference and needs), screws Or fasteners appropriate for your cabinet material (e.g., wood screws for wooden cabinets Or cabinet anchors for drywall), And any additional hardware or accessories, such as shelf supports Or covers, That you may require for the specific shelf installation.
2. Required Tools (e.g., Drill, Measuring Tape, Level)
Collect the necessary tools to facilitate the installation process. These tools typically include a drill with the appropriate drill bits for your cabinet material, a measuring tape or ruler to take accurate measurements, a level to ensure the shelves are installed straight, a pencil or marker for marking the positions of the brackets and shelve, and a screwdriver or power screwdriver to attach the brackets and secure the shelves.
Preparing The Cabinet
1. Clearing The Cabinet And Removing Existing Items

Clearing the Cabinet and Removing Existing Items: Empty the cabinet and remove all items currently stored inside. This allows for a clear workspace and provides easy access to the cabinet interior for cleaning and installation.
2. Cleaning And Organizing The Cabinet Interior
Before adding shelves, take the opportunity to thoroughly clean the cabinet interior. Remove any dust, debris, or residue to ensure a clean surface for the shelves. Additionally, consider organizing the contents of the cabinet, discarding any unnecessary items, and grouping similar items together. This step will optimize the storage space and make it easier to arrange items on the newly installed shelves.
3. Measuring And Marking Shelf Positions

Measure the interior dimensions of the cabinet accurately. Determine the desired height and spacing for the shelves based on the items you plan to store. Use a measuring tape or ruler to mark the positions for the brackets and shelves inside the cabinet. It is important to ensure the markings are level and properly aligned to achieve a visually pleasing and functional shelf arrangement.
Installing Shelf Brackets
1. Determining The Bracket Placement And Spacing
Determining the Bracket Placement and Spacing: Based on the desired height and number of shelve, determine the appropriate placement and spacing for the brackets. Consider the size and weight Of the items you plan to store On the shelve. It is generally recommended to place brackets at each end of the shelf and add additional brackets evenly spaced along the length for added support.
2. Marking The Bracket Positions And Pre-Drilling Holes

Marking the Bracket Positions and Pre-Drilling Holes: Use a pencil or marker to mark the positions of the brackets on the cabinet walls. Ensure the marks are level and aligned with the measurements taken earlier. Next, use a drill with an appropriate drill bit to pre-drill holes at the marked positions. Pre-drilling helps prevent the cabinet walls from splitting or cracking during the installation process.
3. Securing The Brackets To The Cabinet Walls

Align the brackets with the pre-drilled holes and attach them to the cabinet walls using screws or appropriate fasteners. Ensure that the brackets are securely fastened to provide stable support for the shelve. Repeat this step for each bracket, following the marked positions and maintaining alignment.
Installing Shelves
1. Measuring And Cutting Shelves To Fit The Cabinet Dimensions

Measuring and Cutting Shelves to Fit the Cabinet Dimensions: Take precise measurements of the cabinet interior to determine the dimensions for the shelve. Transfer these measurements to the selected shelf material, whether it’s pre-made shelves or custom-cut pieces. Use a saw or appropriate cutting tool to trim the shelve to the correct size, ensuring a snug fit within the cabinet.
2. Placing The Shelves On The Brackets
With the brackets securely attached to the cabinet walls, carefully place the shelves on top of the brackets. Ensure that the shelves are aligned properly and sit evenly on the brackets. Double-check the levelness of the shelves to maintain a balanced and visually pleasing installation.
3. Securing The Shelves To The Brackets

Once the shelves are in position, secure them to the brackets using screws or fasteners provided with the brackets. Ensure that the screws are tightly fastened, holding the shelve securely in place. Take care not to overtighten, as it could damage the shelf material.
Adjusting Shelf Heights
1. Assessing The Initial Shelf Arrangement
Once the shelves are installed, take a moment to assess the initial arrangement. Consider the items you plan to store on the shelve and evaluate if any adjustments are needed to optimize storage space and accessibility.
2. Modifying Shelf Heights Based On Storage Needs
Determine if the current shelf heights accommodate your storage needs effectively. If you have taller items that require more vertical space, adjust the shelf heights accordingly. Use a measuring tape or ruler to ensure the shelve is evenly spaced and aligned.
3. Ensuring Shelves Are Level And Properly Aligned
Check that the shelves are level and properly aligned with each other. Use a level to confirm horizontal alignment and make any necessary adjustments to ensure a visually appealing and functional arrangement. This step helps create a neat and organized appearance.
Sanding And Painting The Shelve

If desired, you can sand the shelves to create a smooth surface and remove any rough edges. Use sandpaper or a sanding block to gently sand the shelves, following the grain of the wood. Once sanded, wipe away any dust or debris. If you want to add a fresh look or match the shelves to your cabinet or room decor, consider painting or staining them. Select a paint or stain suitable for the type of shelf material, and follow the manufacturer’s instructions for proper application and drying times.
Adding Shelf Liners Or Organizers

For added protection and aesthetics, consider placing shelf liners or organizers on the shelve. Shelf liners help prevent items from slipping or scratching the surface, and they can be easily cleaned or replaced if necessary. Additionally, organizers such as bins, dividers, or baskets can help further optimize storage and keep items organized.
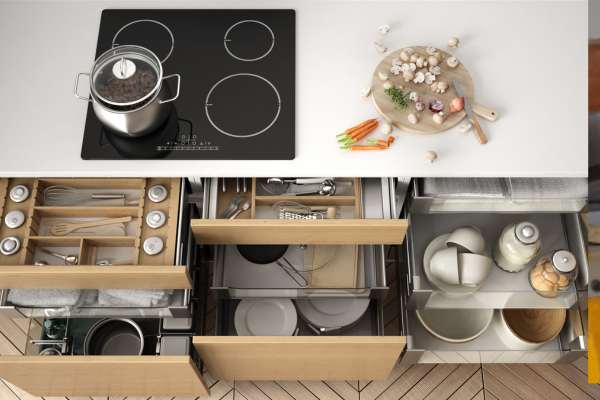
Reorganizing Items And Maximizing Storage Efficiency
Take the opportunity to reorganize your items on the shelve, grouping similar items together and utilizing the available space efficiently. Consider arranging items based on frequency of use or category to improve accessibility and streamline your storage system.
Checking For Any Loose brackets Or Damaged Shelves

Regularly inspect the shelves and brackets for any signs of wear, damage, or loosening. Check that the brackets are securely fastened to the cabinet walls and that the shelve are stable. If any issues are found, tighten the brackets or replace any damaged components to maintain the integrity of the shelf installation.
Making Adjustments Or Repairs As Necessary
As you use the shelve over time, you may find the need for further adjustments or repairs. Monitor the stability of the shelve and address any issues promptly. This may involve repositioning shelve, tightening brackets, or replacing damaged parts to ensure a safe and functional storage solution.
The Final Thoughts
Adding shelves to a cabinet is a worthwhile endeavor that enhances storage capacity and organization. By following the steps outlined in this guide, including examining the cabinet structure, determining shelf placement, considering weight capacity and materials, and adjusting shelf heights to suit your needs, you can create a functional and efficient storage solution. Additionally, optional steps such as sanding, painting, and adding liners or organizers further enhance the aesthetic appeal and usability of the shelves. Embarking on DIY projects like this not only improves your living spaces but also empowers you to explore other creative endeavors to enhance your home. So, take the leap and discover the satisfaction of transforming your space through DIY projects.