
Are you ready to transform your living spaces with a fresh and updated look? Look no further than changing the color of your cabinets. Cabinets not only provide essential storage solutions but also contribute significantly to the overall ambiance and style of a room. In this comprehensive guide, We will walk you through the process of changing cabinet colors, Offering step-by-step instructions, expert tips, And valuable insights to help you achieve professional-quality results. Whether you’re A seasoned DIY enthusiast or A novice, Get ready to unleash your creativity And create A space that reflects your personal style And vision. Let’s embark on this journey Of cabinet color change and bring new life to your home.
The Benefit Of Cabinet Color Change
Changing the color of your cabinets offers a multitude of advantages that can significantly enhance the overall appeal and functionality Of your living spaces. Let’s explore these benefits in more detail:
- Enhanced Aesthetics: One of the primary benefits Of changing the color of cabinets is the ability to transform the overall look and feel of A space. Different cabinet colors can significantly impact the visual appeal of a room, making it appear more modern, traditional, rustic, or any other desired style. A new cabinet color can breathe new life into a tired or outdated space, creating a fresh and updated atmosphere.
- Personalization and Customization: Cabinet color change allows you to personalize and customize your living space according to your preferences. By selecting A color that aligns with your personal style and complements the overall design scheme of the room, You can create a cohesive and harmonious look. It’s an opportunity to showcase your unique taste and create a space that reflects your personality.
- Improved Mood and Ambiance: Colors can have A significant impact on our emotions And moods. Choosing the right cabinet color can help create A specific ambiance in your space. For example, lighter colors like white or cream can make a room feel brighter and more spacious, While darker colors like navy or espresso can add warmth and coziness. By selecting a cabinet color that aligns with the desired mood, you can enhance the overall atmosphere of the room.
- Cost-Effective Solution: Compared to completely replacing cabinets, changing their color is a more cost-effective option. Repainting or refinishing existing cabinets is generally less expensive than purchasing brand new ones. It allows you to achieve a desired aesthetic transformation without the need for A major renovation or the expense of new cabinetry.
Planning And Preparation
1. Choosing The Desired Color And Finish

The first step is to decide on the color And finish you want for your cabinets. Consider the overall aesthetic of the room and your personal style preferences. Are you looking for a bold statement color or a more subtle and neutral tone? Take into account factors such As the existing color scheme, lighting, And the mood you want to create. Collect color swatches, create mood boards, and visualize how the chosen color will harmonize with the rest of the space.
2. Understanding The Impact Of Color On Room Space And Mood

Color has A significant impact on the perception Of space And the mood it evokes. Dark colors tend to make A room feel smaller and cozier, While light colors can create An illusion Of spaciousness. Consider the size and layout of the room when choosing a color for your cabinets. Additionally, different colors evoke different emotions and moods. For example, Warm colors like red And orange can create A lively and energetic atmosphere, While cool colors like blue And green can promote relaxation And serenity. Choose a color that aligns with the desired ambiance and purpose of the space.
3. Assessing The Condition And Type Of Current Cabinet Finish
Before proceeding with the cabinet color change, evaluate the condition of your existing cabinets. Check for any damage, scratches, Or dents that may need to Be repaired before painting Or refinishing. Also, identify the type of current cabinet finish. Is it painted, stained, or laminated? This information will help determine the necessary preparation steps, such as sanding, priming, or stripping, to ensure proper adhesion of the new color and finish.
Materials And Tools Needed
1. List Of Necessary Supplies (Paint, Primer, Brushes, Etc.)

Gather high-quality paint suitable for cabinets, along with a primer that promotes adhesion. Choose brushes and rollers designed for smooth application, and have sandpaper of different grits for surface preparation. Additionally, acquire a tack cloth for removing dust, painter’s tape for protection, and drop cloths or plastic sheets to cover surrounding areas. Don’t forget wood filler for repairs, a screwdriver for removing hardware, and stir sticks to mix paint and primer effectively.
2. Selection And Use Of Different Tools And Materials
Consider using foam brushes and short-nap rollers for precise and even coverage. If you opt for A paint sprayer, Follow the manufacturer’s instructions for setup And usage. A sanding block or electric sander will be helpful for smoothing surfaces, and a putty knife can aid in applying wood filler. Use masking tape to protect areas you don’t want to paint and lay down drop cloths or plastic sheets to safeguard floors and furniture.
3. Safety Equipment: Gloves, Masks, Goggles, Etc.

Prioritize safety by wearing gloves to protect your hands from paint and chemicals. Utilize A respirator Or dust mask to prevent inhaling fumes, And wear safety goggles to shield your eyes from splatters and debris.
Preparing The Cabinets
1. Clearing And Cleaning The Work Area

Start by removing any items from the surrounding area to create a clear workspace. This includes clearing countertops, removing decorative objects, and protecting nearby furniture or appliances with drop cloths or plastic sheets. This ensures that no paint or debris damages other surfaces during the process.
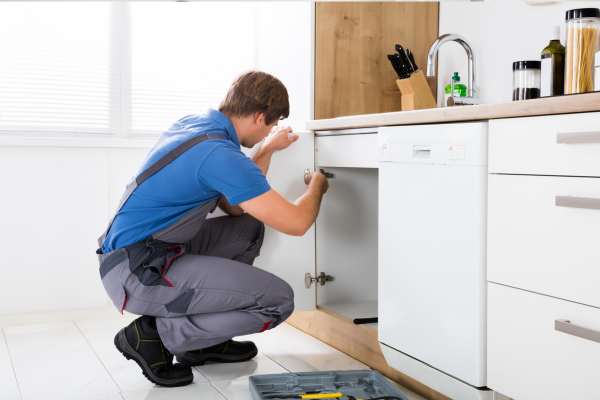
2. Removing Doors, Drawers, And Hardware

To facilitate easier access and achieve a more professional finish, take off the cabinet doors, drawers, and hardware. Use a screwdriver to remove hinges, handles, and knobs. Place them in labeled bags or containers for easy reinstallation later. This step also allows for better coverage and avoids paint drips or smudges on hardware.
3. Cleaning And Sanding The Cabinet Surfaces

Thoroughly clean the cabinet surfaces using a suitable cleaner or degreaser. This removes dirt, grease, and grime that can hinder paint adhesion. Rinse the cabinets with clean water And allow them to dry completely. Next, lightly sand the surfaces with the appropriate grit sandpaper (e.g., 120 or 220) to create a roughened texture for better paint adherence. Sand in the direction of the wood grain, being careful not to oversand or damage the wood.
4. Repairing Any Damages Or Imperfections
Carefully inspect the cabinets for any damages, scratches, or imperfections. Use wood filler to fill in holes, dents, or gouges. Apply the filler with a putty knife, smoothing it out evenly. Allow the filler to dry completely, Following the manufacturer’s instructions. Once dry, sand the filled areas until they are flush with the surrounding surfaces.
Painting The Cabinets
1. Choice Of Paint Type (Oil-Based, Water-Based)
Select the appropriate paint type for your cabinets, considering factors such as durability, finish, and personal preference. Common options include oil-based paints and water-based (latex) paints. Oil-based paints provide a smooth and durable finish, While water-based paints offer easier cleanup And faster drying times. Consider the specific needs of your cabinets and choose a paint that suits your requirements.
2. Techniques For Applying Paint (Brush, Roller, Sprayer)

There are several techniques you can use To apply paint to your cabinets, including brushes, rollers, And sprayers. Brushes allow for precise control and are ideal for painting small areas, corners, and edges. High-quality brushes with synthetic bristles tend to provide smoother results. Rollers are great for larger flat surfaces and can cover a larger area more quickly. Foam or short-nap rollers are often recommended for cabinets. If you have experience or access to a paint sprayer, it can provide a professional finish with an even coat. Follow the manufacturer’s instructions for the sprayer and ensure proper ventilation.
3. Applying Multiple Coats For An Even Finish
To achieve A smooth And consistent finish, It’s often necessary to apply multiple coats Of paint. Start with a thin and even coat, allowing it to dry according to the paint manufacturer’s instructions. Lightly sand the surface between coats with fine-grit sandpaper to create A smooth base for the next coat. This step helps to remove any brush or roller marks, ensuring a professional-looking result. Apply subsequent coats following the same technique until you achieve the desired coverage and color intensity.
4. Sanding Between Coats For A Smooth Finish

Sanding between coats is crucial for achieving a smooth and flawless finish. After each coat has dried, lightly sand the surface using fine-grit sandpaper. This step helps to smooth out Any imperfections, brush marks, Or bubbles that may have occurred during the painting process. Remember to wipe away any dust Or debris with A tack cloth before applying the next coat of paint. This ensures optimal adhesion and A clean surface.
Reassembling The Cabinets
1. Reattaching Doors And Drawers

Start by aligning the cabinet doors and drawers with their respective openings. Use the screwdriver to secure the hinges back onto the cabinet frame for each door. Ensure the doors are level and properly aligned. For drawers, slide them back into their designated slots, making sure they glide smoothly. Check that all doors And drawers are functioning correctly before moving On to the next step.
2. Reinstalling The Hardware
Take the hardware, such as handles, knobs, and pulls, that you removed earlier and reinstall them onto the cabinet doors and drawers. Make sure to use the appropriate screws or fasteners provided with the hardware. Align the hardware properly and tighten the screws securely. This step adds the finishing touch to your cabinets and enhances their overall appearance.
3. Ensuring Everything Aligns And Functions Properly

Once the doors, drawers, and hardware are reattached, carefully check that everything aligns properly and functions smoothly. Open and close each door and drawer to ensure they operate without any sticking or rubbing. Adjust hinges or drawer slides if needed to ensure a perfect fit. Pay attention to gaps and ensure they are consistent throughout the cabinets for a professional look. Make any necessary adjustments until everything is aligned correctly.
Clean-Up And Maintenance
1. Properly Cleaning And Storing Tools And Leftover Materials
Begin by cleaning your brushes, rollers, And any other tools used during the painting process. Follow the instructions provided by the paint manufacturer to clean the brushes and rollers thoroughly. Dispose of any leftover paint, primer, or other materials according to local regulations. Properly seal and store any remaining paint for future touch-ups or projects. Clean the work area by removing drop cloths or plastic sheets and properly disposing of any debris or waste.
2. Routine Care For Newly Painted Cabinets
For routine care, adopt practices that will keep your newly painted cabinets looking their best. Regularly clean your cabinets using A mild, non-abrasive cleaner and A soft cloth or sponge. Avoid harsh chemicals and abrasive scrubbers that can damage the paint finish. Be mindful of excessive moisture and promptly wipe up any spills or splatters to prevent water damage. Handle the cabinet doors and drawers with care, avoiding slamming or applying excessive force. Refrain from using harsh cleaners or abrasive materials that could scratch or chip the paint. Conduct regular inspections to identify any signs of wear, chipping, or damage, and address them promptly to prevent further issues.
The Final Thoughts
Changing the color of your cabinets is a rewarding DIY home improvement project that can greatly enhance the aesthetics of your space. By following the step-by-step process, considering color choices and their impact, and assessing the condition of your cabinets, you can achieve a personalized and stunning transformation. Embrace the opportunity to showcase your creativity and style, And enjoy the sense Of accomplishment that comes with making A unique and personalized statement in your home. Embark on this exciting journey and discover the joy of creating a space that truly reflects your personality and taste.