
A kitchen sink is one Of the most frequently used items in our home, A crucial part of our daily lives where we wash our dishes, rinse our vegetables, And sometimes, give our infants A quick bath. White kitchen sinks, in particular, have a timeless aesthetic that can suit any decor, but the beauty of these sinks can be overshadowed if they become stained or discolored. Therefore, regular cleaning is essential not just for maintaining hygiene but also for retaining the sink’s bright, clean look. Let’s dive into some methods and tips for clean a white kitchen sink effectively, ensuring that it remains an attractive focal point in your kitchen.
How to Clean a White Enamel Sink to Look Like New?
Maintaining the pristine look of a white enamel sink involves a few essential steps and gentle cleaning materials. Begin by removing any dishes or debris and rinsing the sink thoroughly with warm water. Generously sprinkle baking soda all over the sink’s surface and use a non-abrasive sponge to lightly scrub the surface, giving extra attention to stained or discolored areas.
For persistent stains, pour A small amount of white vinegar onto the stain, let it sit for A few minutes, Then scrub with the sponge. Rinically rinse with warm water and repeat these steps until all stains disappear. For an extra shine, rub the cut side of a lemon or lime over the sink’s surface, then rinse thoroughly.
Finally, dry the sink with a soft cloth to prevent water spots and give it a polished look. For exceptionally stubborn stains, a paste of hydrogen peroxide and cream of tartar may be used apply, let it sit for a few minutes, then scrub and rinse. Always remember to avoid harsh chemicals or abrasive cleaners to prevent damage to the enamel surface.
Benefits Of Regular Cleaning
Regular cleaning offers a multitude of benefits beyond just maintaining an appealing and tidy environment.
Here Are Some Of The Key Advantages:
Promotes Health: Regular cleaning helps to reduce dust, allergens, And pathogens, Thus improving air quality and reducing the risk Of allergies, asthma, And illnesses.
Reduces Stress: A cluttered or dirty space can contribute to stress and anxiety. On the contrary, a clean and organized environment fosters calmness and improves mental wellbeing.
Improves Productivity: An orderly and clean environment is more conducive to focus and productivity. It reduces distractions and allows for more efficient work or study.
Preserves Your Possessions: Regular maintenance and cleaning prolong the life of your belongings, whether it’s your furniture, appliances, or clothing. It prevents the build-up of dirt And grime that can cause damage over time.
Safety and Hygiene: Regular cleaning can help prevent accidents like trips and falls caused by clutter. In the kitchen or bathroom, it helps to keep surfaces sanitized, reducing the risk of foodborne illnesses or infections.
Saves Time: While it might seem like cleaning takes up time, Regular cleaning can actually save you time in the long run. It’s quicker and easier to clean a slightly dirty surface than one where grime has been allowed to build up over time.
Boosts Mood and Self-Esteem: A clean home or workspace can be a source of pride and satisfaction, thereby boosting mood and self-esteem. Plus, the act of cleaning itself can provide a sense of accomplishment.
Regular cleaning has far-reaching impacts on health, Safety, productivity, And overall quality Of life.
What You’ll Need

- Gentle Cleaning Agent
- Soft Sponge Or Cloth
- Baking Soda
- Distilled White Vinegar
- Lemon Juice (Optional)
- Microfiber Towel
- Rubber Gloves
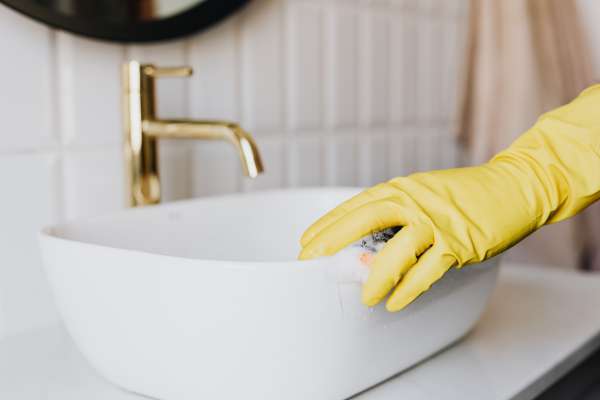
1. Clean The Sink

Remove Dishes, Utensils, And Any Debris
The first step in cleaning your sink is to clear it out completely. This means removing any dishes, utensils, or food scraps that may be present. Any items left in the sink will not only obstruct your cleaning process, but they could also potentially cause damage to your sink or get in the way of a thorough cleanse. You should also check the drain for any food particles or other debris that might clog it and remove these using a sink strainer or just your hand (make sure to use gloves for hygienic purposes).
Rinse The Sink With Warm Water
Once your sink is empty, You can start the cleaning process. Begin by rinsing the entire sink with warm water. This will help to loosen any dirt, grime, or food residues that might be stuck to the surface. The warmth of the water helps to soften these materials, making them easier to remove in the following steps. Make sure you rinse all areas of the sink, including the corners and around the drain, where dirt tends to accumulate. This preliminary rinse serves as a prep for your sink, readying it for a more thorough cleaning.
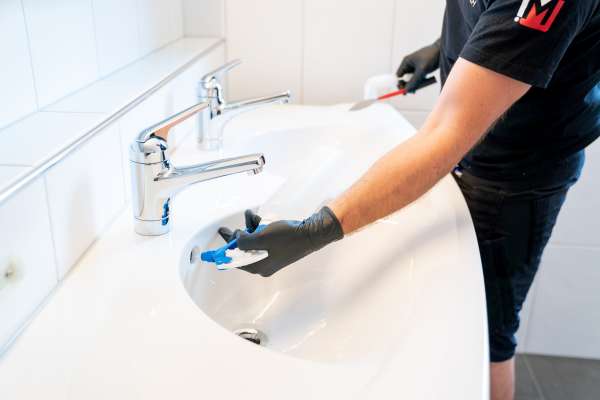
Step 2: Scrubbing With A Soft Sponge Or Cloth

Wet The Sponge Or Cloth With Warm Water
Once you’ve rinsed the sink, the next step involves deeper cleaning. Start by wetting a soft sponge or cloth with warm water. Ensure the sponge or cloth is non-abrasive to avoid scratching or damaging the surface of your sinks. The warm water helps to further soften any tough stains or dried-on food remnants, making them easier to scrub away.
Gently Scrub The Sink In Circular Motions
After wetting the sponge or cloth, begin scrubbing the sinks using gentle, circular motions. This method effectively removes grime without causing unnecessary stress or scratches on the surface. Work your way around the entire sink, Starting from one side And moving towards the other. This systematic approach ensures you don’t miss any areas.
Pay Attention To Stains And Discoloration
While you are scrubbing, pay particular attention to any stains, discoloration, or areas with stubborn residue. These areas might need a little more elbow grease and possibly a targeted cleaner. If general scrubbing doesn’t remove these spots, consider using a cleaning agent suitable for your sink’s material (like a baking soda paste for stainless steel or enamel). Always remember to test any new cleaning agent on an inconspicuous area of the sink before applying it to a visible area. This step ensures that your sinks remains spotless and gleaming, just like new.
Step 3: Treating Stubborn Stains
Create A Paste With Baking Soda And Water
For stubborn stains that don’t respond to initial cleaning, a more concentrated effort may be required. An effective and gentle method involves using a baking soda paste. Mix equal parts Of baking soda And water in A small bowl to form a paste. Baking soda is a mild abrasive that can remove tough stains without scratching your sink’s surface.
Apply The Paste To The Stained Areas
Take the baking soda paste and apply it directly onto the stains. You can use your fingers (with gloves on for hygiene), a soft cloth, or a sponge to do this. Ensure the paste thoroughly covers the stained areas for maximum effect.
Allow It To Sit For A Few Minutes
Once the paste is applied, Let it sit on the stains for A few minutes. This dwell time allows the baking soda to penetrate the stains and break them down, making them easier to remove. However, Don’t let it sit for too long, As it can dry out And become harder to rinse off. Around 10-15 minutes is usually sufficient.
Scrub The Stains With A Soft Sponge Or Cloth
After letting the paste sit, take a soft sponge or cloth and gently scrub the treated areas. You’ll want to use A bit more pressure than before, But still Be cautious to avoid scratching the surface. As you scrub, you should notice the stains starting to fade or disappear entirely. Once you’ve finished scrubbing, rinse the sink thoroughly with warm water to wash away the baking soda paste and any remnants of the stains.
Step 4: Rinse And Wipe Down

Rinse The Sink Thoroughly With Warm Water
Once you’ve finished scrubbing And treating any stains, It’s essential to rinse the sinks thoroughly with warm water. This helps to remove any lingering bits of baking soda paste or cleaning solution that might dull the sink’s surface over time. Use your faucet’s highest pressure setting, or a cup or small bucket to splash water all over the sink, including corners and crevices where residue might hide.
Ensure All Residue Is Removed
While rinsing, check the sink carefully for any signs of remaining residue or grime. Pay close attention to areas around the drain and under the rim of the sink, as these are places where residue often remains. If you find any leftover grime, apply a little more of your cleaning solution, scrub, and then rinse again.
Wipe The Sink Dry With A Microfiber Towel
Once you’ve ensured that the sink is clean And free Of residue, grab A microfiber towel And wipe the sink dry. Drying the sinks prevents water spots, which can dull the surface, and it also discourages bacterial growth. A microfiber towel is An excellent choice because it’s super absorbent And won’t scratch the surface. Wipe the sinks from one side to the other, Making sure to get into all corners and crevices.
Step 5: Removing Stubborn Stains

Soak Stains With Oxygen Bleach
For persistent stains that resist even baking soda, consider using oxygen bleach, a non-chlorine bleach that can effectively break down stubborn stains without discoloring your sink. Mix the oxygen bleach according to the instructions On the package, Then apply it to the stain. Allow it to sit for A few minutes, But don’t let it dry out. After the soak, Scrub the area gently with A soft sponge or cloth, Then rinse thoroughly with warm water.
Clean Up Rust Stains With Salt And Lemon Juice
Rust stains can be particularly stubborn and require a more targeted approach. A simple homemade remedy for rust stains involves using salt and lemon juice. First, sprinkle a small amount of salt on the rust stain. Then, squeeze a little lemon juice over the salt. Let this mixture sit on the stain for A few hours (or overnight if the stain is deep), And then scrub gently with A soft cloth or sponge. The acid in the lemon juice reacts with the rust, While the salt acts as A mild abrasive to help lift the stain.
Use Liquid Dishwasher Soap
Another option for stubborn stains is liquid dishwasher soap. This type of soap is designed to break down food and grease residues, making it an effective cleaner for stubborn stains. Apply a small amount Of liquid dishwasher soap directly to the stain, And let it sit for A few minutes. Then, use a soft sponge or cloth to scrub the area, following with a thorough rinse with warm water.
Additional Tips
Avoiding Abrasive Cleaners
It’s crucial to steer clear of abrasive cleaners when maintaining your sinks. While they might seem effective at removing stubborn grime, they can easily scratch and damage the surface of your sinks, leading to dullness and potentially permanent marks. Opt for gentler cleaners like baking soda, liquid dish soap, or specific cleaners recommended by the manufacturer.
Choose Gentle Cleaning Agents To Prevent Scratches
When choosing a cleaning agent, go for gentle yet effective options. Homemade solutions like vinegar or baking soda paste are usually safe for most sink materials. However, always do a spot test on an inconspicuous area before applying it to the entire sink. If in doubt, Refer To the manufacturer’s instructions for recommended cleaning products.
Avoid Using Steel Wool Or Harsh Chemicals
Steel wool, wire brushes, or other harsh cleaning tools can cause severe scratches on the sink surface. Similarly, harsh chemicals can corrode or discolor the sink material. Instead, use soft sponges or cloths for scrubbing and mild, non-abrasive cleaners for treating stains.
Promptly Clean Spills And Stains
The quicker you deal with spills and stains, the easier they are to remove. Leaving them to dry or settle could lead to stubborn stains that require more effort to clean. Implement a regular cleaning routine for your sinks to maintain its cleanliness and shine.
The Final Thoughts
Clean a white kitchen sink may seem like a challenging task, but with the right techniques and cleaning agents, you can maintain its pristine, inviting look. The cleaning process involves clearing the sink, rinsing with warm water, scrubbing with a soft sponge, treating stubborn stains with safe home remedies or gentle commercial products, and ensuring a thorough rinse and wipe down afterwards. Avoiding abrasive cleaners and harsh chemicals, choosing gentle cleaning agents, and promptly addressing spills and stains also play a crucial role in preserving your sink’s cleanliness and overall integrity. By incorporating these steps into your regular cleaning routine, you can ensure your white kitchen sink stays as gleaming and welcoming as the day you first installed it.