
Maintaining a clean And efficient kitchen is essential for any home, And one crucial aspect of this is ensuring your kitchen ventilation fan Is free of dust and grime. In this article, we will guide you through The process of cleaning your kitchen ventilation fan, An often overlooked but vital component In maintaining a fresh and safe cooking environment. With simple, step-by-step instructions, You’ll learn how to keep this key appliance In top condition, ensuring it functions effectively To remove odors, smoke, And airborne grease from your kitchen.
When Is The Best Time To Use My Kitchen Ventilation?

Utilizing your kitchen ventilation fan at The right times can significantly enhance Its efficiency And longevity. Ideally, you should turn on the fan whenever you’re cooking or using The stove. This practice helps In immediately drawing out smoke, steam, And cooking odors, preventing them from settling on surfaces or lingering In the air. Additionally, It’s beneficial to keep the Fan running For a few minutes after You finish cooking. This ensures that all the airborne particles are effectively removed, keeping your kitchen air fresh And clean.
Importance Of Cleaning Kitchen Ventilation Fans
Regular cleaning of your kitchen ventilation fan Is crucial for several reasons. Firstly, It ensures The fan operates at its maximum efficiency, effectively removing unwanted odors And airborne grease. A clean fan also reduces The risk of fire hazards, as grease And dust accumulation can be flammable. Moreover, A well-maintained fan contributes To a healthier kitchen environment by preventing the recirculation of potentially harmful particles. This aspect Is especially important In Homes with allergy sufferers or respiratory issues. Lastly, regular cleaning extends The lifespan of the fan, saving You money and hassle In the long term.
Pre-Cleaning Preparations
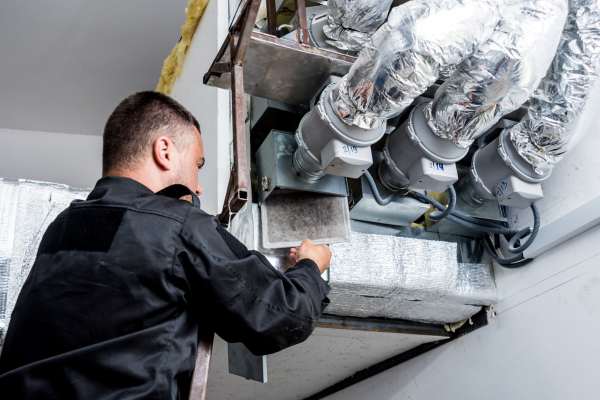
Before you begin The cleaning process, some preparations are necessary To ensure a safe and effective clean. Start by turning off the power To your kitchen ventilation fan Install at The circuit breaker To avoid any electrical hazards. Gather your cleaning supplies, which should include A degreasing agent, warm water, a sponge or cloth, And a soft-bristle brush For tougher grime. If your fan has a filter, you’ll need to remove It; most can be easily slid or popped out. For metal filters, You can typically clean them In the dishwasher, while charcoal filters will need To be replaced. Make sure you have A Sturdy step stool or ladder to safely reach The fan if it’s positioned high up.
Step-By-Step Cleaning Process
Step 1: Switching Off Power

The first and most crucial step In cleaning your kitchen ventilation fan is To ensure your safety by cutting off The power supply. Locate your home’s electrical panel And switch off the circuit breaker connected to The kitchen ventilation system. This precautionary measure Is vital To prevent any electrical hazards while cleaning. It’s always better To be safe and ensure that no electricity is flowing To the fan before you proceed with The cleaning process.
Step 2: Removing The Vent Cover

Once the power Is safely switched off, The next step is to remove The vent cover. This is typically secured In place with screws or A simple snap mechanism. You may need A screwdriver To loosen and remove these screws. Gently but firmly take The cover off, being cautious not to force It In case it’s stuck due To grime accumulation. If it’s your first time removing the cover, take your time To understand its mechanism to avoid any damage.
Step 3: Cleaning The Cover
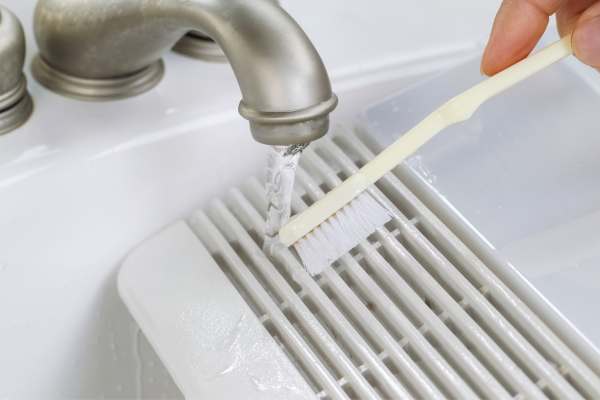
With the vent cover removed, it’s time to clean It. Over time, kitchen vent covers Can accumulate a significant amount of grease and dust. To effectively clean it, prepare A mixture of warm water and A degreasing agent In a basin. Submerge the vent cover in this solution and let it soak For a few minutes to loosen the grease and dirt. After soaking, scrub the cover gently with A sponge or a soft-bristle brush To remove any remaining grime. Rinse It thoroughly with clean water and wipe it down with a dry cloth. Ensure the cover is completely dry before reattaching it To the fan.
Step 4: Vacuuming The Fan

After removing The cover, the next step Is to vacuum the interior of It. This step helps remove loose dust and debris accumulated inside. Use a vacuum cleaner with a brush attachment To gently clean around the fan blades And the interior surfaces. Be careful not to disturb the wiring or any internal components. This vacuuming process helps ensure that The more detailed cleaning steps that follow are more effective And less messy.
Step 5: Cleaning Fan Blades

The fan blades are A crucial part of your kitchen ventilation system, often collecting A significant amount of grease and dust. To clean them, use A mild detergent mixed with warm water. Apply this solution with A cloth or sponge, gently wiping each blade. Be careful not To exert too much pressure, which might misalign the blades. For tougher grime, you might need to use A soft-bristle brush. After cleaning, wipe The blades with a dry cloth to remove any moisture.
Step 6: Wiping Down The Motor
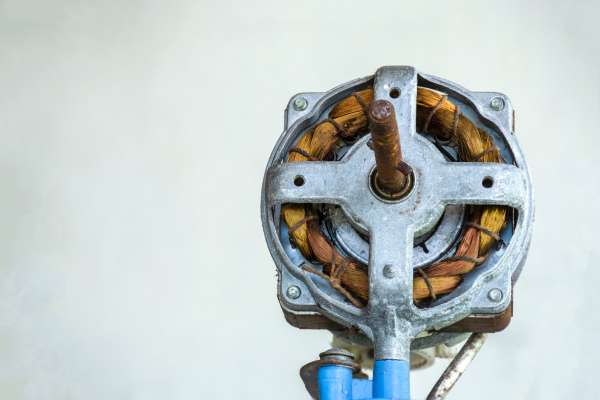
The motor Is a sensitive component of your ventilation fan, so It’s essential to clean it carefully. Instead of using liquids, which Can damage the motor, use A dry cloth or a soft brush To gently remove dust and dirt. Be careful not to disturb The motor’s wiring or any connected parts. This step helps ensure The motor runs smoothly And prevents potential malfunctions caused by dust accumulation.
Step 7: Checking For Repairs

Once the cleaning Is complete, it’s A good opportunity To inspect It for any signs of wear or damage. Look for issues like loose components, unusual noises, or inefficient extraction. If you notice any problems, It may be time to consider repairs or consult a professional. Regular inspections can help catch small issues before they turn into larger, more costly problems, ensuring The longevity and efficiency of your kitchen ventilation system. After completing any necessary checks or repairs, You can reattach the vent cover And restore power To the unit, ensuring it’s back In top working condition.
Can I Use Any Cleaner For The Fan Blades?
When it comes To cleaning the fan blades of your kitchen ventilation system, It’s important to choose the right cleaner. Not all cleaners are suitable, As some may be too harsh And damage The blades. It’s best to use a mild detergent or A specialized degreaser. These are effective at cutting through The grease and grime typically found on kitchen Fan blades without corroding or damaging the surface. Avoid using abrasive cleaners or pads, as these can scratch or degrade The fan blades. If you’re unsure, test The cleaner on a small, inconspicuous area of the blade first.
Is It Safe To Clean The Motor Area?
Cleaning the motor area requires caution. It’s safe To clean it As long as you’re careful not to introduce moisture, which Can damage the motor. The best approach is To use a dry cloth or a soft brush To gently dust around the motor, avoiding direct contact with electrical components. Never spray liquid cleaners directly onto the motor. If the area around the motor is heavily soiled And requires more than just dusting, it may be best To seek assistance from A professional.
Conclusion
Keeping It clean is essential For maintaining a healthy, safe, And efficient cooking environment. Regular cleaning ensures The fan operates effectively, preventing grease build-up And potential fire hazards. Remember To use the appropriate cleaners For different parts of the fan, And approach the motor area with caution to avoid damage. By following these steps and conducting regular checks for repairs, You can extend the life of your kitchen ventilation system and ensure It continues to work effectively For years to come.