Cleaning your KitchenAid meat grinder Is An essential step to ensure Its longevity And performance. This process, When done correctly, not only helps maintain The quality And hygiene of The meat you grind but also extends The lifespan of your appliance. “How To Clean KitchenAid Meat Grinder” Is a topic that covers The best practices And step-by-step methods For efficiently cleaning this kitchen tool. This guide will provide You with detailed instructions To ensure that every component of your KitchenAid Flesh Crusher Is properly cleaned, safeguarding your health And The integrity of your device. Whether you’re A seasoned chef or A home cook, understanding The proper cleaning techniques is crucial For anyone who uses A KitchenAid Flesh grinder.
How Often Should I Clean My Meat Grinder?

Regular clean of your KitchenAid meat grinder Is crucial For maintaining Its performance And hygiene. Ideally, You should clean your meat Crusher after every use. Meat residues, If left unattended, Can lead To bacterial growth And contamination, potentially affecting The taste And safety of The meat. Frequent cleaning not only ensures The grinder’s efficiency but also prolongs Its lifespan, making It A reliable tool In your kitchen arsenal.
What Should I Do If My Grinder Starts To Rust?
If you notice rust on Your KitchenAid Flesh grinder, It’s important to address It immediately. Start by disassembling The Crusher and soaking the rusted parts In A mixture of white vinegar and water For a few hours. This will help loosen The rust. After soaking, use A nylon brush or A sponge To scrub off The rust gently. Thoroughly rinse And dry The parts before reassembling. To prevent future rust, Ensure that All components are completely dry before storing And consider applying A food-safe mineral oil For added protection.
Is It Necessary To Oil The Grinder Parts?

Oiling The parts of your KitchenAid meat Crusher Is a good practice To keep It functioning smoothly. Use A food-grade mineral oil To lightly coat The moving parts, such As The screw, blade, And plate. This not only prevents rust but also ensures that The parts move seamlessly during operation. It’s important To remember not To over-oil, As this Can attract dust And debris.
Importance Of Regular Cleaning
Regular clean of your KitchenAid Flesh grinder Is not meat just about maintaining Its appearance; It’s about ensuring food safety And appliance efficiency. Residual meat And fat left In The grinder Can harbor bacteria, leading to foodborne illnesses. Additionally, regular cleaning prevents The build-up of old meat particles, which Can affect The taste and quality of freshly ground meat. A well-maintained Crusher also operates more efficiently, reducing wear And tear on Its components.
Gathering Necessary Tools

Before starting The cleaning process, gather all The necessary tools. You’ll need mild dish soap, warm water, A soft brush or sponge, A cleaning brush specifically for the grinder, And A dry cloth. For deep cleaning or rust removal, White vinegar And food-safe mineral oil might also be needed. Having All these items At hand will make The cleaning process more efficient And effective.
Disassembling The Meat Grinder
The first step In cleaning your KitchenAid Flesh Crusher Is To disassemble It. Ensure The grinder Is unplugged and remove All Detachable parts, including the hopper, screw, blade, plate, And any other removable components. Disassembling The grinder not only makes cleaning more thorough but also allows You To inspect each part For any signs Of wear or damage, Ensuring your Crusher remains In optimal condition.
Cleaning Each Component
1. Cleaning The Grinder Body
Start by wiping down The body of your KitchenAid Flesh grinder with A damp cloth soaked In warm, soapy water. Pay special attention To crevices where meat particles might hide. Avoid immersing The motorized part in water. For tough stains or stuck-on meat, use A soft brush To gently scrub The area. Rinse The cloth and wipe The body again To remove any soap residue, ensuring it’s completely clean.
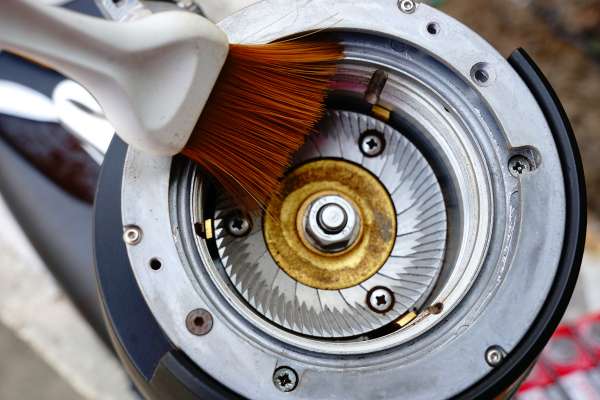
2. Scrubbing The Grinding Plates

The grinding plates require careful cleaning due To their sharp edges and small holes. Use A brush specifically designed For Use A meat grinders or a toothbrush to remove meat residue. Soak the plates In warm, soapy water If necessary, And then scrub each hole thoroughly. Rinse them under running water to ensure all soap and debris are removed.
3. Washing The Cutting Blade

The cutting blade Is A crucial component of your KitchenAid Flesh grinder, And proper cleaning Is essential For its efficiency And longevity. Start by washing The blade In warm, soapy water, taking care To handle It safely due To Its sharp edges. Use a soft brush or sponge To gently remove any meat particles or residue. It’s important To clean every part of The blade, including The edges And The center hole. Rinse It thoroughly under running water To ensure all soap Is washed off.
4. Cleaning For Stubborn Stains

Sometimes, You may encounter stubborn stains or dried meat particles that are difficult To remove with regular washing. In such cases, soak The affected parts In a mixture of warm water And A mild detergent or vinegar For A few minutes. This soaking will help loosen The stubborn residues. After soaking, Use A non-abrasive brush or sponge To gently scrub away The stains. Be sure To rinse The parts thoroughly after this To remove Any traces of The cleaning solution.
5. Drying And Reassembling
After all, the components of your KitchenAid Flesh grinder are cleans important To dry them thoroughly. Moisture can lead To rust And degradation Of metal parts. Use clean, dry cloth To wipe each component, or let them air dry completely before reassembly. Once dry, reassemble The grinder, making sure each piece is properly And securely fitted. This step Is crucial For The effective And safe operation of your Crusher.
Conclusion
Properly cleaning and maintaining your KitchenAid Flesh Crusher is essential for Is performance, durability,And the safety of The food you prepare. Regular, thorough cleaning prevents The buildup of bacteria And rust, ensuring that your grinder remains A reliable tool In your kitchen. By following these steps or washing, cleaning stubborn stains, drying, And reassembling, you’ll keep your meat Crusher In optimal condition, ready For your next culinary project. Remember, A well-maintained meat Crusher not only provides better results but also contributes to A more enjoyable And efficient cooking experience.