
A plastic dish rack is an essential tool in any kitchen, responsible for neatly housing our clean dishes while they air dry. Over time, this hardworking kitchen aid can accumulate grime, stains, and even mold due to constant exposure to moisture. Inevitably, this can compromise the hygiene of your freshly washed dishes.
However, with a few simple steps and household supplies, you can restore your plastic dish rack’s cleanliness and functionality. Here’s a comprehensive guide on how to clean your plastic dish rack effectively and maintain the hygiene of your kitchen.
What Is A Plastic Dish Rack?
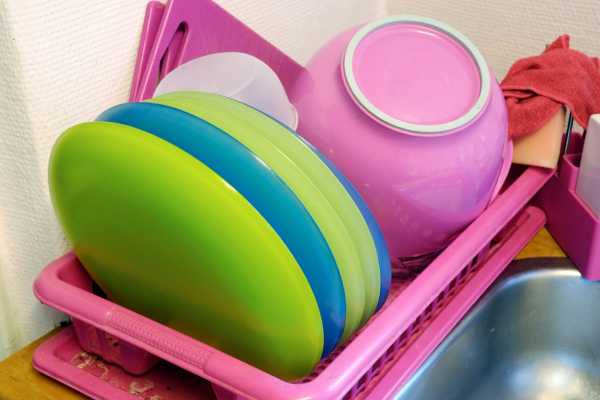
A plastic dish rack, also known as a dish drainer, Is a household kitchen tool designed to hold washed dishes, utensils. And other kitchenware, allowing them to air dry. Made from various types of durable and lightweight plastic, these dish racks typically feature designated slots for plates, bowls, and glasses, and separate compartments for flatware.
Many also come with a drip tray to catch any excess water, preventing it from spreading onto countertops. Plastic dish racks are widely used due to their affordability, ease Of cleaning, and resistance to rust. Making them A practical addition to any kitchen setup.
Importance Of Cleaning Your Plastic Dish Rack

Cleaning your plastic dishes rack is crucial for maintaining the overall hygiene of your kitchen and the health of those using it. These are constantly exposed to moisture and food particles, creating an environment that can harbor harmful bacteria and mold. If left uncleaned, these microbes can transfer onto your clean dishes, utensils, and cookware, posing potential health risks.
Moreover, grimy dish racks can cause unpleasant odors and stains, detracting from the cleanliness and aesthetic appeal of your kitchen. Regularly cleaning your dishes rack ensures that it functions properly and remains a safe place for drying your kitchenware, contributing to a healthier, cleaner kitchen.
The Benefit Of Plastic Dish Rack Clean
Cleaning your plastic dish racks offers several benefits, chief among them being the maintenance of hygiene and cleanliness in your kitchen. By keeping your dishes rack clean, you significantly reduce the chance of harmful bacteria and mold growth, which can transfer onto your clean dishes and utensils.
This means safer food preparation and consumption for you and your family. Additionally, a clean bowl racks helps preserve the aesthetic appeal of your kitchen, eliminating any unsightly stains or odors that a dirty rack might cause. Regular cleaning also extends the life of your plastic dish racks, as it helps prevent wear and tear from grime and mineral build-up.
Thus, it not only saves you potential replacement costs but also contributes to environmental conservation by reducing the need for frequent replacements.
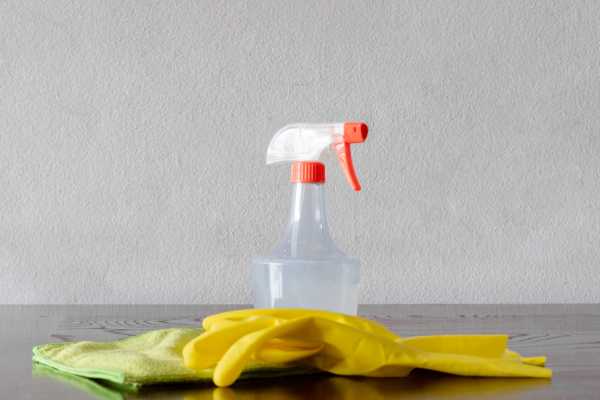
Materials Needed
- Warm water
- Dish soap or a gentle cleaning agent
- A scrub brush, toothbrush, or sponge
- White vinegar
- Baking soda
- Towel
9 Step Of Plastic Dish Rack Clean
Step 1: Empty And Disassemble The Dish Rack
Before you start cleaning, ensure that your plastic bowl rack is completely empty. Remove all dishes, utensils, and other kitchenware. If your dish case comes apart, disassemble it as much as possible. This will make it easier to clean all the different parts, especially those tight corners and crevices where grime and mold can hide.
Step 2: Preparing A Cleaning Solution
Once your bowl case is empty and disassembled, it’s time to prepare your cleaning solution. Fill your sink or a large basin with warm water and add a generous squirt of dish soap. You can also use a mild cleaning agent designed for cleaning kitchen utensils. Make sure the solution is well mixed. For tougher stains and grime, you might consider adding a cup of white vinegar or baking soda to the solution for its natural cleaning and disinfecting properties.
Step 3: Soaking The Dish Rack
Place the disassembled rack parts into the cleaning solution and let them soak for about 15 to 30 minutes. This soaking period allows the solution to penetrate any stubborn grime, making it easier to scrub off later. Make sure all parts are fully submerged in the solution for effective cleaning.
Step 4: Scrubbing And Cleaning
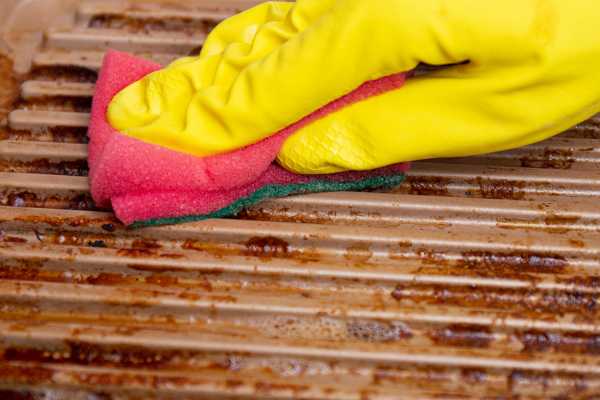
After soaking, it’s time to scrub the rack. Using a scrub brush, sponge, or old toothbrush, thoroughly scrub each part of the bowl rack, paying special attention to areas that come into contact with dishes and those hard-to-reach corners. Be gentle but thorough to avoid scratching the plastic. Once you’ve scrubbed every part, rinse them under warm running water to remove the soap or cleaning agent. Make sure to rinse thoroughly to avoid leaving behind any residue, which could attract more dirt and grime in the future. Finally, pat the dish case dry with a towel or allow it to air dry completely before reassembling and using it again.
Step 5: Let It Sit For 15-30 Minutes
After scrubbing your racks, it can be beneficial to let it sit in the cleaning solution for a further 15 to 30 minutes. This gives the soap or cleaning agent more time to break down any remaining grime or stains. And it allows the natural disinfecting properties of the vinegar or baking soda to work more effectively.
Step 6: Use A Sponge Or Brush To Remove Stains Or Odors
Once the bowl case has soaked, use a sponge, scrub brush, or toothbrush to scrub it again, focusing on any remaining stubborn stains or areas that might still have an odor. The additional soaking should have helped to loosen this residue, making it easier to remove.
Step 7: Rinse And Dry

Rinse your bowl racks thoroughly under warm running water to ensure all soap, grime4. And residue are completely removed. It’s important to remove all the cleaning agents to avoid any potential residue buildup. After rinsing, dry the dish rack thoroughly using a clean towel or let it air dry completely. It’s important to ensure no moisture is trapped as this could lead to mold and mildew growth.
Step 8: Disinfecting The Dish Rack
Even after thorough cleaning, it’s a good idea to disinfect your bowl racks. This can be done by wiping it down with A solution of white vinegar And water (one part vinegar to three parts water is a good mix). White vinegar is a natural disinfectant and can help to kill any lingering bacteria or molds, ensuring your rack is hygienically clean.
Step 9: Preventative Measures For A Clean Dish Rack
To keep your plastic dish racks clean for longer, There are A few preventative measures you can take. First, always remove dishes as soon as they’re dry to avoid water buildup. Second, try to clean your rack regularly, ideally once a week. This will prevent the buildup of grime and bacteria. Additionally, always ensure the bowl rack is dry before placing any dishes on it. A damp environment can encourage bacterial and mold growth. Lastly, you might consider using a tray or mat under your dish racks to catch water, making it easier to keep the area clean and dry.
Common Mistakes To Avoid
When cleaning your plastic racks. There are several common mistakes that you should avoid to ensure it stays in good condition and doesn’t become A breeding ground for bacteria.
- Not cleaning regularly: Neglecting regular cleaning allows grime, mold, and bacteria to accumulate. It’s recommended to clean your rack at least once a week to maintain its cleanliness and hygiene.
- Not drying properly: A common mistake is to not dry the bowl rack properly after cleaning or usage. Leaving it damp can promote the growth of bacteria and mold, defeating the purpose of cleaning it.
- Using harsh cleaners: While you might be tempted to use bleach or other harsh cleaners to disinfect the rack. These can actually cause damage to the plastic over time. Instead, stick to milder cleaning agents like dish soap, baking soda, or vinegar.
- Ignoring hard-to-reach spots: It’s easy to overlook the corners and crevices of your bowl rack during cleaning. But these are the areas where grime and bacteria often accumulate. Make sure to clean these areas thoroughly.
- Not disinfecting after cleaning: Even after a good scrub, your dish racks might still have lingering bacteria or mold. It’s important to disinfect it with a natural disinfectant like vinegar to kill any remaining germs.
- Not taking preventative measures: Keeping your dishes racks dry when not in use And removing dishes as soon As they are dry can help prevent the buildup of grime and bacteria. Reducing the amount of cleaning you need to do in the future.
Avoiding these mistakes will help you maintain clean and hygienic racks. Which is crucial for the overall cleanliness Of your kitchen.
Tips For Maintaining A Clean Dish Rack

Maintaining a clean dish case not only involves a good cleaning routine. But also some daily habits that can prevent dirt accumulation and enhance the longevity of your rack.
Here Are Some Tips To Help You Maintain A Clean Dish Rack:
Regular Cleaning: As discussed earlier, clean your bowl racks at least once A week to prevent the buildup of grime, bacteria, and mold.
Prompt Drying: After each use, make sure your case is dried properly. This reduces the chances of bacterial and mold growth.
Remove Dishes Quickly: Don’t leave your clean dishes on the rack for an extended period. Once they’re dry, put them away. This helps keep the dish rack dry and prevents bacterial growth.
Use a Drain Board or Drip Tray: If your rack doesn’t come with a built-in drain board, consider buying one. It directs the dripped water into the sink, keeping your countertop dry and preventing standing water under your racks which can breed bacteria.
Dry Before Storage: If you’re not using your bowl racks regularly and tend to store it away, ensure it’s completely dry before you put it away to prevent mildew.
Rotate Dish Racks: If possible, have two dish racks that you can rotate. This allows one to be cleaned and thoroughly dried while the other is in use.
Natural Air: Whenever possible, allow your rack to air dry in the sunlight. The ultraviolet rays from the sun have natural disinfecting properties and can help keep your dishes rack free from bacteria and mold.
Regular Disinfection: Even with regular cleaning, it’s beneficial to disinfect your dish racks periodically. A simple wipe-down with a vinegar solution can kill lingering bacteria or mold.
By integrating these tips into your kitchen routine, You’ll be able to maintain A clean, hygienic dishes rack and ensure a healthier kitchen environment.
The Final Thoughts
Cleaning and maintaining a plastic dish rack is an integral part of kitchen hygiene. Regular cleaning using mild cleaning agents like dish soap or vinegar, coupled with thorough drying, can keep your dishes case free from harmful bacteria and molds. Paying attention to often-overlooked areas like corners and crevices can further enhance cleanliness. Additionally, preventive measures such as removing dishes promptly once dried, using a drain board or drip tray. And regular disinfection can extend the life of your dish rack and maintain a healthier kitchen. By adopting these simple practices. You can ensure that your bowl rack remains A safe and hygienic place to dry your dishes.