Maintaining a clean water filter is essential for ensuring your drinking water remains safe and contaminant-free. Regularly cleaning your purification system prolongs its lifespan and enhances its efficiency in removing impurities. By learning how to clean your water filter, you can save money, reduce the risk of harmful bacteria buildup, and ensure your aqua supply stays fresh and clean. This guide will provide you with a step-by-step process on how to effectively clean your water filter, keeping your home’s water supply at its best.
When To Clean Your Water Filter?
You should clean your water filter when you notice a decrease in water flow, an unusual taste or odor in the aqua, or if it’s been more than the recommended time between cleanings, which is typically every three to six months depending on the manufacturer’s guidelines and your aqua quality. Regular cleaning ensures the purifier remains effective at removing contaminants and provides you with the best quality aqua.
Here Are Step By Step Process Of How To Clean Water Filter
Gather Your Cleaning Supplies
- A Soft-Bristle Brush Or Sponge
- Mild Dish Soap
- White Vinegar Or A Specialized Purification System Cleaning Solution
- A Clean Bucket Or Basin
- Towels Or Paper Towels
- Gloves (Optional)
Turn Off The Water Supply
Before you begin cleaning your water clarifier, the first and most crucial step is to turn off the aqua supply. This prevents aqua from flowing through the purifier while you’re working on it, avoiding any mess or damage. Locate the shut-off valve near the purifier system and turn it clockwise until it’s fully closed. This step ensures a safe and efficient cleaning process. Failing to turn off the aqua supply could result in aqua spilling everywhere, making the job much harder. It’s a simple but essential step that sets the stage for the rest of the cleaning process. Always make sure the aqua supply is completely off before proceeding to the next steps to avoid any complications. Once the water is off, you’re ready to move on to the next step.
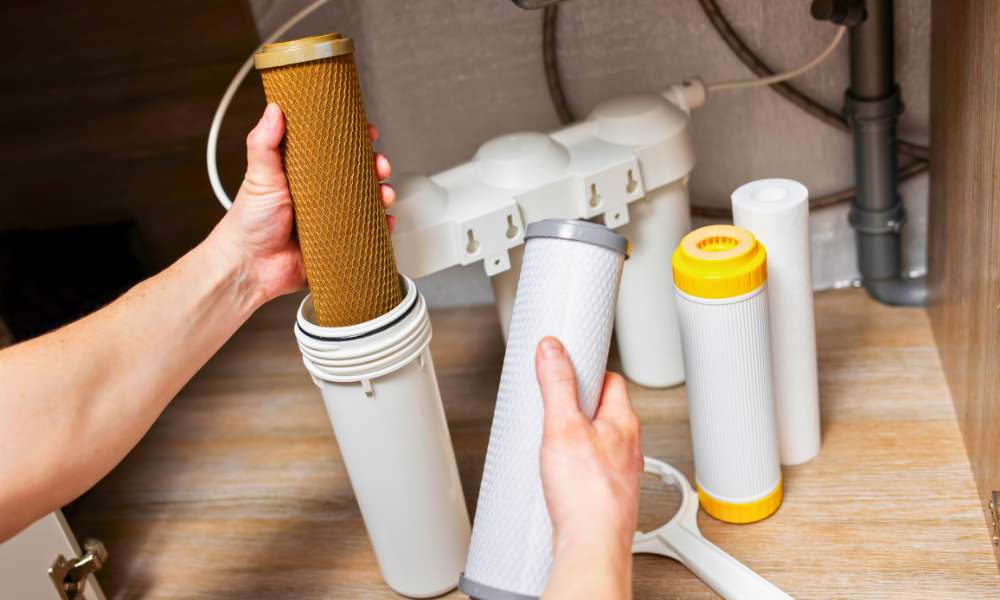
Remove The Water Filter
After shutting off the water supply, the next step is to carefully remove the purification system from its housing. Depending on your clarifier type, this might involve unscrewing or detaching from its holder. Be cautious during this process to avoid damaging any components. Gently pull the purifier out, ensuring you don’t spill any remaining aqua inside the housing. This step allows you to inspect the purifier and prepare it for cleaning. If the purifier appears clogged or dirty, it’s time for a thorough cleaning. Removing the purifier properly is crucial, as mishandling it could lead to leaks or reduced performance. Take your time to ensure the clarifier is removed smoothly, and you’re ready to disassemble for a deeper clean.
Disassemble The Filter Housing
With the purification system removed, you can now disassemble for a more thorough cleaning. Carefully take apart the housing components, which may include O-rings, seals, and other parts depending on your system. Lay them out in an organized manner so you can easily reassemble them later. This step is vital for accessing all areas where dirt and debris might accumulate. By disassembling the housing, you ensure that every part is cleaned properly, which helps maintain the filter’s effectiveness. Be sure to keep track of each component to avoid losing any small pieces. Properly disassembling the housing sets the stage for a complete and effective cleaning process.
Rinse The Filter Components
Once housing is disassembled, it’s time to rinse each component thoroughly. Use warm aqua to rinse off any debris, sediment, or buildup from the purifier and housing parts. Pay special attention to itself, ensuring all contaminants are washed away. This rinsing process is crucial for maintaining efficiency and ensuring clean water flow. If necessary, use a soft brush or sponge to gently scrub the components, especially in hard-to-reach areas. After rinsing, shake off any excess aqua and place the parts on a clean towel to dry.
Soak The Filter In A Cleaning Solution
After rinsing the components, the next important step is to soak the filter in a cleaning solution. Fill a clean bucket or basin with a mixture of aqua and either white vinegar or a specialized cleaning solution. Submerge the purifier in this solution, ensuring it is fully covered. Allow the purifier to soak for at least 15-30 minutes, depending on the level of buildup or manufacturer recommendations. Soaking helps to loosen and dissolve any remaining contaminants, minerals, or bacteria that might be clinging to the purifier. This process is crucial for deep cleaning and ensures the clarifier is restored to its optimal performance level. After soaking, it will be ready for a more thorough scrubbing.
Scrub And Clean The Filter
Once it is soaked, it’s time to scrub and clean it thoroughly. Using a soft-bristle brush or sponge, gently scrub to remove any remaining debris, dirt, or buildup. Focus on all surfaces, including crevices and hard-to-reach areas, to ensure every part of the filter is clean. The goal here is to eliminate any particles that soaking didn’t fully remove. Be careful not to apply too much pressure, as this could damage the purifier. Scrubbing is a crucial step in maintaining efficiency and ensuring it continues to provide clean, safe water. After a thorough scrub, it will be almost ready to go back into service, but first, it needs to be rinsed.
Rinse The Filter Thoroughly
After scrubbing, it’s essential to rinse the filter thoroughly to remove any remaining cleaning solution and loosened debris. Use clean, warm aqua to rinse all surfaces until the water runs clear. This step is critical to ensure that no cleaning residues are left behind, which could affect the taste and quality of your aqua. Thorough rinsing also helps to ensure that the purifier is ready to effectively remove contaminants from your aqua supply once it’s reinstalled. Shake off any excess aqua and allow the purifier to air dry on a clean towel. Proper rinsing is the final step in ensuring the clarifier is clean and ready for use.
Reassemble The Filter Housing
With the filter and its components thoroughly cleaned and dried, the next step is to reassemble the purifier housing. Carefully place the purifier back into its housing, ensuring it is properly aligned. Reattach any O-rings, seals, or other parts that were removed during disassembly, making sure everything fits snugly and securely. Proper reassembly is crucial to prevent leaks and ensure that the purifier operates efficiently. Once the housing is reassembled, double-check that all components are in place and properly secured. This step ensures that your clarifier is ready to be reinstalled and that it will function as intended, providing clean, safe aqua to your home.
Reinstall The Water Filter
After reassembling the filter housing, the next step is to reinstall the purification system back into its designated spot. Carefully position the purifier in the housing, ensuring it fits securely and aligns with any connecting parts. Double-check that all seals and O-rings are in place to prevent any leaks once the aqua supply is turned back on. This step is crucial as proper installation ensures the purifier will work effectively. Take your time to make sure everything is aligned and securely attached. A properly reinstalled purifier will continue to provide clean water without any issues. Once the clarifier is securely in place, you can move on to restoring the aqua supply.
Turn On The Water Supply
With the purification system reinstalled, the next step is to turn on the water supply. Slowly open the shut-off valve by turning it counterclockwise, allowing the aqua to flow back into the clarifier system. Take a moment to observe the system as the aqua pressure builds up, checking for any leaks or unusual sounds. This step is essential for ensuring that the purifier is properly installed and that there are no issues with the aqua flow. If everything appears to be functioning correctly, let the aqua run for a few minutes to clear out any air bubbles or remaining cleaning solution. Once the aqua flow is steady and clear, the clarifier is ready for regular use.
Test The Water Filter For Proper Functioning
After turning on the water supply, it’s important to test the purification system to ensure it’s functioning correctly. Begin by running aqua through the filter for a few minutes to flush out any air pockets or residue from the cleaning process. Pay attention to the aqua flow and clarity, as this will indicate whether the purifier is working as it should. If you notice any issues, such as reduced aqua flow or unusual taste, check the purifier and housing to ensure everything is properly installed. Testing the purifier ensures that it’s effectively removing contaminants and providing you with clean, safe drinking water. Once the clarifier passes the test, it’s ready for continued use.
Final Thoughts
Regularly cleaning your water filter is essential for maintaining the quality and safety of your drinking aqua. By following the proper steps and maintaining a consistent cleaning schedule, you can ensure that your clarifier continues to operate efficiently, providing you with fresh, clean aqua. Whether you’re using vinegar or a specialized cleaning solution, the key is to keep your clarifier free from contaminants and functioning at its best. Remember, a well-maintained purification system not only improves water quality but also extends the life of your filtration system, making it a crucial part of your home maintenance routine.
How Often Should I Clean My Water Filter?
You should clean your purification system every three to six months, depending on the manufacturer’s recommendations and the quality of your water supply. Regular cleaning ensures the purifier remains effective in removing contaminants and maintains a steady aqua flow. However, if you notice a decrease in aqua pressure or an unusual taste, it may be necessary to clean the filter more frequently. Keeping a consistent cleaning schedule helps prolong the life of the purifier and ensures your water stays clean and safe.
Can I Use Vinegar To Clean My Water Filter?
Yes, you can use white vinegar to clean your water filter. Vinegar is a natural and effective cleaning agent that helps dissolve mineral deposits, kill bacteria, and remove any lingering odors. To clean your purifier with vinegar, mix equal parts of white vinegar and aqua, then soak the purifier in this solution for 15-30 minutes. After soaking, scrub the clarifier gently with a soft brush, rinse it thoroughly with clean water, and allow it to air dry. Vinegar is a safe and eco-friendly option for maintaining your purification system.
What Are The Risks Of Not Cleaning A Purification System Regularly?
Not cleaning your purification system regularly can lead to several risks. A dirty filter can become clogged with contaminants, reducing aqua flow and making the filtration process less effective. Over time, this can lead to the buildup of harmful bacteria, mold, and other impurities, which can affect the taste and safety of your aqua. Additionally, a neglected purifier may strain your filtration system, potentially causing damage and leading to costly repairs or replacements. Regular cleaning is essential to avoid these risks and ensure your aqua remains clean and safe.
How Do I Know If My Water Filter Needs To Be Replaced Instead Of Cleaned?
Is It Necessary To Clean All Types Of Water Filters?
Yes, it is generally necessary to clean all types of water filters, although the frequency and method may vary depending on the purifier type. For example, carbon filters and reverse osmosis systems require regular maintenance to function effectively, while sediment filters may need more frequent cleaning due to debris buildup. Manufacturers design some disposable filters for one-time use and replacement rather than cleaning. Always follow the manufacturer’s instructions for your specific clarifier type to ensure proper maintenance and optimal performance.