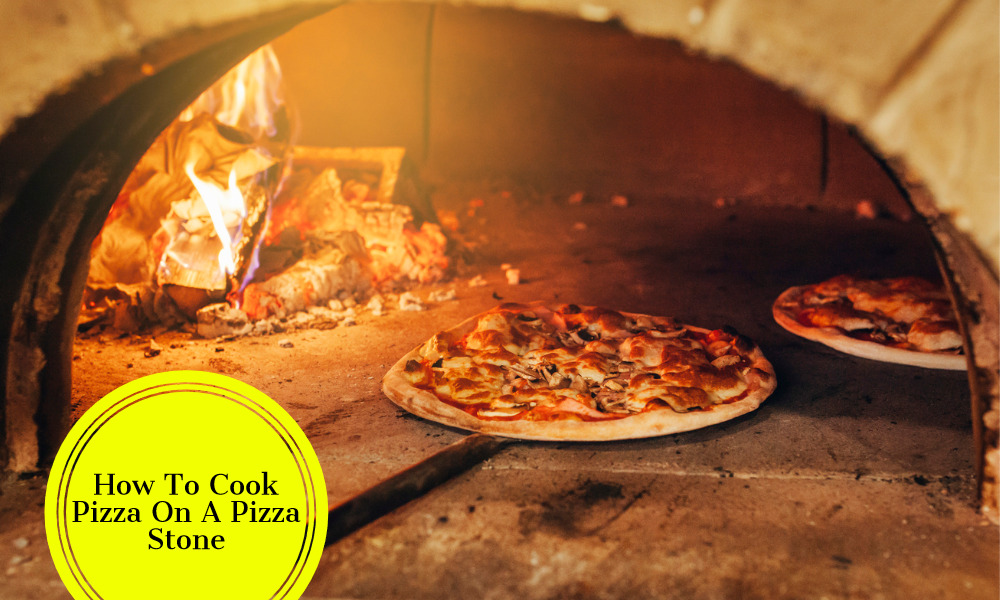
Cook pizza on A pizza stone is a game-changer for any pizza lover, Elevating the homemade pizza experience to rival that Of professional pizzerias. It is made from ceramic, clay, or stone, and replicates the high heat of a traditional wood-fired oven, ensuring an evenly baked, crispy crust every time. By evenly distributing the heat and drawing out moisture, the stone ensures that the dough gets that delightful, slightly charred finish – a hallmark of authentic pizza. Whether you’re a novice or a seasoned home chef, mastering the art of using a pizza stone can take your pizza nights to a gourmet level. Here’s how To make the perfect pizza on A stone.
Why Use A Pizza Stone?
Using a pizza stone transforms the home pizzas-making experience by simulating the conditions of a professional brick oven, delivering a notably superior crust and overall pizza quality. The stone, constructed from materials like ceramic, clay, Or cordierite, efficiently absorbs And evenly distributes the oven’s heat. This ensures that the pizzas dough cooks uniformly, achieving a crispy, slightly chewy texture. Furthermore, The stone’s porous surface pulls moisture away from the dough, preventing sogginess And promoting that sought-after crispy base. For pizza aficionados aiming for an authentic, pizzeria-style result right in their kitchens, a pizza stone is an indispensable tool.
Benefits Of A Pizza Stone
- Even Heat Distribution: It provides uniform heat, ensuring that the pizzas crust bakes consistently without any unevenly cooked spots.
- Crispier Crust: The porous material of the stone draws out moisture from the dough, preventing a soggy base and giving the crust a delightful crispiness.
- Retains Heat: Once heated, a stone can maintain a stable temperature, making it excellent for cooking multiple pizzas in succession.
- Mimics Brick Oven Conditions: Using a stone closely replicates the conditions of a traditional wood-fired or brick oven, renowned for producing the best pizzas.
- Versatility: Beyond pizzas, these stones are great for baking bread, pastries, and other baked goods, imparting them with a uniformly baked exterior and a soft interior.
- Improved Flavor: The stone can enhance the overall flavor of the pizzas, especially if it has been used multiple times, as it can retain some seasoned flavors from past bakes.
- Durability: With proper care, stones can last for many years, offering countless delicious pizzas and baked goods.
A Guide To Cooking Pizza On A Stone
Making Dough
1. Get Ingredients.

Before embarking on your pizza-making journey, It’s crucial to gather all the essential ingredients. For basic pizzas dough, You’ll typically need all-purpose flour, active dry yeast, warm water, salt, sugar, And olive oil. Opting for high-quality ingredients can make A noticeable difference in the flavor and texture Of your pizzas crust.
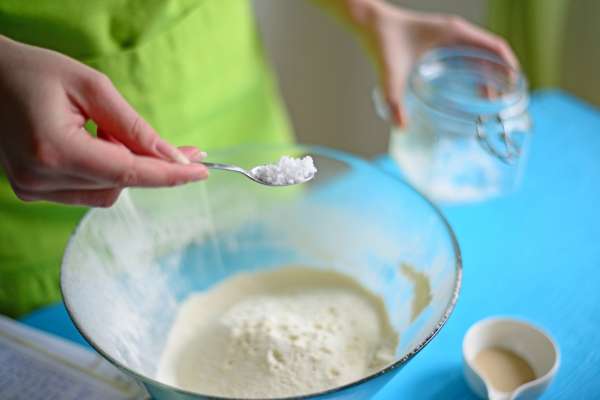
2. Sprinkle Yeast Over Warm Water In A Large Bowl

Begin by activating the yeast, a critical step to ensure your dough rises properly. In a large mixing bowl, pour warm water (typically around 110°F or 45°C) and then gently sprinkle the yeast over it. Make sure the water isn’t too hot, or it could kill the yeast, and if it’s too cold, the yeast might not activate. Let the mixture sit for about 5-10 minutes until it turns frothy. This frothiness indicates the yeast is alive and active, ready to make your dough rise to perfection. Add a pinch of sugar to the water-yeast mixture to feed the yeast and accelerate its activation.
3. Add Salt And Cold Water
Once your yeast is activated, it’s time to introduce more water to achieve the desired dough consistency. But first, stir in the salt to the yeast mixture. Salt not only enhances the flavor but also controls yeast activity, ensuring that fermentation doesn’t proceed too rapidly. After incorporating the salt, add cold water to the bowl. The combination of warm and cold water results in a perfect lukewarm temperature that’s ideal for dough formation.
4. Knead Dough

Gradually add the flour to your water and yeast mixture. Once the ingredients begin to come together, turn the dough onto a lightly floured surface. Kneading is a crucial process; it helps develop the gluten in the dough, making it elastic and perfect for that stretchy pizza base. Use your palms and the base of your fingers to push and fold the dough for about 8-10 minutes, or until it becomes smooth and elastic. If the dough is too sticky, sprinkle a bit more flour; if too dry, add a dash of water.
5. Let The Dough Rise
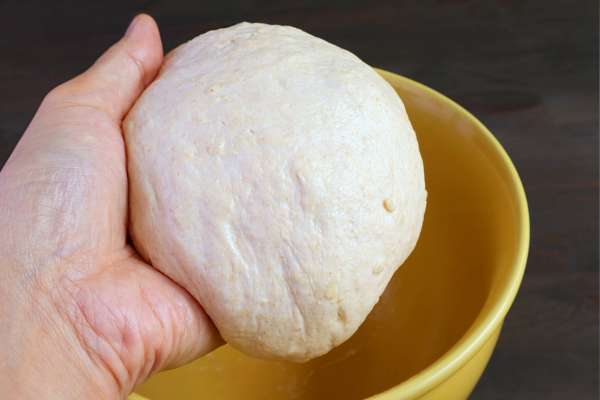
Place your kneaded dough in a lightly oiled bowl, ensuring the dough ball is coated with a thin layer of oil to prevent drying. Cover the bowl with a damp cloth or plastic wrap and set it in a warm, draft-free location. Allow the dough to rise for about 1-2 hours or until it has doubled in size. This fermentation period is essential as it not only increases the dough volume but also enhances the flavors. Once risen, your dough is ready to be shaped into a pizzas base, topped with your favorite ingredients, and baked to perfection on your pizza stone.
Topping And Cooking Your Pizza
1. Preheat Oven

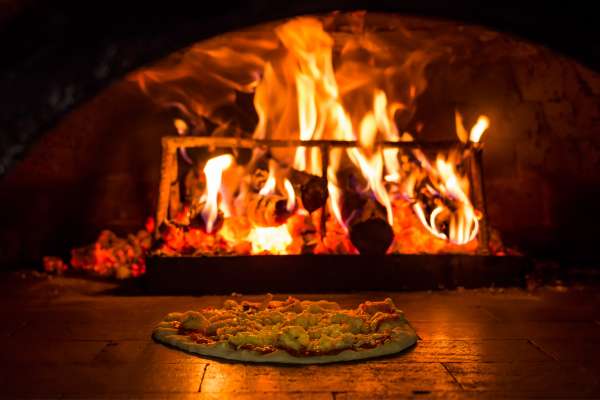
Before you start working on your pizza toppings, it’s essential to preheat your oven, ensuring it’s at the optimal temperature for baking. Place your pizzas stone inside the oven while preheating so that it becomes blazing hot, mimicking the conditions of a professional brick oven. Set your oven to its highest temperature, typically around 475°F to 500°F (245°C to 260°C). Allow it to preheat for at least 30 minutes. This ensures that the pizzas stone is evenly heated, allowing your pizza to cook uniformly.
2. Dust Your Dough

Once your dough has risen and is ready for shaping, it’s time to prepare it for toppings. Gently punch down the risen dough to release any air bubbles, and turn it out onto a floured surface. Dust the dough lightly with flour. This prevents sticking and provides a rustic texture to your pizzas base. Stretch or roll the dough to your desired thickness, but remember, an evenly shaped base ensures consistent cooking.
3. Work Surface With Flour

Preparing a well-floured work surface is crucial to ensure that your pizzas dough doesn’t stick when you’re stretching, shaping, or transferring it. Generously sprinkle flour onto your countertop or pizza peel. This not only facilitates easy handling of the dough but also adds a pleasant, slightly crispy texture to the base’s underside. Once your base is shaped, you’re ready to layer on the sauce, cheese, and any other toppings you desire. Remember, after adding your toppings, swiftly transfer the pizzas to the preheated stone in the oven to capture the essence of brick oven cooking at home.
4. Top Your Pizza

With the base of your pizzas ready, it’s time to unleash your creativity. Start with a layer of your preferred sauce, be it classic tomato, creamy Alfredo, pesto, or even a barbecue drizzle. Spread it evenly, leaving a small border for the crust. Next, sprinkle a generous layer of cheese, such as mozzarella, cheddar, or feta, depending on your taste. Finally, adorn your pizza with a medley of toppings – veggies, meats, olives, or even fruits like pineapple for those who fancy it. Be mindful not to overload the pizzas, as a heavy pizza might get soggy or not cook uniformly.
5. Place Your Pizza On The Stone
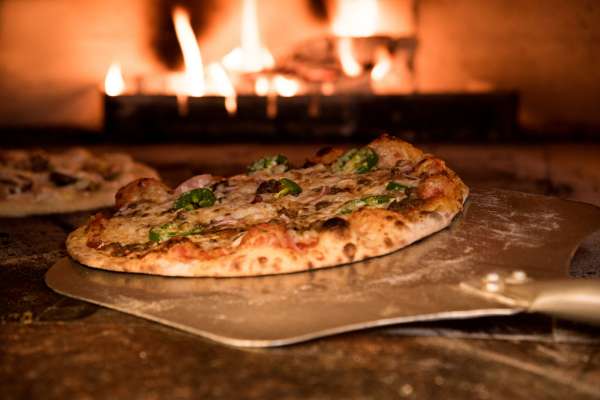
This is a crucial step that requires some finesse. Using a floured pizza peel or an inverted baking sheet, carefully slide your pizzas onto the preheated stone in the oven. If you’ve prepared your surface well with flour or cornmeal, the pizzas should slide off smoothly. The scorching stone will immediately start cooking the base of the pizzas, giving it that desirable crispy bottom.
6. Bake Your Pizza
With the oven at its highest temperature, your pizzas will cook quickly, mimicking the conditions of a wood-fired oven. Depending on its thickness and your specific oven’s quirks, the pizzas usually take between 8 to 12 minutes. You’ll know it’s ready when the cheese is bubbly and slightly golden, the edges of your crust have a beautiful brown hue, and the bottom is crispy when slightly lifted with a spatula.
7. Cut And Enjoy

Once out of the oven, let your pizza rest for a minute or two; this allows the cheese to set a bit. Using a pizza cutter or a sharp knife, slice into your desired pizzas wedge sizes. The delightful aroma, the melted cheese, and the perfectly cooked base will be a testament to your efforts. Serve hot, relish every bite, and bask in the joy of a perfectly baked pizzas made right in the comfort of your home.
Choosing The Right Pizza Stone
Selecting the perfect pizzas stone is paramount to achieving that pizzeria-quality crust at home. While most pizzas stones promise a crisp crust and even cooking, factors like material, size, and thickness can drastically affect your baking results.
The most popular materials are ceramic, cordierite, and cast iron – each with its unique thermal properties and durability. Ceramic and cordierite stones are excellent for even heat distribution and moisture absorption, giving you that crispy crust. Cast iron, on the other hand, heats up quickly and retains heat exceptionally well. It’s also essential to consider the size of the stone to ensure it fits comfortably in your oven while leaving room for heat circulation.
A thicker stone retains and distributes heat more effectively but might take longer to preheat. In contrast, a thinner stone heats up faster but may not hold onto the heat as long. Reflect on your baking preferences and oven’s size to choose a stone that will serve you pizzas perfection for years to come.
What’s The Difference Between A Pizza Stone And A Pizza Steel?
Pizza Stone:
A pizza stone, traditionally made from clay, ceramic, or cordierite, is designed to replicate the conditions of a brick oven, delivering a crisply cooked pizzas crust. The porous nature of these materials allows the stone to absorb moisture from the dough, ensuring a crispy outcome. Pizza stones also distribute heat evenly across their surface, preventing hot spots and leading to consistent baking. This ensures that pizzas, breads, and other baked goods achieve a uniformly baked exterior. However, pizzas stones can be a bit delicate, especially if exposed to sudden temperature changes, which can cause them to crack.
Pizza Steel:
On the other hand, pizza steel, sometimes referred to as baking steel, is a newer entrant in the home pizzas-making world but has quickly garnered a loyal following. Made from a conductive metal, usually thick steel, it heats up faster and retains high temperatures more effectively than a pizzas stone. This high thermal conductivity means it can cook pizzas faster and achieve an even crispier crust. Pizzas steels are also more durable and resistant to cracking or breaking compared to their stone counterparts. However, they don’t absorb moisture like stones, but due to their intense heat, they can effectively draw out moisture, ensuring a crisp crust. They are especially favored by those who like New York-style thin-crust pizzas, as they can deliver that slightly charred, crisp bottom synonymous with this style.
Do I Need To Clean The Pizza Stone After Every Use?
While pizzas stones are relatively low maintenance, they do benefit from occasional cleaning, though not necessarily after every use. After baking, let the stone cool completely in the oven to avoid thermal shock. Once cool, scrape off any food residues with a spatula or a brush. If further cleaning is necessary, use plain water and a cloth or brush; avoid soap as the porous nature of the stone can absorb it, potentially affecting the flavor of future bakes.
Remember, it’s normal for pizzas stones to develop stains and discolorations over time, and these actually contribute to its seasoning, enhancing its non-stick properties. In essence, light cleaning to remove food remnants is sufficient, and the stone will naturally darken and season with repeated use.
The Final Thoughts
Cooking pizza on a pizza stone bridges the gap between homemade efforts and professional pizzeria results. By using a pizza stone, you harness its ability to evenly distribute heat and draw out moisture, ensuring a perfect, crispy crust every time. Remember to preheat the stone in a hot oven, prepare your pizzas on a well-floured surface, and then slide it onto the hot stone for optimal results. With a bit of practice, mastery of this technique will elevate your pizza nights, bringing authentic, wood-fired oven quality right into your kitchen. Whether you’re a pizza purist or love experimenting with toppings, the pizzas stone is your passport to pizzas perfection.