
The presentation of the cheese plays a crucial role in enhancing both the aesthetic appeal and taste of your charcuterie board. In this guide, we will walk you through the steps of cut block cheese for a charcuterie board, ensuring that each slice is uniform, visually appealing, and easy to serve. By mastering this skill, you will elevate your charcuterie game and impress your guests with a beautifully arranged assortment of cheese.
Can I Use A Regular Knife For Cutting Cheese, Or Do I Need Specialized Cheese Knives?
It comes to cut block cheese for a charcuterie board, using a regular knife can work, but specialized swiss knives offer several advantages. These knives are designed specifically for cutting dairy products and have unique features that make the task easier and more precise. The blades of dairy product knives are typically thinner and sharper than regular knives, allowing for cleaner cuts without applying excessive pressure. The shape of the blade also varies depending on the type of cheese to be cut, ensuring optimal slicing for different textures and consistencies.
Choosing the right cheese knife and board

It comes to cut block cheese for a charcuterie board, having the right tools is essential. Start by selecting a sharp, sturdy dairy product knife with a serrated edge or a thin-bladed one specifically designed for slicing swiss. This will ensure clean cuts without squishing or crumbling the swiss. Additionally, opt for a wooden or slate cutting board, as these materials provide a stable surface and help maintain the flavor integrity of the dairy product.
Preparing the block of cheese
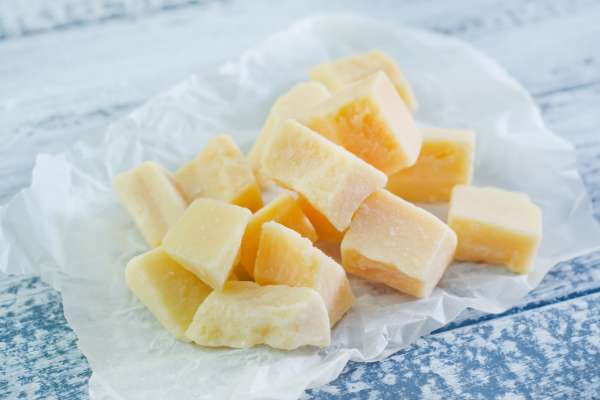
Before you start cutting, make sure your block of cheese is properly chilled. Cold swiss is easier to handle and less likely to stick to the knife. Take it out of the fridge just a few minutes before you plan to cut it to allow it to come up to room temperature slightly.
Choosing The Right Cheese
1. Brie

Brie is a creamy and soft cheese that requires special care when cutting. To get perfect slices, it’s best to use a wire cutter or a dairy product plane with a thin blade. Begin by thoroughly chilling the brie in the refrigerator to firm it up slightly, which will make it easier to slice cleanly. When ready to serve, gently press the wire cutter or plane into the brie and slowly glide through it in a fluid motion. By using these specialized tools designed for soft cheeses like Brie, you can ensure your charcuterie board showcases elegant and evenly sliced portions.
2. Cheddar

Cheddar, being a hard cheese, requires more strength to cut through its firm texture. A sturdy and sharp knife with a non-serrated edge works best for this type of cheese. Ideally, choose a knife with a long blade that allows you to apply even pressure throughout your slicing motion. Start by placing the cheddar block on a stable surface and firmly hold it in place with one hand while applying controlled downward force with the knife using your other hand. Maintain steady slicing motions until you achieve uniform pieces suitable for your charcuterie board.
3. Gouda

Gouda falls between soft and hard cheeses in terms of texture, making it a bit more forgiving to cut. A regular chef’s knife can be used for slicing Gouda, but there are specialized knives available if you want to achieve the best results. Opt for a semi-soft dairy product knife with a medium length and a slightly curved blade. Its design enables smooth cutting through the Gouda’s creamy but firm interior while minimizing sticking to the blade. Similar to cheddar, maintain controlled slicing motions by applying even pressure during each cut.
Preparing The Cheese
1. Remove from Refrigeration
Before you start Cut Cheese For Charcuterie Board, take it out of the refrigerator and allow it to come to room temperature. This step is important because cold dairy products are harder and more difficult to cut smoothly. Allowing the swiss to warm up slightly will make it easier to slice through without any resistance.
2. Unwrapping
Once the cheese has reached room temperature, carefully remove any packaging or plastic wrap from around the block. Make sure to handle the swiss gently to avoid squishing or damaging its shape. If there are any labels or stickers on the surface of the swiss, peel them off before proceeding with cutting.
Cutting Techniques
1. Cubes or Rectangles (Hard Cheese)

For hard cheeses like cheddar, it is best to cut them into cubes or rectangles. Start by creating a flat surface on one side of the cheese block by making a straight slice. Then, using a sharp knife, cut the dairy product into even-sized cubes or rectangles, depending on your preference. This method is perfect for easy consumption and pairing with crackers or fruits on your charcuterie board.
2. Wedges (Semi-Soft Cheese)

Semi-soft cheeses like Gouda are best cut into wedges. Begin by slicing off the tip of the dairy product diagonally to create a pointy end. Then, make subsequent angled cuts from the thicker side to create triangular-shaped wedges. This presentation adds an elegant touch to your charcuterie board and allows guests to easily pick up a wedge and enjoy its creamy texture.
3. Spreadable Portions (Soft Cheese)

When it comes to soft cheeses like Brie, cutting them into spreadable portions is ideal. Carefully use a sharp knife to remove any rind if desired or leave it intact for added flavor and texture. Then, gently slice the swiss into small sections that can be easily spread onto bread or crackers. This method allows guests to build their own bites with different toppings and accompaniments.
Presentation And Arrangement
1. Layering
One way to showcase the variety of cheeses on your charcuterie board is through layering. Start by placing a base layer of crackers or sliced baguette on the board. Then, arrange the different types of cheese on top, using the different cutting techniques mentioned earlier to create visual interest. You can alternate between cubes, wedges, and spreadable portions for an appealing presentation. Consider placing the larger dairy product pieces towards the center of the board and smaller ones towards the edges to create a balanced look.
2. Pairing
To enhance the flavors of the cheeses, consider pairing them with complementary ingredients. Arrange small bowls of honey, jams, or chutneys that can be drizzled or spread onto the swiss. Add some fresh fruits like grapes or sliced apples that provide a refreshing contrast to the richness of the dairy product. Nuts like almonds or walnuts can also be added for additional texture and flavor. By strategically placing these pairings around your cheeses on the charcuterie board, you’ll encourage guests to experiment with different combinations.
3. Garnish
Adding garnishes not only enhances the visual appeal but also adds extra flavor and depth to your charcuterie board. Fresh herbs like basil or thyme can be sprinkled over the cheeses for a pop of color and aroma. Edible flowers such as pansies or nasturtiums add an elegant touch and make your presentation more visually appealing. Finally, consider adding some olives or pickles as tangy accompaniments that complement both hard and soft cheeses.
Should I Remove The Cheese Rind Before Serving It On A Charcuterie Board?
Whether or not to remove the dairy product rind before serving it on a charcuterie board is a matter of personal preference. Some people enjoy the added flavor and texture that the rind provides, while others prefer to remove it. It’s important to note that not all swiss rinds are edible, so it’s essential to check the specific type of swiss you are working with. Soft cheeses like Brie usually have an edible rind, while harder cheeses like Cheddar may have a tougher, inedible rind. Ultimately, removing or keeping the dairy product rind is up to your taste preference and the preferences of your guests.
What’s The Ideal Room Temperature To Serve Cheese For A Charcuterie Board?
Cheese should be served at room temperature for optimal flavor and texture. When cheese is too cold, its flavors can become muted, and the texture can become firm or rubbery. On the other hand, when dairy products are too warm, it can become overly soft and oily. The ideal room temperature for serving most cheeses is around 65-70°F (18-21°C). By allowing the dairy product to come to room temperature before serving, you’ll ensure that it is at its best flavor and texture.
How Do I Prevent The Cheese From Drying Out?
1. Properly store the cheese: Keep any unused portions of your cheeses wrapped in wax paper or parchment paper, then place them in a resealable plastic bag or an airtight container in the refrigerator. This helps retain moisture and prevents excessive drying.
2. Limit exposure to air: When displaying your cheeses on a charcuterie board, try not to leave them exposed for too long before serving. Excessive exposure to air can cause the dairy product to dry out. Cut or slice your cheeses as needed rather than doing it all at once.
3. Provide moisture: To help keep the dairy product moist, you can place a small dish of water on the board nearby. The evaporating water will add some humidity and prevent the cheese from drying out.
Conclusion
Creating an enticing charcuterie board with perfectly-cut block cheese requires selecting the right knives, choosing appropriate types of cheese, utilizing different cutting techniques, and presenting them attractively. Deciding whether or not to remove the dairy product rind depends on individual preference and specific dairy product types. Serving cheese at room temperature enhances its flavors, while taking steps to prevent it from drying out ensures a delightful dining experience. With these tips in mind, you can confidently create a visually appealing and delicious dish that will impress your guests with its variety of cut block cheeses.