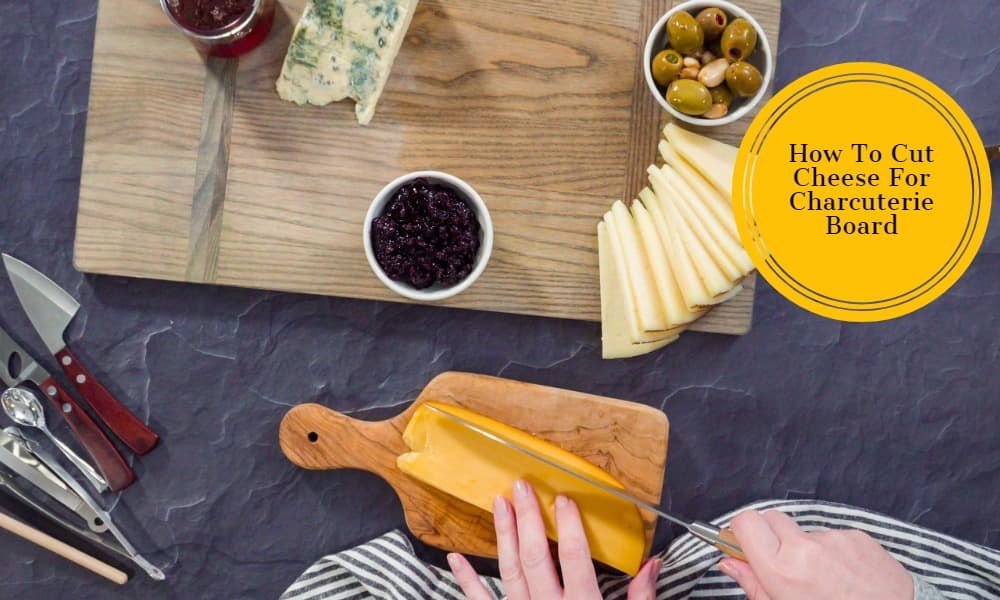
The charcuterie board, a symphony of flavors and textures, is a centerpiece at many gatherings, allowing guests to graze, relish, and celebrate the joys of gourmet indulgence. Central to this masterpiece is cheese, its myriad tastes balancing the cured meats and accompanying delicacies. Yet, as with any art, the beauty is often in the details. Cut cheese for a charcuterie board isn’t just about portioning; it’s about enhancing flavors, embracing textures, and creating a visual feast. Whether you’re a novice taking your first steps or a seasoned enthusiast, mastering the craft of cutting cheese is pivotal. Dive in with us, and let’s elevate your charcuterie presentation to new heights.
What’s The Ideal Cheese-Cutting Temperature?
The ideal cheese-cutting temperature lies in the balance between too cold and too warm, ensuring both flavor optimization and ease of slicing. For most cheeses, this means allowing them to sit at room temperature for about 30 minutes to an hour before cutting. When cheese is too cold, straight out of the refrigerator, it can become crumbly or difficult to slice, especially for harder varieties.
On the other hand, cheddar that is too warm can become overly soft and lose its shape, especially for softer cheeses. Thus, tempering your cheese to a slightly cool room temperature ensures that its intrinsic flavors are more pronounced and its texture remains intact for precise cuts.
How Can You Enhance Cheese Board Presentation?
Enhancing a cheese board’s presentation hinges on visual appeal, texture variety, and thoughtful arrangement. Start with a mix of cheese types – soft, semi-hard, and hard – and cut them in diverse shapes such as wedges, cubes, or slices. Introduce color and contrast with accompaniments like fresh fruits, dried fruits, nuts, and olives. Incorporate a selection of bread and crackers, both for height and textural contrast. Garnish with sprigs of fresh herbs or edible flowers for a touch of elegance.
Always ensure there’s ample space between items to allow for easy picking, and consider placing cheese knives or spreaders alongside softer cheeses. Ultimately, the board should feel abundant but not cluttered, inviting guests to explore the carefully curated flavors and textures.
The Importance Of Cheese In A Charcuterie Board

Cheese plays an indispensable role in a charcuterie board, acting as the harmonizing element amidst a medley of flavors and textures. While charcuterie primarily refers to prepared meat products, it’s the cheddar that offers a counterbalance, providing creamy, sharp, salty, or even tangy contrasts to the savory and often spiced characteristics of the meats. Beyond flavor, the variety of cheeses, from soft brie to crumbly blue to firm cheddar, introduces a spectrum of textures, making every bite a unique experience.
Visually, cheeses contribute rich colors and varied shapes, elevating the board’s aesthetic appeal. In essence, cheese enriches the charcuterie experience, blending tradition and taste into a cohesive, gourmet presentation.
Choosing The Right Cheese Varieties
Choosing the right cheese varieties for any occasion requires a balance of flavors, textures, and origins. It’s vital to include a range from soft, creamy options like brie or camembert, to semi-hard cheeses such as manchego or gouda, and hard cheeses like aged cheddar or Parmigiano-Reggiano. For added depth, incorporate a blue cheese like Roquefort or Gorgonzola for its tangy and pungent qualities.
Additionally, consider cheeses from different regions or countries to offer a global tasting experience. The key is diversity; by presenting a spectrum of tastes and textures, you cater to a broader range of palates, ensuring that every guest discovers a favorite.
Essential Tools For Cheese Cutting
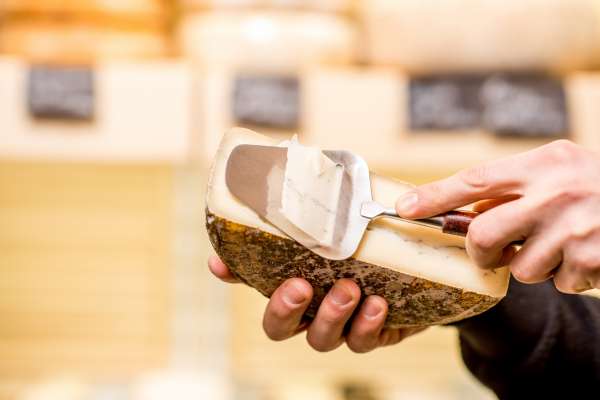
Proper cheese cutting hinges on the use of the right tools, ensuring clean cuts while preserving the cheese’s integrity. A cheddar knife set often includes a spade knife for hard cheeses, a narrow plane knife for soft and semi-soft cheeses, and a chisel knife for breaking crumbly cheeses.
A cheese wire, with its taut wire design, is perfect for slicing through soft to semi-hard cheeses, providing a clean cut without dragging. Additionally, a pronged cheddar knife helps in serving slices after cutting, while a cheese spreader is indispensable for soft, spreadable varieties like brie or camembert.
A sturdy and sizeable cutting board, preferably made of wood, acts as the foundation, ensuring a stable surface for the most precise cuts.
Proper Handling And Storage Of Cheese
Proper handling and storage of cheese are crucial to preserving its flavor, texture, and longevity. Always handle cheese with clean hands or use parchment paper to avoid transferring oils or contaminants. For storage, cheddar prefers a cool, humid environment, making the vegetable drawer of a refrigerator an ideal spot.
Wrap soft cheeses in parchment or wax paper first, then loosely in plastic wrap to allow them to breathe while maintaining moisture. Hard and semi-hard cheeses fare well in cheddar paper or beeswax wraps, which protect them from drying out while permitting adequate airflow.
For blue cheeses, wrapping them tightly in foil can help maintain their moisture and prevent their strong aromas from permeating other foods. Regularly inspect stored cheeses for any signs of mold or drying, and remember that well-preserved cheddar enhances the overall tasting experience.
Cut Cheese
1. Techniques For Cutting Soft Cheese
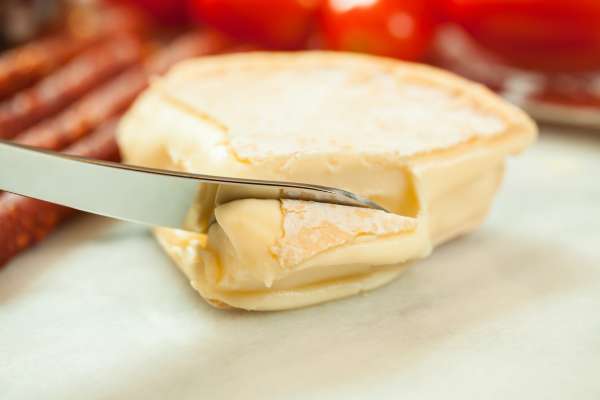
Soft cheeses, such as Brie, Camembert, or goat cheese, are creamy and can be a bit tricky to handle due to their texture. When cutting soft cheeses, first chill it slightly to make it firmer, which aids in cleaner cuts.
Use a knife with a thin, sharp blade or a cheddar wire to prevent the cheese from sticking to the blade. Cut the cheeses in one smooth motion, wiping the knife or wire between slices to maintain neatness. For wheel-shaped cheeses, start by cutting the cheddar in half and then into wedges, resembling slices of cake. For logs, like goat cheddar, slice them into rounds.
2. Techniques For Cutting Hard Cheese

Hard cheeses, such as Parmigiano-Reggiano, aged Cheddar, or Manchego, require a bit more force due to their firm texture. Begin with a sharp knife, preferably one with a short and sturdy blade. For block or wedge-shaped cheeses, you can create thin slices by holding the knife at an angle and cutting from the narrowest edge outward.
If dealing with a particularly hard cheese like Parmesan, it’s beneficial to use a cheddar knife with a pointed tip to “break” or “chip” the cheeses into chunks, following its natural fault lines, rather than forcing a clean slice.
3. Slicing Semi-Soft And Semi-Hard Cheeses
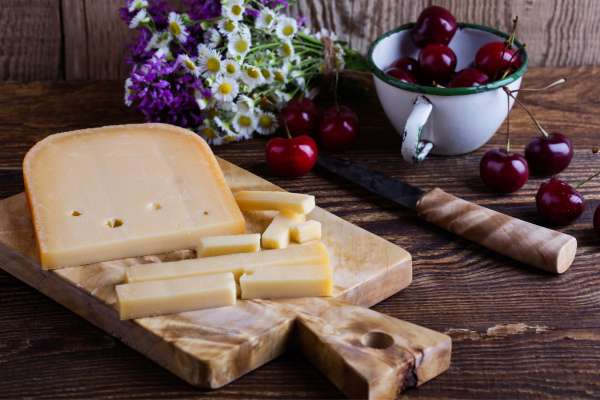
Semi-soft and semi-hard cheeses, such as Gouda, Havarti, or Monterey Jack, are in between soft and hard cheeses in terms of texture, offering a bit of flexibility in the cutting approach.
A sharp knife with a medium blade length is ideal. For wheel or round cheeses, begin by cutting them in half and then slice into even wedges. If it’s a block, you can slice it into thin or thick rectangles, depending on your preference. Ensure smooth, consistent strokes to avoid jagged edges. A cheese plane can also be used for creating thin, consistent slices, especially useful for layering on crackers or sandwiches.
4. Crumbling Cheese For The Board

Cheeses like Feta, Blue Cheese, and some aged cheddar can be crumbled to add texture and ease of consumption to your board. To crumble cheese, start by chilling it slightly for easier handling. Then, using clean hands or a fork, gently break the cheddar into smaller, bite-sized pieces.
This technique allows for a rustic look and is perfect for sprinkling over salads or other accompaniments on the board. Keep in mind that crumbled cheddar tends to dry out faster, so it’s best to crumble just before serving.
5. Creating Attractive Cheese Shapes

The presentation can elevate the appeal of your charcuterie board. For soft cheeses, consider using a warm spoon to scoop out and create quenelle shapes. Hard cheeses can be shaved into thin, delicate curls using a vegetable peeler or cheddar plane. Semi-hard cheeses can be cut into cubes or triangles for visual variety.
If you’re feeling particularly creative, consider using cookie cutters to cut cheese into fun shapes like stars, hearts, or other thematic designs, making your board more interactive and playful.
6. Combining Cheese With Other Board Elements
The art of a charcuterie board lies in the harmonious combination of its elements. Place cheeses next to items that complement their flavors. For instance, pair a tangy blue cheese with sweet honey or fig jam, or a sharp cheddar with tart apple slices. Intersperse the cheeses with a variety of crackers, ensuring each type of cheddar has a suitable vehicle for consumption.
Fresh fruits, like grapes or berries, can act as palate cleansers, while cured meats paired with cheddar can create delightful savory combinations. Remember to provide space between each element for easy access and to avoid flavor contamination. The board’s visual appeal will be enhanced by a mix of colors, textures, and heights, making it both a feast for the eyes and the palate.
Serving And Presentation Tips
A well-presented charcuterie board is as much about aesthetics as taste. Start with a visually appealing board made of wood, marble, or slate. Group items by type, but also consider color contrasts. Use small bowls or ramekins for wet items or spreads to prevent them from making other items soggy. Play with heights using folded meats, stacked crackers, and cheddar wedges.
Always include a variety of textures and colors, from the creamy spread of a brie to the deep red of dried fruits or cured meats. Fresh herbs or edible flowers can also add a pop of color and elevate the overall presentation.
Popular Charcuterie Cheese Pairings
Pairings can significantly enhance the flavor experience of your board. Some classics include:
- Brie with fig jam or fresh apple slices
- Manchego with quince paste or marcona almonds
- Aged Cheddar with salami or stone-ground mustard
- Blue Cheese with honey or dark chocolate pieces
- Gouda with prosciutto or roasted nuts
Experiment with regional themes, like a Mediterranean board with feta, olives, and hummus, or stick to time-tested favorites.
What Tools Are Essential For Cheese Cutting?
Having the right tools can make all the difference in cheddar presentation. Essential tools include a cheese knife set comprising a spade knife for hard cheeses, a plane knife for soft to semi-hard cheeses, and a chisel for crumbly ones. A cheese wire is perfect for slicing soft cheeses cleanly.
Additionally, a pronged cheddar knife is handy for serving, and a spreader is great for soft, spreadable cheeses. Finally, a solid cutting board, preferably with grooves for catching any crumbs or liquids, is foundational.
What’s The Key To Slicing Soft Cheese?
Soft cheese, given its creamy texture, can often pose a challenge when slicing. The key is temperature and tool choice. First, chill the cheddar for a brief period to firm it up without making it too hard. This ensures a cleaner slice. Next, use a knife with a thin blade or a cheddar wire. These tools reduce resistance and prevent the cheddar from sticking too much.
Clean the knife or wire between cuts to maintain precision. If using a knife, a quick dip in warm water between slices can also prevent sticking.
The Final Thought
Crafting the perfect charcuterie board is a harmonious blend of selection, presentation, and technique. While the variety of cheeses and their pairings form the board’s soul, understanding the nuances of cutting and presentation brings its essence to life. With the right tools and knowledge, not only can one preserve the taste and texture of the cheeses, but also enhance its aesthetic appeal on the board.
Whether you’re a seasoned connoisseur or a curious beginner, every cheddar and charcuterie experience can be a journey of flavors, textures, and delightful discoveries, culminating in shared moments of gourmet indulgence.
