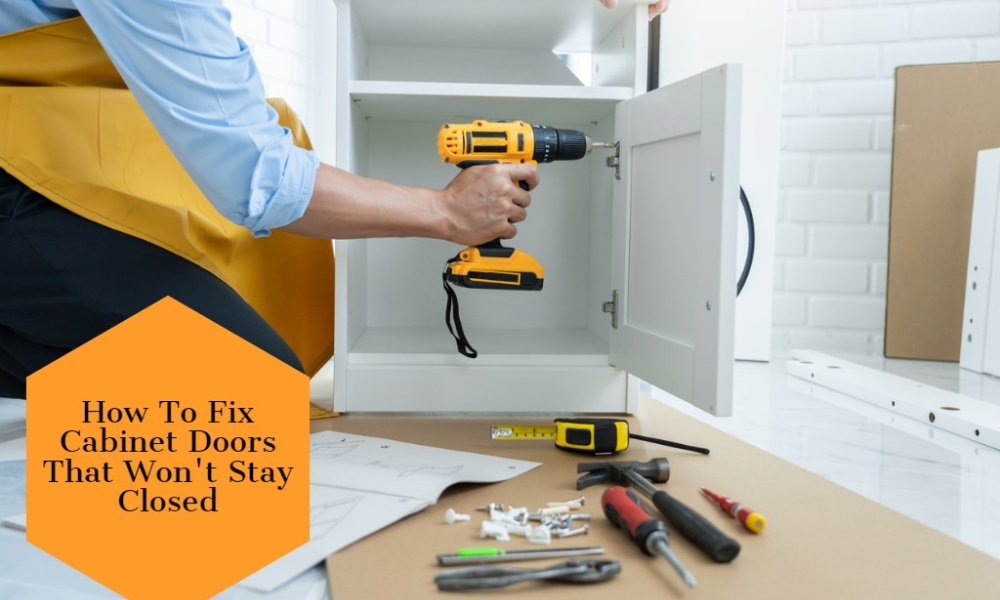
Cabinet doors that don’t stay closed can be a frustrating nuisance, transforming what should be a neatly ordered room into a space of chaos and disorder. Rather than being a symptom of larger structural issues, however, this problem often boils down to a few fixable glitches that homeowners can rectify themselves. This blog post serves as your DIY guide to understanding how to fix cabinet doors that won’t stay closed. Read on to arm yourself with practical knowledge and actionable steps, and take a proactive approach to maintaining the aesthetics and functionality of your home.
Why Won’t The Doors Stay Closed?
Cabinet doors refusing to stay closed can stem from several causes. This can range from misalignment, which often occurs naturally over time due to regular use, to issues with the hinges such as damage or looseness that prevent secure closure. If your cabinets Are made Of wood, They may also be subject to warping due to temperature And humidity fluctuations, leading to an improper fit. Additionally, faulty or worn-out door catches might be unable to hold the door in place effectively. Understanding these potential issues is the first step towards fixing a door that won’t stay closed.
Identifying Common Causes Of Cabinet Doors Not Closing Properly
1. Warped Doors

Warping usually happens because of exposure to humidity, drastic temperature changes, or the use of inferior quality wood. You can easily identify A warped door by removing it from its hinges and laying it on A flat surface like a table or the floor. If you see that all parts of the door aren’t touching the surface evenly, the door has warped. Severe warping might require door replacement, while minor warping could potentially be corrected by adding or adjusting hardware.
2. Loose Or Damaged Hinges

Cabinet door hinges endure a lot of use over their lifetime, and it’s common for the screws to loosen or for the hinges to wear out or break. Inspect the hinges closely to see if they Are broken, If there’s any visible wear or rust, Or if the screws aren’t tightly secured. Sometimes, just tightening the screws can resolve the issue, While in other cases, you might need to replace worn-out Or broken hinges.
3. Buildup Of Grime And Debris

Cabinets in kitchens are prone to A buildup of grime, dust, And food debris, which can inhibit their proper operation. Check the door, The hinges, and the area around the latch for any signs of accumulated dirt or grease. This might require a thorough cleaning with a suitable kitchen degreaser. Make sure to remove any buildup from the small moving parts of the hinges and latch.
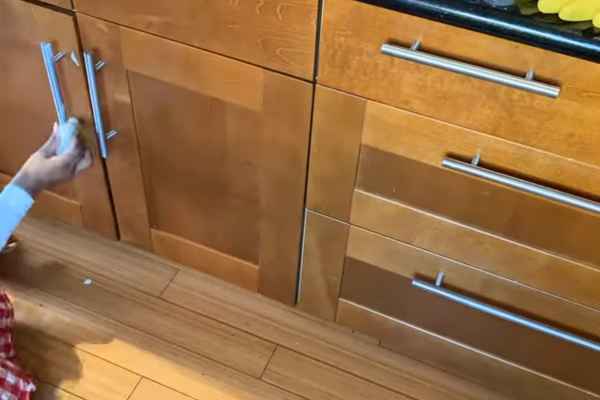
4. Misalignment Of Cabinet Doors

Misalignment is another common issue with cabinet doors. A cabinet door may become misaligned due to incorrect installation, changes in the structure of the cabinet over time, or even the settling of the house’s foundation. When doors are misaligned, they may not meet the latch correctly, or they may hang at an odd angle. To identify a misalignment, check the door carefully for any uneven gaps between the door and the cabinet frame or between multiple doors. Also, look at the level of the doors to see if they are hanging straight. Some minor adjustments to the hinges or latch may be needed to realign the doors.
Gathering The Necessary Tools And Materials
Detailed List Of Tools And Materials Required For Each Possible Cause
1. Screwdriver

A staple in any DIY project, the screwdriver is necessary for tightening or loosening screws in the hinges. Depending on the type of screw heads used in your cabinet’s construction, You’ll need either A flat-head, Phillips-head, Or possibly even A hex or star-head screwdriver. It’s A good idea to have A screwdriver set on hand to be prepared for any situation.
2. Adjustable Wrench

This tool can be particularly helpful if your cabinet hinges are bolted on, or if you need to make adjustments to the door alignment through hinge hardware. An adjustable wrench is versatile due to its ability to accommodate a range of nut sizes.
3. Cleaning Supplies
To address grime and debris, you’ll need cleaning supplies. This can include mild soap, vinegar, or a kitchen degreaser, along with a soft cloth or sponge for gentle scrubbing. For tough spots or hinges, an old toothbrush can be useful. Always finish with a rinse of warm water and dry thoroughly to prevent moisture damage or buildup.
4. Carpenter’s Glue

This strong adhesive is designed for bonding wood and can help correct minor warping or fix delaminating cabinet doors. If you’re clamping the door during repairs, be sure to protect the wood surface with a soft cloth to prevent any damage from the clamps.
5. Replacement Hinges (If Needed)

Always try to find replacement hinges that match the existing ones As closely As possible, not just in size and style but also in color and finish, to ensure A uniform look. It’s worth noting that some modern hinges have built-in adjustment mechanisms that can help correct minor misalignments.
6. Magnetic Or Roller Catch (If Needed)

If your cabinet doors lack a catch or if the current one is broken, a new catch will be necessary. Magnetic catches are common and effective for most cabinets, but roller catches can be a better fit for heavier doors. Make sure you have the necessary screws for installation, as some catches may not include them.
Step-By-Step Guide To Fixing Cabinet Doors
Addressing Warped Doors
1. Diagnosis Of Warped Doors
To diagnose A warped door, remove it from the hinges and lay it flat on A surface such as A table or the floor. If any part of the doors doesn’t lay flat and evenly touch the surface, the door is warped. You can also hang the doors back onto the cabinet and observe any discrepancies in the way the door aligns with the cabinet frame. Misalignment at the corners or along the edges usually indicates warping.
2. Techniques To Fix Warped Doors, Including Adjusting, Replacing, Or Reconditioning The Door
Adjusting: Sometimes, the door warping is minor and can be rectified by adjusting the hinges. Many modern hinges have inbuilt adjustment features that allow minor changes in alignment. By loosening or tightening the adjustment screws, you can often compensate for the warp.
Replacing: If the warp is severe, it may be more time-efficient to replace the doors entirely. While this could be a more expensive option, it guarantees a door that will align correctly and close properly. Ensure the new door is made of good quality material and is properly treated to prevent future warping.
Reconditioning: In some cases, it may be possible to un-warp a wooden door. One method is to use moisture and heat. Wet the concave side of the door, then lay it out in the sun or use a hairdryer to slowly dry it out. As it dries, the door should flatten. This method may not work with severely warped doors or doors made from certain materials.
Another reconditioning method is to disassemble the door (if it’s A panel door), lay it flat, apply carpenter’s glue to the joints, And then clamp the door until it dries. This may correct minor warping but can be time-consuming and complex.
Remember that these methods do not guarantee success and there is a risk of further damaging the doors. Always consider the value of your time and the cost of a replacement door.
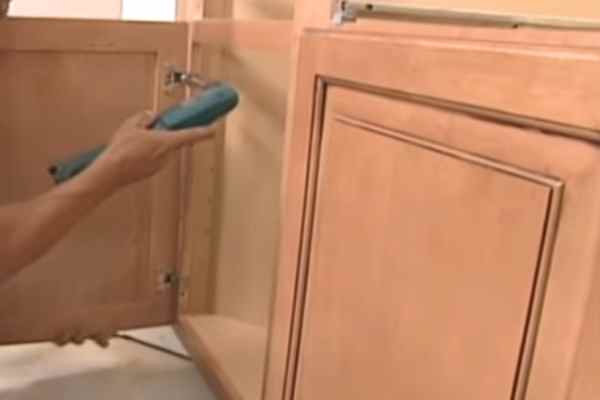
Fixing Loose Or Damaged Hinges
1. Assessment Of Hinge Condition
Begin by opening the cabinet doors and examining the hinges. Look for any signs of wear, damage, Or rust. Check if the screws are loose or missing. If the hinges are loose, the door may not align properly, preventing it from closing fully. Similarly, rusted or broken hinges may not allow the door to move freely.
2. Tightening Loose Screws Or Replacing Worn-Out Hinges
Tightening Loose Screws: If you find that the screws are loose, Use A screwdriver to tighten them. Make sure not to overtighten as it can strip the screw hole, making it difficult for the screw to grip the wood. If the screw won’t tighten, it may be because the hole has become stripped. In this case, you can use a longer screw or fill the hole with a wooden toothpick or dowel coated in wood glue. Once the glue dries, re-drill the hole And insert the screw.
Replacing Worn-out Hinges: If the hinges are worn out, rusted, Or broken, They will need to be replaced. Remove the old hinges by unscrewing them from both the doors and the cabinet frame. Take one of the old hinges with you to the hardware store to ensure you buy the correct size and style. Once you have the new hinges, screw them into the existing holes on the cabinet and doors. Use an adjustable wrench to tighten any nuts. After the new hinges are installed, You may need to make minor adjustments to the hinges for the doors To align properly.
Cleaning Grime And Debris
1. Appropriate Cleaning Techniques
Start by removing the cabinet doors if possible for a thorough clean. Use a soft cloth or sponge soaked in a solution of warm water and mild detergent to gently clean the doors, hinges, and latch area. If the grime is heavy, You may need to use A kitchen degreaser, following the instructions on the bottle.
For stubborn spots or for cleaning the small moving parts of hinges, an old toothbrush can be very effective. If there’s A thick layer of grime, You might need to let the cleaning solution sit for A few minutes before scrubbing it off.
After cleaning, rinse thoroughly with warm water to remove any residual soap or cleaner, as this could cause further buildup or discoloration. Dry the doors and hinges thoroughly after cleaning to prevent rust or damage. If necessary, You can use A hairdryer to make sure all the nooks And crannies are dry.
2. Preventive Measures To Avoid Buildup In The Future
Regular cleaning can help prevent the buildup of grime and debris. Depending on how much use your kitchen sees, aim to clean your cabinet doors and hinges at least every few months.
Avoid spraying cooking oil liberally, as it can become airborne and settle on your cabinets. If you notice splatters or spills, clean them up immediately before they harden and become more difficult to remove.
Consider using a protective coating or polish on your cabinet doors after cleaning. These products can help repel dust and grime, making your future cleaning tasks easier.
Lastly, maintaining good ventilation in your kitchen can also help to reduce the amount Of grime that settles on your cabinets. This can be achieved with an effective extractor fan or regularly opening windows to air out the kitchen.
Correcting Misaligned Doors
1. Methods For Diagnosing Misalignment
Misalignment can be spotted by looking at how the door hangs compared to the cabinet frame. A misaligned door may hang at an odd angle or not meet the cabinet frame evenly. Look for uneven gaps around the doors, particularly at the top and bottom. Misalignment can also be detected by trying to close the doors. If the door hits the frame or doesn’t close smoothly, it may be misaligned.
2. Adjusting The Hinges For Better Alignment
If the door is misaligned, the hinges may need to be adjusted. Most modern hinges have screws that allow for three types of adjustments: depth, vertical, and horizontal.
Depth Adjustment: This moves the door closer to or away from the cabinet, which can be helpful if the door is hitting the cabinet frame when it closes.
Vertical Adjustment: This moves the door up Or down relative to the cabinet frame, Which can help if there’s An uneven gap at the top or bottom of the door.
Horizontal Adjustment: This moves the door left or right, which can correct an uneven gap on the sides of the doors.
Always make small adjustments, then close the doors to check the alignment. Continue making adjustments until the door is properly aligned.
3. Installing A Catch For Added Security If Necessary
If the door still doesn’t stay closed after adjusting the hinges, it may be necessary to install a catch. A catch adds a little resistance to keep the door closed. There are various types of catches, like magnetic and roller catches, that can be installed relatively easily. Choose the type that best suits your cabinet style and material.
To install a catch, you’ll typically screw one part to the top or bottom of the cabinet frame and the other part to the inside of the door, aligned with the first part. When the door is closed, the two parts of the catch connect and hold the door closed. Follow the manufacturer’s instructions for the specific catch you’re installing.
Testing And Ensuring Proper Functionality
1. Methods For Testing The Cabinet Door’s Closure
Once you’ve made adjustments Or replacements, It’s important to test the doors to ensure it’s functioning correctly. Close the doors gently and observe if it sits flush with the cabinet frame. Look for even gaps around all edges of the doors and ensure it doesn’t catch or scrape on any part of the frame. Open and close the door several times to check for smooth operation. The doors should open easily and stay closed without popping open.
2. Addressing Any Remaining Issues
Should the door continue to exhibit problems, take a moment to reevaluate the situation. The door might not be closing entirely due to lingering alignment problems or a catch that requires adjustment. If the door is difficult to open, it might be a result of overly tightened hinges or a need for lubrication. Severe warping could necessitate more substantial repairs or a total replacement of the doors. If any of these tasks feel beyond your comfort level, don’t hesitate to reach out to a professional for assistance.
3. Importance Of Regular Maintenance To Prevent Future Issues
Regular maintenance can go A long way in preventing future issues. Clean the doors and hinges regularly to prevent grime buildup. Tighten any loose screws as soon as you notice them. If you live in A humid climate, consider using A dehumidifier to prevent warping. Check the doors regularly for signs of wear and tear and address any issues promptly to prevent further damage. Remember that while fixing small issues can be a DIY project, more significant issues or adjustments might need professional attention.
The Final Thoughts
Fix cabinet doors that won’t stay closed is often a straightforward process that involves diagnosing the problem, gathering the necessary tools and materials, and addressing the issues. The door might be warped, in which case it can be adjusted, replaced, or reconditioned. Loose or damaged hinges can be tightened or replaced, while grime and debris can be cleaned off. Misalignment can often be rectified by adjusting the hinges or installing a catch.
Throughout these repairs, it’s crucial to continually test and ensure proper functionality. Regular maintenance, such as cleaning and tightening screws, is invaluable in preserving the life of your cabinet doors and avoiding more significant problems down the line. While these repairs can typically be carried out by homeowners, don’t hesitate to call a professional if the issues persist or if you’re uncomfortable making these adjustments. Timely repairs can save you time and money in the long run and keep your kitchen looking its best.