
Are you in need of a sleek and functional storage solution for your bathroom essentials? Look no further than a medicine cabinet! A medicine cabinet is A versatile fixture that not only adds style to your bathroom but also provides A convenient And organized space to store medications, toiletries, And other necessities. However, it’s crucial to ensure proper installation to maximize its functionality and aesthetic appeal. In this blog, We will guide you through the step-by-step process Of install a medicine cabinet, Allowing you to transform your bathroom into A well-organized oasis effortlessly.
what Is A Medicine Cabinet?

A medicine cabinet is a specialized fixture typically installed in bathrooms or other areas where medications and personal care items are stored. It is A wall-mounted or recessed cabinet designed to provide storage space for medications, First aid supplies, Toiletries, And Other Essentials. The cabinet is usually equipped with a mirrored door, allowing it to serve a dual purpose as a mirror for grooming and a storage unit. The interior of the medicine cabinet often includes adjustable shelves or compartments to help organize and accommodate various items. Some medicine cabinets also feature additional features such as built-in lighting, electrical outlets, or defogging mechanisms. Overall, a medicine cabinet offers a convenient and organized solution for storing and accessing commonly used items in a bathroom or other appropriate settings.
Pre-Installation Preparation
1. Selecting The Right Location

Carefully choose the location for your medicine cabinets. Consider the height and accessibility for all potential users. It is typically installed above the bathroom sink at a height that allows for easy access. Ensure that there is enough wall space to accommodate the size of the cabinets without obstructing other fixtures or accessories.
2. Gathering The Necessary Tools And Materials

Before you begin the installation, gather all the tools and materials required. This will save You time And effort during the process. Common tools needed include a stud finder (to locate wall studs), measuring tape, level (to ensure proper alignment), pencil or marker (for marking measurements), screwdriver or drill, screws or mounting hardware suitable for your wall type, drywall saw or utility knife (for recessed cabinets), and safety equipment such as gloves and goggles.
3. Turning Off Power If Necessary

If your medicine cabinets have built-in electrical features, such as lighting or outlets, it’s essential to ensure electrical safety. Locate the circuit breaker or fuse box and turn off the power supply to the specific area where you will be working. This precaution will prevent any accidents or electric shocks during the installation process.
Step-By-Step Installation Guide
1. Removing The Existing Cabinets (If Applicable)

If you have an existing medicine cabinets that needs to be replaced Or removed, Start by detaching it from the wall or surface. Carefully unscrew any screws or fasteners holding it in place and gently remove the cabinets. Be cautious not to damage the wall or surrounding areas during the removal process.
2. Marking The Installation Area

Once the old cabinets are removed, it’s time to mark the installation area for your new medicine cabinets. Use a tape measure, level, and pencil to determine the desired height and position on the wall. Consider factors such as the height of the users, accessibility, and any nearby fixtures or obstructions. Mark the positions for the mounting points and ensure they are level and evenly spaced.
3. Installing The Mounting Hardware
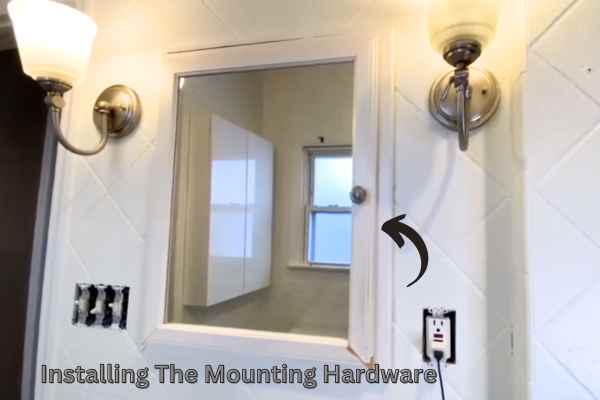
Depending on the design of your medicine cabinets, it may require specific mounting hardware for proper installation. This could include brackets, cleats, or anchors. Follow the manufacturer’s instructions to install the mounting hardware securely on the wall. Use a level to ensure it is straight and aligned. If possible, try to attach the hardware to wall studs for added stability. Use a stud finder to locate the studs and mark their positions accordingly.
4. Attaching The Medicine Cabinets

A. Aligning The Cabinets With The Mounting Points
With the mounting hardware in place on the wall, carefully align the medicine cabinets with the designated mounting points. Ensure that the cabinet is level and centered within the installation area. Take your time to make precise adjustments to achieve the desired alignment.
B. Securing The Cabinet To The Wall Or Surface
Once the cabinet is properly aligned, it’s time to secure it to the wall or surface. Begin By inserting screws through the pre-drilled holes in the back Of the cabinets. Drive the screws into the wall or mounting hardware, using a screwdriver or drill. Start with the uppermost screws, and then move to the lower ones, maintaining the cabinet’s alignment throughout the process. Be cautious not to overtighten the screws, as it could damage the cabinets or the wall surface.
5. Checking For Stability And Functionality

A. Ensuring The Cabinet Is Securely Attached
After attaching the medicine cabinets to the wall, It’s important to double-check its stability and ensure It is securely attached. Give the cabinets a gentle shake or push to ensure it feels solid and doesn’t move or wobble. If you notice any instability, check the screws or mounting hardware to ensure they are tightened securely. Make any necessary adjustments or tighten the screws as needed to improve the cabinet’s stability.
B. Testing Doors, Shelves, And Other Features
Once the cabinet is securely attached, test the functionality of its doors, shelves, and any other features it may have. Open and close the doors to ensure they operate smoothly without any sticking or misalignment. Check the shelves to ensure they Are sturdy and can support the weight Of the items you intend to store. Make any adjustments or alignment tweaks as necessary to ensure optimal functionality.
Post-Installation Considerations
1. Cleaning And Finishing Touches

A. Removing Any Installation Residue
After completing the installation of your medicine cabinets, take a moment to clean up any residue or debris left behind. Use A damp cloth Or sponge to wipe away any dust, Fingerprints, or marks on the cabinet’s surface. Pay attention to the surrounding area as well, ensuring that there are no leftover screws, packaging materials, or tools.
B. Polishing Or Touching Up The Cabinets If Necessary
Depending on the material and finish of your medicine cabinets, You may want to give it a final polish Or touch-up to enhance its appearance. Use a suitable cleaning agent or polish recommended for the specific material of your cabinets. Apply it with a soft cloth, following the manufacturer’s instructions, to restore the cabinet’s shine and remove any smudges or minor scratches.
2. Organizing And Stocking The Cabinet

A. Arranging Items For Easy Access And Visibility
Now that your medicine cabinets is installed, it’s time to consider the arrangement of items inside for easy access. Think about the items you use most frequently, such as medications or daily skincare products, and place them within easy reach. Arrange items based on their frequency of use, with frequently used items towards the front or at eye level for convenient access. This way, you can quickly locate and retrieve items without digging through the cabinets. Adding Necessary Shelves Or Dividers
B. Adding Necessary Shelves Or Dividers
Visibility is crucial when organizing your medicine cabinets. Consider the design and structure Of Your cabinets and arrange items in a way that allows you to easily see and identify them. Use clear containers, Small bins, Or drawer dividers to separate and categorize similar items, making It easier to find what you need at a glance. Utilize adjustable shelves, if available, to create different height levels and maximize visibility.
3. Maintenance And Care

A. Regular Cleaning And Upkeep
To ensure the longevity and cleanliness of your kitchen cabinets, regular cleaning and upkeep are important. Use A soft, damp cloth or mild cleaning solution to wipe down the interior and exterior surfaces Of the cabinets. Pay attention to any spills or stains, and promptly clean them to avoid permanent damage. Avoid using abrasive cleaners or harsh chemicals that may scratch or deteriorate the cabinet’s finish. Additionally, be mindful of any cleaning recommendations provided by the manufacturer.
B. Inspecting Hinges, Latches, And Hardware Periodically
It is essential to periodically inspect the hinges, latches, and hardware of your medicine cabinets to maintain its functionality. Check for any signs of wear, looseness, or damage. Ensure that the hinges are properly aligned and the latches secure the doors effectively. If you notice any issues, such as squeaky hinges or loose hardware, tighten screws or lubricate moving parts as necessary. If there are significant problems, consider contacting the manufacturer for assistance or replacement parts.
The Final Thoughts
Install a medicine cabinet involves a step-by-step process, including removing the existing cabinet (if applicable), Marking the installation area, installing the mounting hardware, and attaching the cabinet securely to the wall Or surface. It is crucial to check for stability and functionality after installation. Additionally, post-installation considerations such as arranging items for easy access, adding shelves or dividers, and performing regular cleaning and upkeep contribute to the longevity and functionality of the cabinet. If unsure or facing complex installations, it is advisable to seek professional help to ensure a successful and safe installation.