
Spice racks are a fantastic addition to any kitchen, providing an organized and easily accessible storage solution for your diverse collection of spices. With a homemade hanging spice rack, not only can you create a space that caters to your unique needs, but you can also incorporate a personalized design that complements your kitchen decor. This DIY project, suitable for both beginners and experienced crafters, can be completed in a single weekend. It’s a simple, yet rewarding undertaking that promises to declutter your countertops and cupboards, transforming your spice storage into an appealing and practical display. Let’s dive into the steps to creating your very own hanging spice rack.
What Is A Hanging Spice Rack
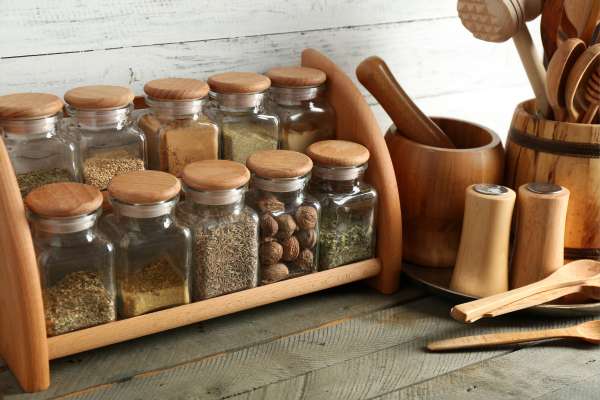
A spice rack is a storage solution designed to help organize and display your spice jars for easy access. As the name implies, it hangs from a wall or underneath a cabinet, utilizing vertical space rather than occupying valuable counter or drawer space. The design can range from simple wire racks to elegant wooden shelves, and it can hold anywhere from a handful to dozens of spice jars. Besides its primary function of organization and storage, a hanging rack can also enhance the visual appeal of your kitchen, displaying your collection of spices like a vibrant array of culinary colors and textures. It’s an excellent way to simplify your cooking process and beautify your kitchen simultaneously.
The Benefit Of Hanging Spice Rack Making

Creating a hanging spice rack comes with a multitude of benefits.
- Space Efficiency: Hanging racks utilize vertical space, thereby freeing up your kitchen counter or drawers. This is especially beneficial for small kitchens where counter space is at a premium.
- Accessibility: With a hanging rack, your spices are displayed in plain sight and are easily reachable. This can significantly streamline your cooking process, as you no longer need to rummage through a cabinet or drawer to find the spice you need.
- Organization: A well-designed racks can help you keep your spices organized. You can arrange them alphabetically, by frequency of use, or even by cuisine, helping you locate them quickly and efficiently.
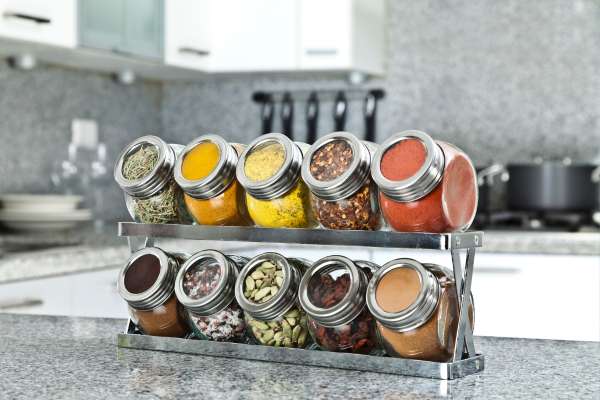
- Aesthetic Appeal: Besides being functional, a hanging rack can also add to the aesthetic appeal of your kitchen. Whether it’s made from reclaimed wood for a rustic charm or sleek metal for a modern touch, it can become a statement piece in your kitchen.
- Customization: When you build your own spice racks, you can customize it according to your specific needs and preferences. You can decide on the size, design, material, and color, creating a piece that perfectly suits your kitchen’s decor and your personal style.
- Cost-Effective: Making your own hanging rack can be a cost-effective alternative to buying a pre-made one. You can use recycled or inexpensive materials, keeping your budget in check.
- Fun Project: Finally, making your own hanging racks can be a fun and satisfying DIY project. It’s a great way to engage your creativity and potentially learn new skills in the process. Plus, there’s a unique sense of satisfaction that comes with using something you’ve made yourself.
Step To Step Make A Hanging Spice Rack
1. Gather The Materials
The first step in creating your hanging racks are to gather all necessary materials. This includes your choice of wood, a saw (a hand saw or a power saw for larger projects), sandpaper, wood glue, screws, a screwdriver or drill, a tape measure, and paint or stain if you want a specific color or finish. Depending on the design of your spice racks, you might also need dowel rods, hooks, or brackets. Remember to also gather safety equipment such as gloves and goggles to protect yourself during the process.
2. Measure And Prepare The Wood

After collecting all the materials, the next step is to measure and prepare the wood. Start by deciding on the dimensions of your racks – how wide, tall, and deep it should be. Consider the size and number of spice jars you’ll be storing, as well as the available space where you plan to hang the rack. Once you’ve decided on the measurements, mark them on your wood pieces using a pencil. Ensure your lines are straight and your measurements are accurate to avoid any mismatched pieces.
3. Cut The Wood Pieces

With your measurements marked, it’s time to cut the wood pieces. Using your saw, carefully cut along the marked lines. Remember to always cut slightly outside the line to account for the thickness of the saw blade you can always sand down the edges later for a perfect fit. After cutting, use sandpaper to smooth the edges and surfaces of the wood pieces. This will not only make your spice racks look more polished, but it’ll also help the paint or stain adhere better in the next steps. During this step, remember to follow safety guidelines and use proper techniques when handling the saw. If you’re using a power saw, ensure you’re familiar with its operation to avoid accidents.
4. Assemble The Spice Rack
Once all the pieces are cut and smoothed, you can begin assembling the racks. Start by laying out the pieces in the configuration of the finished rack to ensure everything fits together correctly. Then, apply wood glue to the connecting edges and secure the pieces together. Depending on your design, you might also need to use screws for added stability. For a simple rack, this might mean attaching the sides to the base first, then attaching the back. For more complex designs, you might need to attach shelves or individual compartments. After the glue has dried, reinforce the connections with screws if needed. Always ensure that the racks are square and the pieces are secure.
5. Sand And Finish The Rack

Once your spice rack is fully assembled, it’s time to give it a final sanding. This will smooth out any rough spots or glue residue, and it will prep the wood for finishing. Start with a medium-grit sandpaper to smooth out the larger imperfections, then switch to a fine-grit sandpaper for a polished finish. After sanding, wipe down the racks with a damp cloth to remove any dust. Then, apply your chosen finish, such as paint or wood stain. Be sure to let it dry completely before proceeding to the next step.
6. Attach Hooks And Hanging Mechanism
The final step in making your hanging rack is attaching the hooks and the hanging mechanism. This will depend on where you plan to hang the rack. If it’s going to be hung from a wall, you might use picture hangers, brackets, or French cleats. If it’s going to be hung under a cabinet, you might use screw-in hooks or adhesive hooks. Make sure to measure and mark where the hooks will go to ensure the racks hangs level. Also, choose a hanging mechanism that can support the weight of the racks and the spices. Once the hooks and hanging mechanism are attached, your handmade rack is ready to be hung and filled with your favorite spices!
7. Hang The Spice Rack

With the hooks and hanging mechanisms securely attached, you’re ready to hang your racks. Choose a location that’s easily accessible and within your line of sight while you’re cooking. Using a level, ensure that the rack is straight. Depending on your chosen hanging method, you might need to mark and drill holes into your wall or under your cabinet. If drilling, ensure that you’re not hitting any electrical wires or plumbing. Once your holes are prepared, you can hang the spice racks. Double-check that it’s securely attached before adding any weight to it.
8. Arrange And Label The Spice Jars

Finally, it’s time to fill your spice racks! Arrange your spice jars in a way that makes sense for your cooking habits. This could be alphabetically, by cuisine, or by frequency of use. Consider using uniform jars for a clean, organized look. It’s also a good idea to label your spices, especially if they’re in a drawer or a rack where only the tops are visible. You can use a label maker, or simply write on the lids with a permanent marker. With your spices arranged and labeled, your new hanging racks are not just a storage solution, but a functional piece of kitchen decor that can inspire your culinary creativity.
Maintenance And Care Tips
Maintaining your hanging rack properly is important to ensure its longevity and keep it looking its best. Here are some tips on how to care for and maintain your homemade spice racks:
Regular Cleaning: Dust and dirt can accumulate over time, so regular cleaning is crucial. Use a damp cloth to wipe down the surface of the rack regularly. If your rack is painted or stained, make sure the cleaning solution you use won’t damage the finish.
Avoid Overloading: Although it might be tempting to cram as many spice jars as you can onto your racks, try not to overload it. Too much weight can strain the rack and potentially damage it, or even cause it to fall off the wall. Stick to the capacity you designed it for.
Periodic Checks: Regularly check the racks to make sure it’s securely attached to the wall and that there are no loose screws or weak spots. Over time, the weight of the spices can cause wear and tear, so it’s good to catch any potential issues early.
Spice Rotation: To maintain the quality of your spices, try to rotate them regularly. Spices can lose their flavor over time, especially if exposed to heat and light. Try to use up older spices first and replace them as needed.
Avoid Moisture: If possible, don’t place the spice rack near a source of steam or moisture, like a stove or a dishwasher. Moisture can damage both the racks and the quality of the spices.
By following these maintenance and care tips, you can ensure that your handmade hanging racks remains a functional and attractive part of your kitchen for years to come.
The Final Thoughts
Learning how to make a hanging rack can be a fun and rewarding project, bringing both practicality and style to your kitchen. From gathering the right materials, accurately measuring and cutting the wood, through careful assembly, finishing, and finally, hanging your creation in its rightful place, every step adds a personal touch that can’t be found in store-bought versions. Beyond simply being a storage solution, your custom-made spice rack is a testament to your creativity and your love for cooking. Remember to maintain and care for your spice rack properly to ensure its longevity. With your spices neatly arranged and readily accessible, you’re all set for a smoother, more efficient, and enjoyable culinary journey.