Maintaining A clean kitchen is essential to keeping A safe and healthy home. Mold can quickly spread on surfaces, especially when frequent moisture and humidity are present. Wooden cutting boards, in particular, Can develop mold if not properly cared for And cleaned regularly. Fortunately, It is possible to remove mold from wooden cutting boards with some basic cleaning supplies And the right techniques. We will discuss how to effectively remove mold from wooden cutting board in order to keep your kitchen clean and safe.
What Is Mold On Cutting Boards?

Mold on cutting boards is A type of fungus that can develop on the surface of wood, plastic, Or other porous surfaces. This type of mold is typically caused by dampness and poor ventilation, And it can cause discoloration, musty odors, And even health problems if not treated properly. To keep mold from forming on cutting boards, It’s important to thoroughly clean them after each use with mild dish soap And warm water. Make sure to dry the board completely before storing it in A cool, dry place. Additionally, periodically sanitizing the board with vinegar Or diluted bleach can help prevent the growth of mold.
Process Of Remove Wooden Cutting Board Mold?

Remove mold from A wooden cutting board can be A tricky process. The best way to start is by cleaning the surface with warm soapy water and A scrub brush. This should remove any surface mold, But if the mold has gone deeper into the wood then you may need to use A stronger solution. A mixture Of vinegar and baking soda can Be effective in removing deeper mold, As it will create An acidic environment that will kill off the spores. Start by mixing equal parts vinegar and baking soda in A bowl and then using A sponge Or rag to apply it to the affected area. Let it sit for 10 to 15 minutes before rinsing off with warm water. If some mold remains, Repeat this process until all of it has been removed.
Proper Washing Techniques
Proper washing techniques are essential for maintaining good hygiene And preventing the spread Of germs. Whether it’s your hands, body, Or clothes, knowing how to wash properly can help keep you and those around you healthy. Here are some tips on proper washing techniques:
Cleaning Process: Cleaning Preparation
1. Removing Any Loose Debris
To start the process Of removing loose debris from your home, Gather necessary cleaning supplies such as A broom or vacuum cleaner. Begin by sweeping the floors thoroughly to remove any large pieces Of debris that may be present. Use A dustpan to collect the swept up debris And dispose of it properly.
2. Washing With Soap And Water
Then wet them with clean running water And apply soap. Rub your hands together for at least 20. Making sure to cover all surfaces including the backs of your hands, between your fingers, And under your nails. Rinse thoroughly under running water and dry your hands using A clean towel Or air dryer.
3. Rinsing With Warm Water
Rinsing with warm water, It’s important to use the correct temperature. Water that is too hot can damage certain surfaces Or cause burns, While cold water may not be As effective at removing dirt and grime. The ideal temperature for rinsing with warm water is between 110 120 degrees Fahrenheit.
Cleaning Process: Cleaning Agent
1. Applying The Vinegar
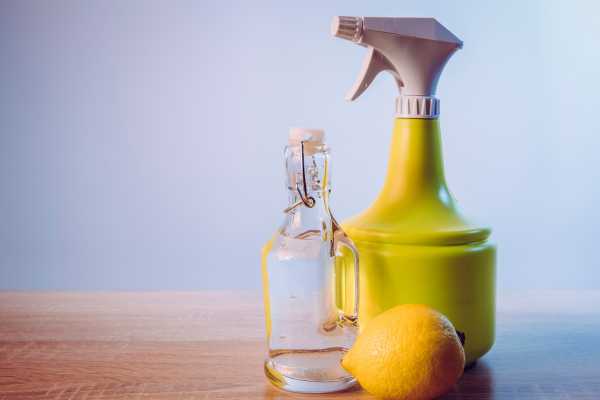
One Of the most common uses for vinegar as A cleaning agent is in the kitchen. It can Be used to clean countertops, stovetops, And even cutting boards. Simply mix equal parts water And vinegar in A spray bottle, then apply the solution to the surface you want to clean. Let it sit for A few minutes before wiping it clean with A cloth or sponge.
2. Applying The Hydrogen Peroxide
Hydrogen peroxide has strong oxidizing properties which make it effective at breaking down organic substances such as dirt, grime, And bacteria. It can easily penetrate surfaces to eliminate stains And odors without leaving any residue behind. Additionally, It is eco-friendly compared to other harsh chemicals commonly used in cleaning products.
3. Applying The Bleach
Before applying bleach, Be sure to read the label carefully And follow all instructions. Wear protective gloves and clothing, As well as eye protection if necessary. Dilute the bleach with water according to the instructions on the label. Using too much undiluted bleach can damage surfaces And even harm your health.
Cleaning Process : Natural Solution
1. Use A Lemon
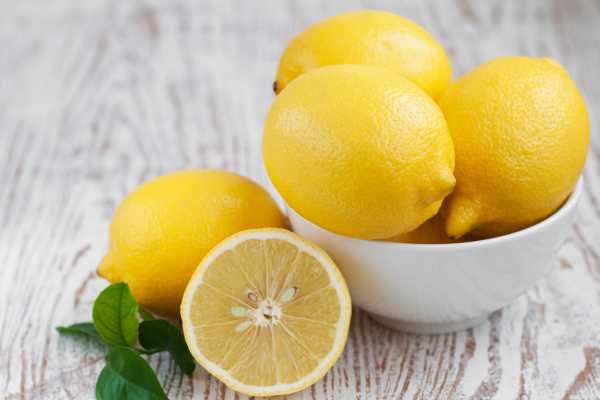
One Of the most significant advantages Of using A lemon is its ability to boost your immune system. Lemons contain high levels Of Vitamin C, Which helps in fighting off infections And diseases. By consuming lemon juice regularly, You can improve your body’s resistance to harmful pathogens that cause illnesses such As colds and flu.
2. Use A Kosher Salt
Using kosher salt is that it enhances the flavors Of your food without overpowering them. The larger grains also help to draw out moisture from meats, allowing them to develop A crispy exterior when cooked. Additionally, Since kosher salt is less dense than table salt, You’ll actually end up using less Of it overall.
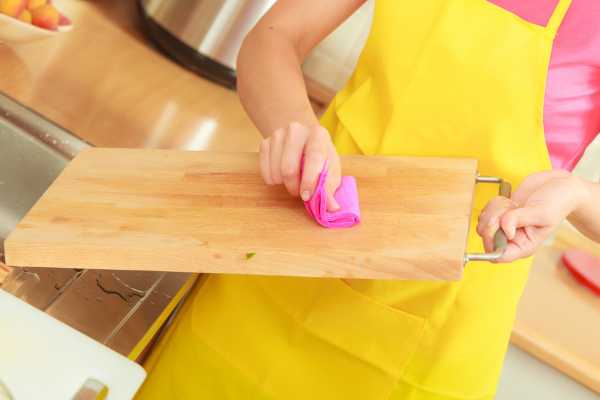
3. Scrubbing The Cutting Board Thoroughly
Scrubbing the cutting board thoroughly is important To ensure it’s free from harmful bacteria And germs. While some people rely on chemical solutions for cleaning their cutting boards, There are natural solutions that can Be just as effective. A natural solution not only helps in getting rid Of germs but also ensures that the board remains safe for use.
4. Allowing The Cleaning Agent To Sit For The Recommended Time
Allowing the cleaning agent to sit allows it to penetrate dirt And grime more effectively, Making it easier to clean. For example, If you’re using a vinegar solution as An all purpose cleaner, Allow it to sit on surfaces like countertops and bathroom fixtures for at least five minutes before wiping it away with a cloth. This will give the vinegar time to break down any buildup and leave your surfaces sparkling clean.
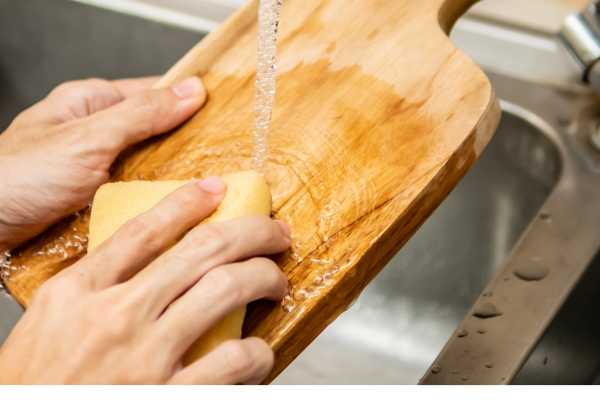
5. Rinsing The Cutting Board With Clean Water
Rinsing your cutting board with clean water also helps to remove any residual chemicals Or contaminants from cleaning products that may have been used during prior cleaning sessions. This is particularly important if you prefer using natural solutions such As vinegar Or lemon juice for cleaning your kitchen utilities.
6. Dry It Properly Every Time
Drying your clothes, towels, And other fabrics is An essential part of your laundry routine. However, If you don’t dry them properly every time, You might end up with damp Or musty smelling items that can ruin the freshness of your home. Luckily, There is A natural solution to this problem that can help you keep everything clean And fresh.
Regular Cleaning And Sanitizing Of Cutting Boards After Each Use
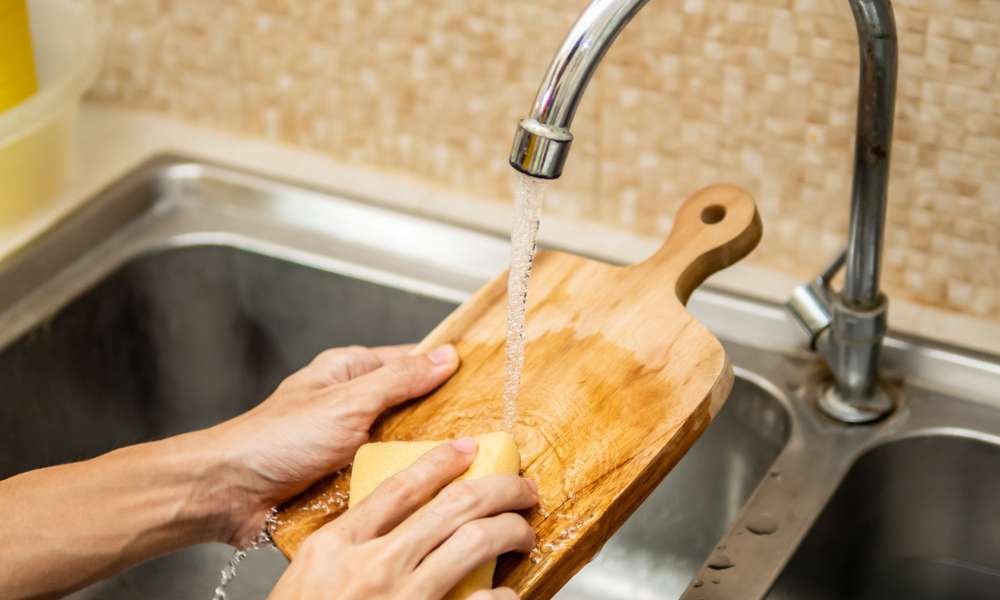
Regular cleaning And sanitizing of cutting boards, Especially wooden ones, Is A crucial step in maintaining good hygiene in your kitchen. Wooden cutting boards Are highly porous And can harbor bacteria that can cause foodborne illnesses if not properly cleaned after each use. To avoid cross contamination and ensure safe food preparation, It’s important to follow proper cleaning procedures.
To start, rinse the board with hot water immediately after use to remove any excess food particles. Then, Using A mild soap or detergent, thoroughly wash the board on both sides with a sponge or brush. Make sure to get into any crevices Or grooves where bacteria may hide. Rinse the board again with hot water and dry it with A clean towel.
Next comes the sanitizing step. There are several methods you can use to sanitize your wooden cutting board.
How To Prevent Mold On Cutting Boards?
Mold on wooden cutting boards is common, And it can be dangerous for your health. Mold grows in moist environments And can spread quickly if not properly managed. To prevent mold on wooden cutting boards, There are several steps you can take.
- It’s essential to keep your cutting board clean And dry at all times. After each use, Wash the board with hot soapy water and then dry it thoroughly with a clean towel Or paper towel. Never leave the board soaking in water As this creates A breeding ground for bacteria And mold.
- Consider using separate cutting boards for different types of food. For example, Use one board for meat products And another For vegetables. This will prevent cross contamination Of bacteria between different types Of food which could lead to mold growth.
The Final Thoughts
Mold on A wooden cutting board can Be successfully remove with the simple steps outlined in this article. Start by scrubbing the surface with A brush, Then use either vinegar Or baking soda to remove any remaining residue. If necessary, Use A mixture of bleach and water to finish the job. Finally, Always make sure to thoroughly dry the cutting board after cleaning before using it again. With these tips, You can keep your cutting board looking And smelling like new for years to come!