Keeping your refrigerator’s water filter in good condition is essential for ensuring that you and your family have access to clean, fresh-tasting water. Over time, these filters can become clogged with contaminants, reducing their effectiveness. Replace Water Filter your fridge is a straightforward task that can be done in a few simple steps. This guide will walk you through the process, helping you maintain the quality of your drink and ice.
Why It’s Important To Replace Your Fridge’s Waters Filters?
Your refrigerator’s water filter plays a crucial role in removing impurities from the water. It helps out harmful contaminants like chlorine, lead, and other chemicals, making your drinking water safer and more pleasant-tasting. However, over time, these filters can become saturated with these substances, reducing their efficiency and potentially affecting the taste and quality of your drink.
When Should You Replace Your Waters Filters?
Most manufacturers recommend replacing It every six months, depending on your usage and drink quality. If you notice a decrease in water flow, a change in taste, or an indicator light on your fridge, it’s likely time to Replace Whirlpool Water Filter the strainer.
Step-By-Step Guide To Replacing Your Waters Filters
Step 1: Identify Your Filters Type
Before you begin, it’s crucial to determine the type of It your fridge uses. Most refrigerators have either an internal It located inside the fridge or an external strainer connected to the drink line. Consult your refrigerator’s manual or check the model number to find the correct replacement strainer.
Step 2: Turn Off The Waters Supply
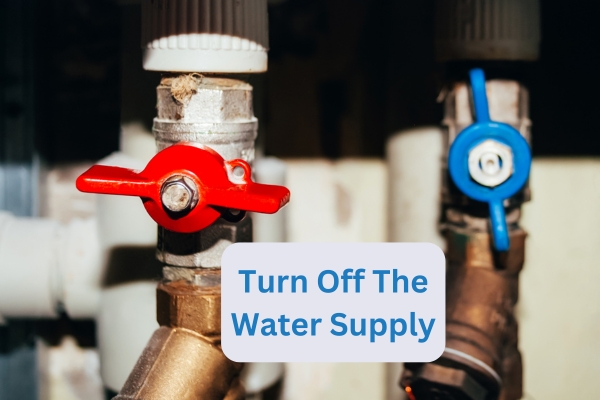
For safety, turn off the water supply to your refrigerator before removing the old colander. This step prevents the drink from spilling out when you detach the strainer.
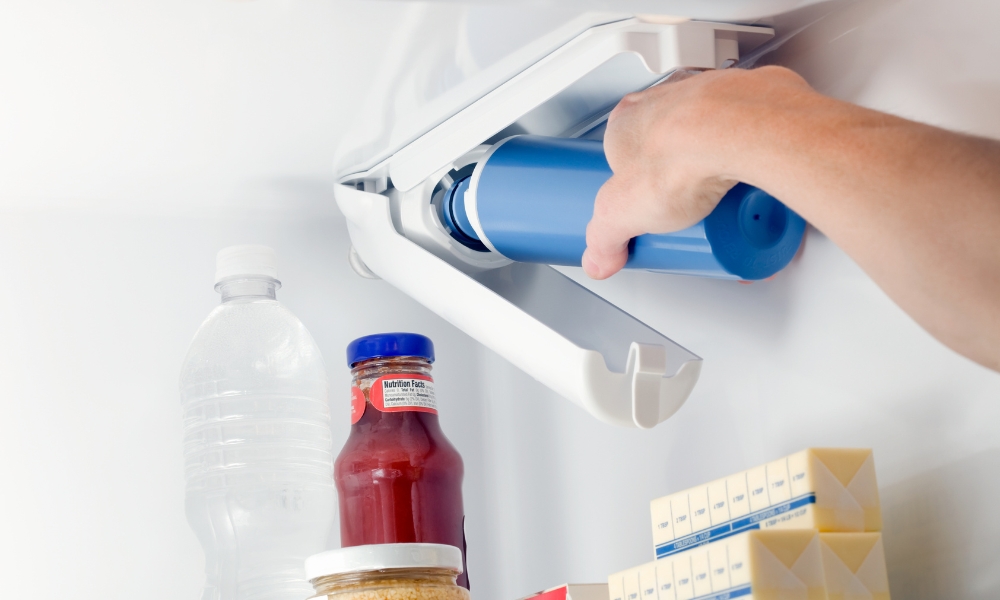
Step 3: Locate And Remove The Old Filters
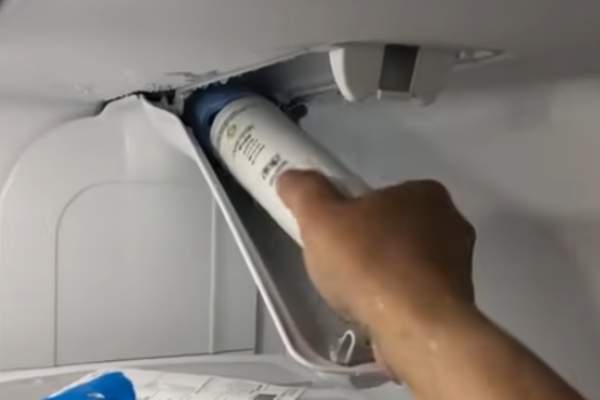
Depending on your fridge model, the It will be located either inside the fridge, near the bottom grille, or behind the refrigerator. Twist or pull the old strainer to remove it. Some filters may have a button that needs to be pressed before removal.
Step 4: Install The New Filter
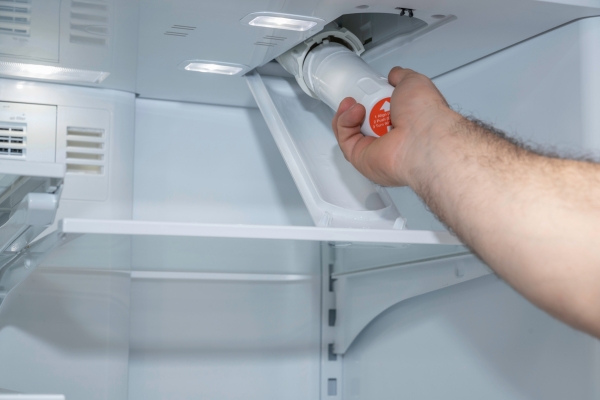
Take the new filter out of its packaging and remove any protective caps. Align it with the strainer housing and insert it, twisting or pushing it in until it locks into place. Ensure it is securely fitted to avoid leaks.
Step 5: Turn On The Waters Supply And Flush The Filter
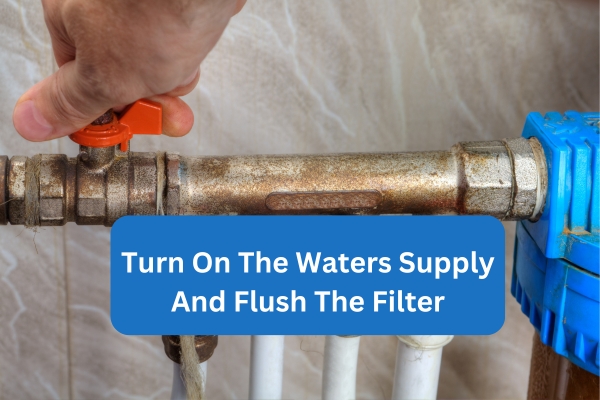
After installing the new filter, turn the water supply back on. It’s important to flush the strainer by running a few gallons of drink through it to remove any air and impurities. You can do this by dispensing drinks from the fridge’s drink dispenser.
Step 6: Reset The Filter Indicator
Many modern refrigerators come with a filter indicator light that alerts you when it’s time to change the strainer. After replacing the strainer, reset the indicator according to your fridge’s instructions to ensure it tracks the next replacement accurately.
Conclusion
Replacing the water filter in your fridge is a simple yet crucial task to maintain the quality of your drinking water. By following this step-by-step guide, you’ll ensure that your refrigerator continues to provide clean, fresh-tasting drink and ice for your family. Remember to replace the strainerregularly and keep an eye on the drink quality for the best results.