
The realm of culinary excellence, the Pampered Chef Kitchen Shears stand as a testament to precision and functionality. These versatile kitchen tools, designed with utmost care and quality, often become indispensable companions in the culinary journey. However, like any well-loved instrument, they require occasional maintenance to ensure peak performance. In this guide, we will delve into the art of sharpen Pampered Chef scissors, unraveling the steps and techniques necessary to Kitchen Shears restore their cutting prowess. Elevating your kitchen experience starts with maintaining the sharpness of these shears, and by following our comprehensive instructions, you can effortlessly preserve the edge and longevity of your Pampered Chef scissors. Join us on a journey to culinary sharpness, where the process is as rewarding as the result.
How Long Does The Sharpening Process Take?
Sharpening Pampered Chef Kitchen Shears is a straightforward process that can be completed efficiently with a few simple steps. On average, dedicating around 10 to 15 minutes to this maintenance task is sufficient. The relatively quick nature of its process ensures that you can promptly restore the scissors to their optimal cutting condition, allowing you to resume your culinary endeavors with precision and ease.
Importance Of Keeping Kitchen Shears Sharp
Maintaining sharp scissors is paramount for various reasons. A sharp edge not only enhances the shears’ performance but also contributes significantly to kitchen safety. Sharp scissors require less force to cut through ingredients, reducing the risk of accidents. Moreover, sharp scissors promote accuracy in cutting, ensuring that your culinary creations are executed with finesse. By prioritizing the sharpness of your Pampered Chef scissors, you not only extend their lifespan but also elevate the overall efficiency and safety of your kitchen.
Signs Of Dull Kitchen Shears

Recognizing the signs of dull scissors is crucial to maintaining a well-equipped kitchen. Firstly, experiencing difficulty in cutting through various food items is a clear indicator that the shears have lost their sharpness. Additionally, if you notice the shears crushing ingredients instead of making clean cuts, it is a telltale sign of dullness. Uneven cuts further underscore the need for sharpening, as a sharp edge ensures a smooth and consistent cutting motion. Being attuned to these signs allows you to address the issue promptly, preventing frustration and ensuring optimal performance from your Pampered Chef scissors.
Why Sharpening Is Necessary
Sharpening is an indispensable aspect of kitchen maintenance, especially when it comes to tools like knives and Tighten Kitchen Shears. Over time, the cutting edge of these instruments can wear down due to regular use, resulting In a dull blade. Dull blades not only compromise the efficiency of the tools but also pose safety risks in the kitchen. A sharp edge ensures clean and precise cuts, reducing the effort required and minimizing the potential For accidents. Regular it not only enhances the performance of kitchen tools but also prolongs their lifespan, making it a fundamental practice For any home chef or culinary enthusiast.
Tools And Materials Needed
- Honing Rod
- Sharpening Stone
- Professional Knife Sharpener
Step-By-Step Guide To Sharpening
1. Inspection Of Shears

Before diving into the sharpening process, carefully inspect your Pampered Chef Kitchen Shears. Look for any visible damage, nicks, or irregularities In the blades. Addressing these issues beforehand ensures A more effective sharpen outcome and prevents potential damage to your sharpening tools.
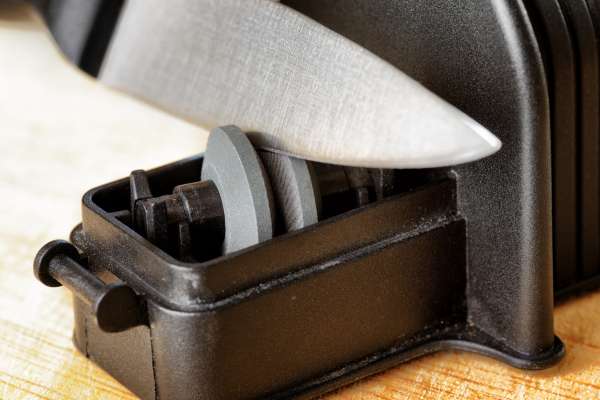
2. Choosing The Right Sharpening Tool
Selecting the appropriate sharpening tool is crucial for optimal results. Depending on your preference and skill level, you can choose between a honing rod, A sharpening stone, or a professional knife sharpener. Each tool offers a unique approach to sharpen, so consider factors such As convenience, precision, and the level of sharpness You aim to achieve.
3. Proper Technique For Sharpening
When using a honing rod or sharpening stone, maintain a consistent angle between the blade and the tool. For kitchen shears, an angle of approximately 20 degrees works well. With a honing rod, perform smooth and controlled strokes along the entire length of the blade, alternating sides. If using a sharpen stone, follow the manufacturer’s instructions, ensuring even strokes and consistent pressure. For those opting for a professional knife sharpener, consult the user manual for guidance on securing the shears and activating the sharpening mechanism.
4. Testing The Sharpness

After sharpening, it’s crucial to assess the sharpness of your Pampered Chef Kitchen Shears. Carefully run the blades through A piece of paper or perform a gentle cut on a soft vegetable. A sharp edge should result in a clean and effortless cut. If the scissors still exhibit signs of dullness, repeat the sharpen process, adjusting your technique as needed. Testing the sharpness allows You to fine-tune and ensure that your scissors are ready for precise cutting tasks.
Benefits Of Sharp Kitchen Shears
Sharp scissors offer a multitude of advantages that significantly enhance their utility in the culinary realm. First and foremost, the ability to effortlessly cut through various ingredients promotes efficiency In food preparation. Whether it’s trimming herbs, cutting poultry, or snipping through packaging, sharp shears make these tasks quick and seamless. Additionally, sharp scissors contribute To kitchen safety by reducing the need for excessive force, minimizing the risk of accidents associated with struggling to cut through tough materials.
Conclusion
The benefits of keeping yourscissors sharp extend far beyond mere convenience. A sharp pair of Pampered Chef scissors transforms routine kitchen tasks into effortless and enjoyable activities. The efficiency, safety, and precision that come with a sharp edge make these shears indispensable tools in any culinary setting. As you embrace the practice of regular sharpening, you not only enhance the functionality of your shears but also contribute to a safer and more pleasurable cooking experience. So, sharpen those scissors and savor the advantages that a keen edge brings to your kitchen.