
Using a salad spinner can be quite a simple task once you understand the basic mechanics. Begin by first washing your vegetables, ensuring all the dirt and potential pesticides are thoroughly cleaned off. Then, place the washed veggies into the basket of your salad spinner. Make sure not to overfill it, as this may prevent the spinner from working efficiently. Next, place the lid securely onto the spinner and start the spinning mechanism. This could be a push-button, a crank, or a pull-cord, depending on the model you have. As the basket spins, it forces the water from the vegetables to the outer bowl. Continue spinning until you feel your vegetables are dry enough. Finally, remove the lid and take out your crisp, clean, and dry vegetables.
What Are Salad Spinners?

A salad tosser is a tool used in the kitchen to mix and evenly distribute salad ingredients and dressing. They are often designed as two large spoon-like utensils, sometimes with prongs, which you hold in each hand to gently combine your greens ingredients without crushing or bruising them.
What Is The Purpose Of A Vegetable Spinner?
A vegetable spinner, commonly referred to As a greens spinner, is primarily used to dry salad greens or other vegetables after washing. Centrifugal force is used to spin water off the fresh blend and into the outer bowl In order for it to function. This helps maintain the bite and freshness Of your greens and prevents your fresh blend from becoming wet and sloppy. It also aids in the dressing’s improved contact with the leaves.
Importance Of A Salad Spinners
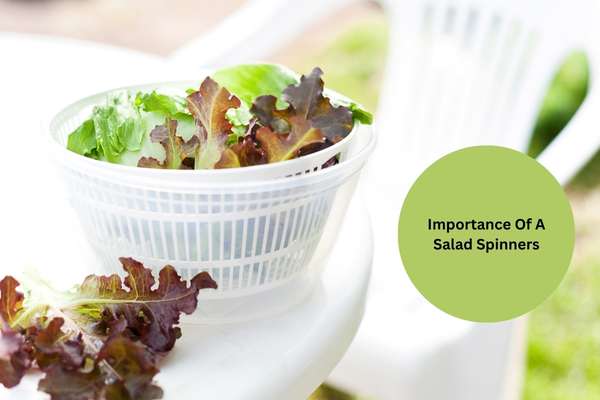
Tossing salads requires the use of A greens tosser. Because It allows for gentle mixing, the dressing is applied evenly to all the leaves and ingredients. Every bite of the greens Is more pleasurable as a result of the salad’s overall flavor improvement. Furthermore, by preventing the delicate greens ingredients from being mashed or crushed while mixing, a salad tosser aids in maintaining the integrity of the contents.
Choosing The Right Vegetable Spinner

Choosing the right vegetable spinner largely depends on your personal needs and preferences. Consider the capacity of the spinner; if You often make salads for a large group, you might need a larger one. The type of spinning mechanism is also crucial; some people prefer a push-down mechanism, while others might prefer a crank or pull cord. Durability is important as well; choose a spinner that’s made from strong, durable materials. Lastly, consider ease of cleaning. Some Green mixture can be disassembled and are dishwasher safe, making clean-up a breeze.
Types Of Salad Spinners
There are a variety of Green mixtures available on the market, categorized by their spinning mechanism. The most common types are:
Crank Handle Spinners: These have a handle on the lid that you turn to spin the basket. They’re usually easy to use but might require a bit more effort.
Push-Button Spinners: These use a button or a pump mechanism on the top. You press it down repeatedly to spin the basket. They can be quicker and easier to operate than crank handle spinners.
Pull Cord Spinners: These have a cord that you pull out to start the spinning. They can be very effective but might require a bit more manual effort.
Choose the type that best fits your preferences for comfort, ease of use, and the volume of salad you typically prepare.
Step-By-Step Guide To Using A Salad Spinner
Steps1: Rinsing The Greens
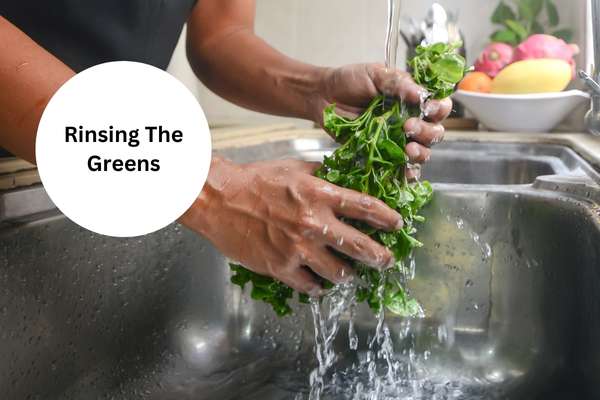
Start by rinsing your salad greens under cold running water. This initial rinse helps remove any loose dirt And debris from the surface of The vegetables.
Steps2 : Prepare Your Salad Ingredients.

Next, Prepare the salad ingredients next in accordance with your instructions. For example, you might chop vegetables, tear lettuce, or peel cucumbers. It is important to prepare your components, so they are prepared for the subsequent processes and so the spinner can properly remove water from all surfaces.
Steps3: Lift Out The Strainer Basket And Place Your Ingredients In It.

Once your salad ingredients are ready, lift the strainer basket out of the greens spinner. Place your prepared greens and other fresh blend ingredients into this basket.
Steps4: Flush Thoroughly With Water.

After loading the strainer basket, rinse your ingredients again. This ensures that any remaining dirt, grit, or pesticides are removed. Use plenty Of cold water for this process To ensure cleanliness.
Steps5: Put The Lid On The Spinner.

Next, put the strainer basket back into the spinner and secure the lid. Ensure the lid is firmly attached, as a loose lid could interrupt the spinning process Or cause water to splash out.
Steps6: Start Spinning The Salad.

Now it’s time to start spinning. Depending on your specific Green mixture model, this could involve pushing a button, pulling a cord, or turning a crank. Continue spinning until you’re satisfied that most of the water has been expelled from the greens ingredients.
Steps7: Remove Your Ingredients.

Finally, stop spinning and remove the lid from the fresh blend spinner. You can then lift out the strainer basket and remove your cleaned and dried salad ingredients. These are now ready to be used in your greens, providing a fresh and crisp base for your meal.
The Best Spinners Improve The Taste Of Your Salad
Every kitchen that wants To enhance the flavor and texture of fresh blend needs a salad spinner. The greatest Green mixture is effective at removing extra water from the greens, which improves the greens flavor and makes it easier for the dressing to stick to the leaves, As a result, the salad Is more flavorful, crisp, and fresh.
The History Of The Salad Spinner

The history of the salad spinner is quite intriguing. Invented in the early 1970s by a British engineer, the first fresh blend was a plastic bowl with a removable colander basket and a lid with a spinning mechanism. The user would add washed greens to the basket, replace the lid, and activate the spinning mechanism. This process would then force the water out of the greens and into the outer bowl, leaving the fresh blend dry and crisp. Since then, various designs and mechanisms have been introduced. But the basic concept remains the same.
How Often Should I Clean My Salad Spinner?
Maintaining your Green mixture Is critical to its performance and longevity. As a general rule, you should clean your greens spinner after each use. Most models are dishwasher safe, making cleaning easy, However, If your model Isn’t, warm soapy water. And a soft cloth will do the trick. Ensure it’s thoroughly dry before storing to prevent bacteria Or mold growth.
The Final Thoughts
To improve the flavor and texture Of your Fresh blend, use a greens spinner. It’s simple to use, straightforward to clean, And yields results that are desirable. Pick a salad maker that best suits your needs, maintain It clean, and benefit from healthier, more flavorful greens, To improve the overall flavor and satisfaction Of your greens, keep in mind that A superior Green mixture is more likely to do So.