A dull knife may not seem like a big deal—until you try slicing through a tomato and end up crushing it. Sharp knives don’t just make prep work faster and smoother; they’re also significantly safer. When your knife glides through food effortlessly, there’s less chance of slippage and accidental cuts. In the kitchen, precision is everything, and a well-sharpened knife gives you just that. It’s an underrated tool that enhances your overall cooking experience. Use A Whetstone To Sharpen A Kitchen Knife.
What Is a Whetstone and Why Is It the Best Tool for Sharpening?
A whetstone, sometimes referred to as a sharpening stone, is a block of abrasive material used to grind and hone the edges of steel tools. Unlike electric sharpeners or honing rods, a whetstone offers control, precision, and a gentler touch. It doesn’t shave off unnecessary metal but refines the edge gradually. Whetstones come in various materials, from natural stones to synthetic ones, and they’re prized by chefs for their effectiveness and reliability.
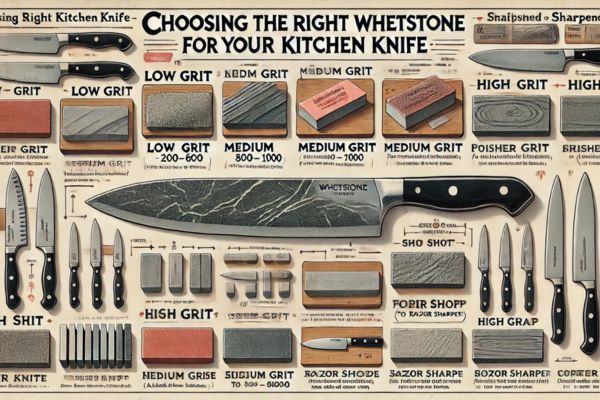
Choosing the Right Whetstone for Your Kitchen Knife
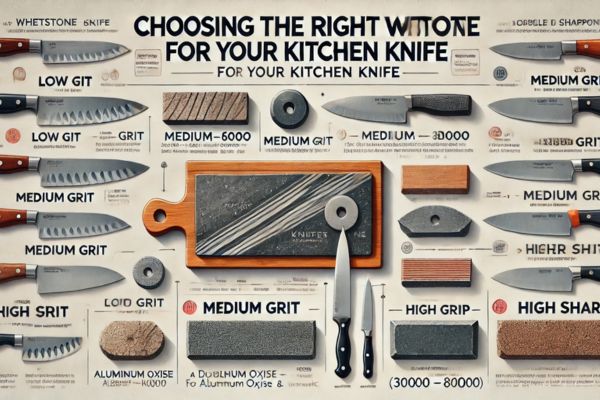
Not all whetstones are created equal. They vary in grit level, which determines how coarse or fine the surface is. Lower grit numbers (like 200–600) are used for repairing damaged blades or extremely dull edges. Medium grits (800–1000) are ideal for regular sharpening, while high grits (3000–8000) polish the edge to razor sharpness. Beginners may benefit from a double-sided whetstone with both coarse and fine surfaces. Look for stones made of aluminium oxide or ceramic for long-lasting performance.
Preparing Your Whetstone for Action
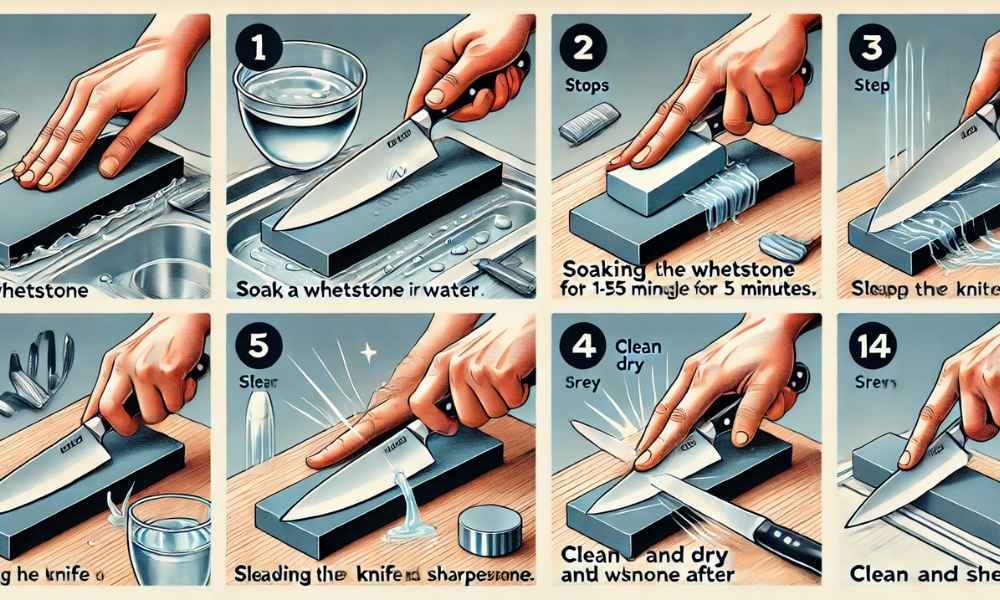
Before you start sharpening, your whetstone needs a bit of prep. Water stones must be soaked in water for 10–15 minutes until they stop releasing bubbles. This ensures a smooth surface and prevents metal filings from clogging the pores. Some stones require oil instead of water, so always check the manufacturer’s instructions. Place your stone on a non-slip base, or use a damp towel underneath to keep it steady.
Safety First: Getting Set Up for a Smooth Sharpening Session
Sharpening a knife might sound risky, but it’s entirely safe when you follow a few simple guidelines. Always work on a stable surface with good lighting. Keep your fingers behind the blade’s edge and use slow, deliberate movements. Having a towel nearby to wipe your blade and hands is also a good idea. The goal is to stay focused and controlled—never rush the process.
Understanding Your Kitchen Knife’s Angle
One of the most crucial elements in sharpening is maintaining the correct angle. For most kitchen knives, the optimal sharpening angle is between 15 to 20 degrees. This angle strikes a balance between durability and sharpness. You can use angle guides or even coins stacked under the blade’s spine to help keep consistency. With practice, muscle memory kicks in, and holding the angle becomes second nature.
Step-by-Step: How to Use a Whetstone to Sharpen a Kitchen Knife
- Place the whetstone coarse side up on a damp cloth or rubber base.
- Hold the knife at the proper angle with one hand on the handle and the other lightly pressing the flat of the blade.
- Begin stroking the knife across the stone in a sweeping motion—from the heel to the tip. Apply gentle pressure.
- Repeat 10–15 strokes per side, checking the blade’s edge regularly.
- Flip the knife and repeat on the other side, keeping the same angle and number of strokes.
This rhythmic push-pull movement creates a sharp, even edge. Stay patient—quality sharpening is a slow craft.
Flipping and Repeating: Sharpening Both Sides Evenly
Symmetry is key. Uneven sharpening can lead to a crooked edge that performs poorly and feels awkward. Always count your strokes and alternate sides at regular intervals. Feel for the “burr”—a tiny metal lip—forming on one side of the blade. Once detected, flip the knife and work the other side until the burr disappears. This ensures both sides are equally sharp and balanced.
Using the Fine Grit for Razor-Sharp Finishing
After establishing a solid edge with the coarse side, flip your stone to the fine grit. This stage is about refinement. Lighter strokes polish the edge, remove burrs, and produce a mirror-like finish. The blade should feel like it effortlessly glides across the stone. A properly finished knife will slice through paper, tomatoes, and meat with zero resistance.
Testing Your Knife’s Sharpness the Right Way
Skip the finger test—there are safer ways. The paper test involves slicing a piece of paper; a sharp knife will cut it cleanly with no snags. Try the tomato test—a sharp knife should pierce the skin with no pressure. Alternatively, use the thumbnail test, gently pressing the edge against your nail to see if it bites in without sliding. These simple tests confirm whether your efforts paid off.
Post-Sharpening Care: Cleaning and Storing Your Whetstone
Once done, rinse your whetstone thoroughly to remove metal particles and slurry. Dry it naturally—never use heat—as it can cause cracks. Store it in a dry place, ideally wrapped in a cloth or original box. Regular maintenance prevents buildup and ensures your stone lasts for years. A neglected whetstone can become uneven or lose effectiveness over time.
Maintaining That Sharp Edge Between Whetstone Sessions
Sharpening shouldn’t be a weekly task. Maintain your knife’s edge with a honing rod before or after each use. This realigns the blade rather than grinding it down. Clean your knives regularly and avoid dishwashers, which can dull the edge. Cutting on wooden or plastic boards also helps preserve sharpness longer.
Troubleshooting Common Beginner Mistakes
New to sharpening? It’s normal to make a few slip-ups. Common issues include:
- Applying too much pressure
- Using inconsistent angles
- Skipping the polishing stage
To fix them, slow down, practise often, and consider watching video tutorials. The more you sharpen, the better your technique becomes.
Sharpening Specialty Knives: A Quick Overview
Not all knives are created equal. Serrated knives require special sharpeners or professional care. Japanese knives, often made of harder steel, need finer grit stones and gentler handling. Cleavers and thick blades can tolerate lower angles but take more time to sharpen. Always check the manufacturer’s sharpening recommendations.
Conclusion
Mastering how to use a whetstone to sharpen a kitchen knife may seem intimidating at first, but it’s an incredibly rewarding skill. Not only does it improve your cooking efficiency and safety, but it also instils a sense of craftsmanship. With a bit of patience and practice, you’ll keep your knives sharper, your meals tastier, and your kitchen experience far more enjoyable.