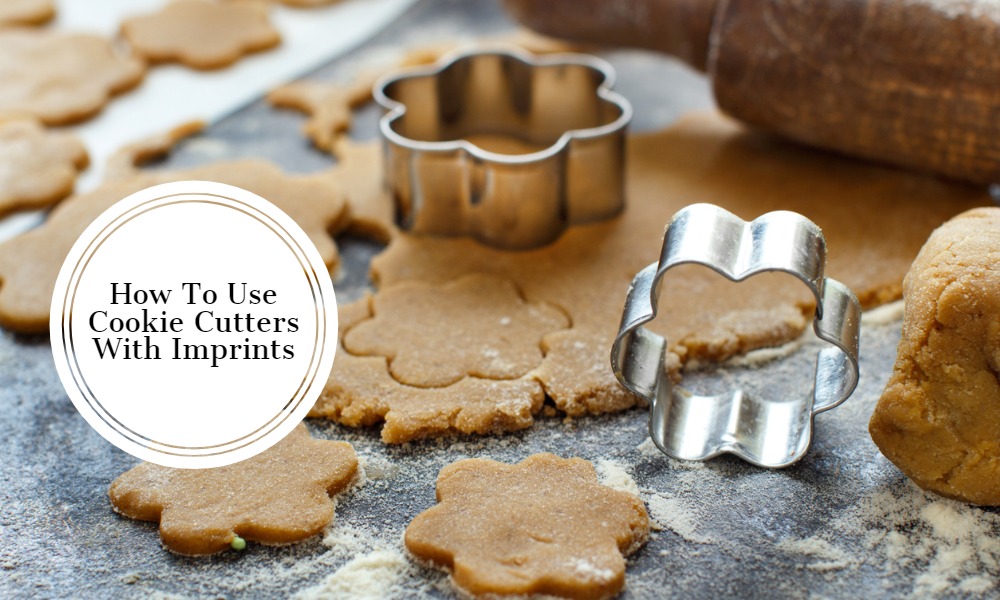
Cookie cutters with imprints add a charming and detailed touch to homemade baked goods. These clever kitchen tools allow you to create cookies that are not only delicious but also visually impressive. The process is quite simple, even for beginner bakers, allowing for more creativity and personal touch in your creations. Whether you’re crafting sweet treats for A holiday, or special occasion, or simply want to make baking more fun, This guide on how to use cookie cutters with imprints will provide you with clear instructions, ensuring your cookies are as beautiful as they are tasty.
Understanding Cookie Cutters With Imprints
This is a fun and easy way to elevate your baking game. These tools consist of a traditional cookie cutter shape with an additional design component that imprints a pattern or image directly onto your dough. The imprints can be as simple as lines and dots or as complex as intricate designs or even words. They’re typically made from plastic or metal and come in an array Of shapes and sizes to fit any occasion Or theme. When the imprinted cookies are baked, the design becomes baked into the cookie itself, resulting in a beautiful, edible work of art that stands out from standard cookies. This simplicity and versatility make these tools a favorite among both professional bakers and home enthusiasts.
What Are Cookie Cutters?

Cookie cutters are kitchen tools used to cut cookie dough into specific shapes before baking. Traditionally, they are made from metal, plastic, or wood, and they come in A vast array of designs, ranging from simple geometric shapes like circles and squares to more complex and whimsical designs like animals, flowers, And holiday-themed shapes. The cutters work by being pressed into rolled-out cookie dough, cutting out the desired shape which retains its form during baking. Cookie cutters are an essential tool for anyone who loves baking And wants to add an extra touch Of creativity to their sweet treats.
Benefits Of Using Cookie Cutters With Imprints
The benefits of using cookies cutters with imprints are manifold. Firstly, they elevate the aesthetics of your baked goods, impressing guests or adding an extra touch of charm to your homemade treats.
They allow for intricate designs that would be difficult to achieve by hand, creating an array of eye-catching patterns and images on your cookies. Furthermore, These cookie cutters make it easy to create themed cookies for specific occasions such as birthdays, holidays, Or other special events. In addition to this, cookies cutters with imprints can also be a fun way to get kids involved in the kitchen.
The process of cutting and imprinting the dough can be a hands-on, creative activity for children, while also helping them develop their fine motor skills. Lastly, despite their impressive results, cookies cutters with imprints are simple to use, making them a great tool for bakers of all skill levels.
Step-By-Step Guide To Using Cookie Cutters With Imprints
1. Gather Your Supplies

The first step in using cookie cutters with imprints is to gather all the necessary supplies. This includes your choice of cookie dough, flour for dusting, a rolling pin, Your cutters with imprints, and baking sheets. If you’re decorating your cookies after baking, you’ll also need icing, sprinkles, or other edible decorations. It’s essential to have everything within reach before you start, To make the process as smooth And efficient as possible.
2. Prepare The Cookie Dough

Start by preparing your favorite cookie dough recipe. Keep in mind that some doughs work better With cookie cutters than others. For best results, Use dough that doesn’t spread too much during baking, Such as A sugar cookie Or gingerbread dough. Once The dough is ready, Chill it in the refrigerator for about An hour. This helps the dough firm up and makes it easier to work with, ensuring that your cookies hold their shape during the cutting and baking process.
3. Roll Out The Dough
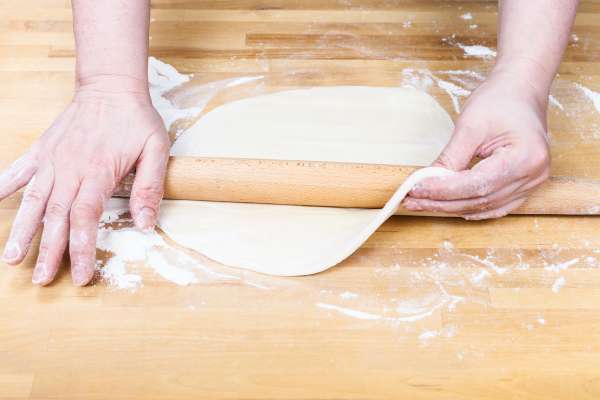
After chilling, take the dough out of the refrigerator. Lightly dust your work surface and roll the pin with flour to prevent the dough from sticking. Roll out your dough to an even thickness. The thickness will depend on your preference and the specifics Of your recipe, but generally, A thickness of about 1/4 inch works well. It’s thick enough to hold the imprint design, but not so thick that the cookies take too long to bake. Once your dough is rolled out, you’re ready to start using your cutters with imprints.
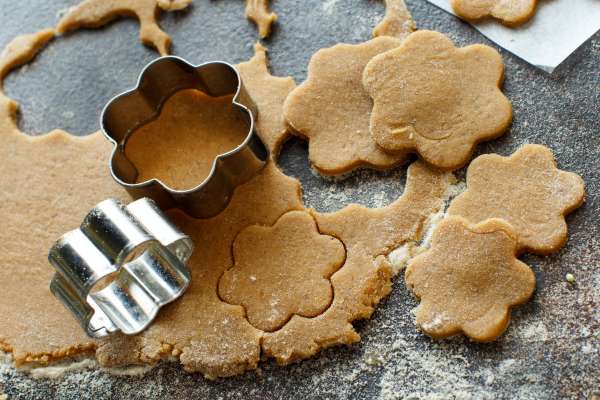
4. Cut Out The Shapes

Begin by pressing the cookie cutter into the dough, making sure to apply even pressure so the shape cuts out cleanly. Keep in mind that you should aim To cut out as many shapes as possible from each roll to avoid overworking the dough with too many re-rolls. Once you’ve cut out a shape, carefully lift the cutter, ensuring the dough stays within the cutter.
5. Imprint The Cookies
This is where cutters with imprints really shine. While the cut dough is still in the cutter, press the plunger or imprint section down to emboss the design onto the cookie. Apply even pressure, but be careful not to push so hard that the cutter cuts through the dough. Once imprinted, gently lift the cutter away from the dough, leaving the imprinted cookie on the work surface.
6. Bake The Cookies

Transfer the imprinted cookies onto a baking sheet, leaving some space between each cookie to account for any potential spreading. Bake according to your recipe’s instructions, but keep a close eye on them to ensure the cookies don’t over-bake and lose their imprinted designs. Once baked to perfection, Remove them from the oven And let them cool on the baking sheet for A few minutes before transferring them to A cooling rack.
7. Decorating The Cookies

After the cookies have fully cooled, you can enhance the imprinted design by decorating them. This could be as simple as dusting them with powdered sugar, which will stick to the raised parts of the design and highlight the imprints. Alternatively, you could use colored icing to fill in the imprinted areas, adding a pop of color and additional sweetness. Regardless Of how you choose to decorate, ensure the cookies are completely cool to prevent the icing from melting Or the sugar from absorbing into the warm cookies.
Tips And Tricks For Perfect Imprinted Cookies
1. Choosing The Right Cookie Cutter

The key to creating beautiful imprinted cookies starts with choosing the right cookie cutter. Look for cutters with clear, well-defined imprints to ensure your designs are distinct and visible. The material of the cutter is also important. Metal cutters are often sharper and can provide cleaner edges, while plastic cutters can offer more intricate imprints.
Depending on your needs And preferences, Both can Be excellent choices. Also, remember to choose a size appropriate for your purpose – larger cutters can make a big impression but may be harder for young children to handle, while smaller cutters are great for bite-sized cookies or for baking large quantities.
2. Handling The Cookie Dough
The way you handle your dough can greatly impact the end result of your imprinted cookies. The overworked dough can become tough and more difficult to handle. To avoid this, Try to get as many cut-outs as you can from each roll-out, And combine And re-roll scraps only once or twice. Chilling your dough before rolling it out can also make it easier to cut and imprint. If the dough becomes too soft while you’re working with it, Don’t hesitate to pop it back into the fridge for A few minutes.
3. Properly Imprinting The Cookies
For clear imprints, it’s crucial to apply even pressure when pressing the imprint into the dough. However, be careful not to press too hard, As this can cause the cutter to cut through the dough completely Or distort the shape. It may take A few tries to get the hang of it, So Don’t Be discouraged if your first few cookies aren’t perfect. Also, If you’re using An intricate cutter, You may need to flour it lightly before each cut to prevent the dough from sticking to the cutter. Finally, remember to always imprint your cookies before baking, as the heat of the oven will set the design.
4. Baking Temperature And Time
Different cookie recipes might call for different baking temperatures and times. But generally, a temperature Of 350-375°F (175-190°C) is commonly used. The baking time can vary depending on the size And thickness of your cookies, But it’s usually between 8-12 minutes.
Be sure to keep An eye on your cookies while they bake to ensure they don’t burn Or over-bake. Which could cause them to lose their imprinted design. Rotate your baking sheets halfway through the baking time to ensure even browning. If the imprints start to puff out and lose their shape, your oven might be too hot.
5. Cooling And Storing The Cookies

Allow your cookies to cool on the baking sheet for A few minutes before transferring them to A cooling rack. This will prevent them from breaking or losing their shape while they’re still soft from the heat.
Once they’re fully cooled, Store them in an airtight container at room temperature. Depending on the recipe, They can last up to a week, although they’re usually at their best for the first few days. If you’ve decorated your cookies with icing. Allow the icing to fully harden before storing the cookies To prevent them from sticking together.
To keep them fresh longer, you can also freeze them. Just Be sure to wrap them well to prevent freezer burn And thaw them at room temperature before serving.
What Materials Are Cookie Cutters With Imprints Made Of?
These are made from A variety Of materials, each with its own set Of advantages. The most common materials are plastic and metal. Plastic cookie cutters, often made from food-grade plastic, are lightweight, inexpensive, And can come in a variety Of colors.
They can also handle more intricate designs due to the flexibility and malleability of plastic. Metal cookie cutters, typically made from stainless steel or tin, are highly durable and offer sharp, clean edges for precise cuts. Some high-end metal cookie cutter may also have a silicone or plastic top for added comfort when pressing down.
Additionally, there are also wooden cookie stamps available that are typically used for creating imprints. Each material type offers a different aesthetic and function. So the choice often depends on personal preference, specific baking needs, and budget.
Can I Use Cookie Cutters With Imprints For Other Purposes Besides Cookies?
Absolutely, cookie cutter with imprints can be versatile tools used for a variety of purposes beyond just making cookies. They’re excellent for creating shapes in other types Of dough, such as biscuit dough, pie crusts, Or even pizza dough. For instance, they can be used to make festive pies with imprinted top crusts or fun-shaped sandwiches for children’s lunches. In addition, these cutters can also be used in crafting. They’re great for cutting out shapes in modeling clay, playdough, or making homemade ornaments. Some people also use them as templates for drawing or painting, or for creating shapes in foam for DIY projects. The possibilities are nearly endless, making these cutters a valuable addition to your kitchen or craft supplies.
Are There Any Safety Concerns With Using Cookie Cutters With Imprints?
Cookie cutter with imprints are generally safe to use, provided that they are handled correctly. One potential safety concern might be the sharp edges of metal cookie cutter, which could cause minor cuts if not handled carefully.
This is especially important When children are involved in the baking process. However, most modern cookie cutters are designed with safety in mind and have duller edges that are not likely to cause harm. Also, both plastic And metal cutters should be checked for any signs of damage or wear. As chipped or broken edges could potentially be a hazard.
Lastly, ensure the cookie cutters are cleaned properly after each use to prevent the growth of bacteria. Always check that the cookie cutters are made of food-grade materials and are free from harmful substances like BPA. With these precautions in mind, using cookies cutters with imprints can be a safe and fun activity for bakers of all ages.
The Final Thoughts
Using cookie cutters with imprints is an easy and effective way to elevate your baking, creating beautifully designed cookies that are sure to impress. With the right tools, suitable dough, and a bit of practice, you can achieve perfect imprints every time. Remember to choose the right cutter for your needs, handle your dough with care, apply even pressure when imprinting. And bake at the right temperature for the best results. Despite their impressive results. These cookie cutters are simple to use, making them A fantastic tool for bakers of all skill levels, from professionals to beginners And even children. So, get creative and have fun with your baking your delicious and beautifully decorated cookies are sure to be a hit on any occasion.