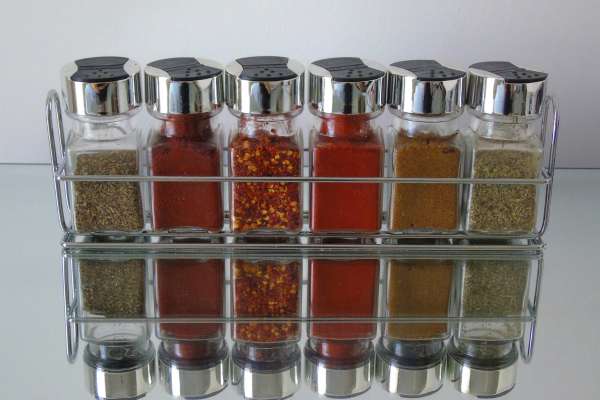
Spice racks serve as efficient organizers that offer easy access to your array of spices, helping to save space and reduce clutter in your kitchen. They can Be an aesthetically pleasing addition to your kitchen decor, Allowing you to show off your collection Of spices. Building your own spice rack gives you the flexibility to customize it to your taste, Fitting it perfectly to your space And needs. It can also be a cost-effective and satisfying DIY project. In this guide, We’ll walk you through A simple yet effective method To build your own wooden spice rack, offering A perfect blend of utility and style. Let’s get started.
Why Build A Spice Rack?
Building a spice rack offers several advantages:
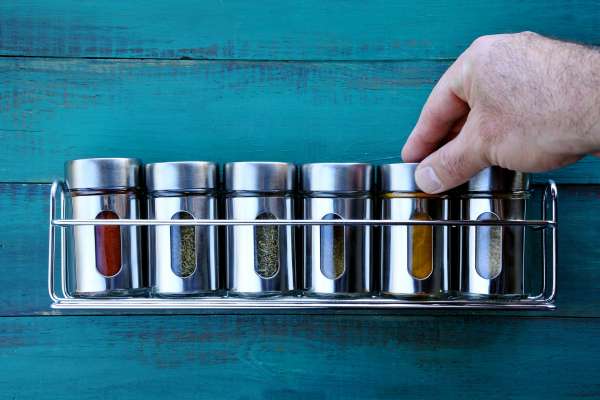
- Organization and Accessibility: A spice rack provides a structured space for your spices, which improves organization and makes them easily accessible while cooking. It prevents the mess created by loose spice jars.
- Space Saving: If your kitchen is small or crowded, a rack can help save space. It can be mounted on the wall or inside a cabinet, freeing up counter and drawer space.
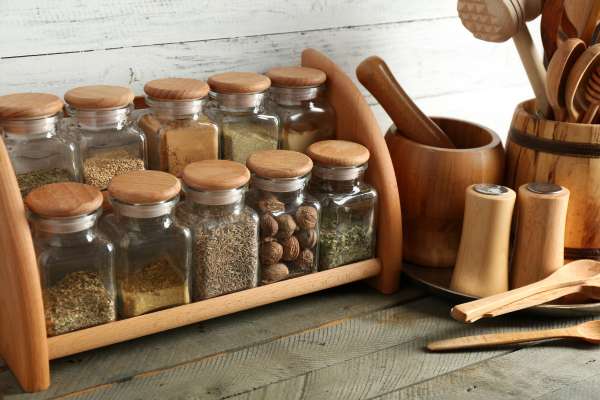
- Aesthetic Appeal: A homemade spices racks can be a charming addition to your kitchen decor. You can customize it to match your kitchen’s color scheme and style.
- Cost Effective: Building a spice rack yourself can be more affordable than buying a pre-made one. You can choose inexpensive materials and adapt the design to suit your budget.
- Fun and Satisfying DIY Project: If you enjoy crafting or woodworking, building a spices rack can be a rewarding project. It gives you the satisfaction of creating something functional and attractive with your own hands.
- Customization: When you build your own spice rack, You can tailor it to your specific needs. You can decide the size, The number of shelves, and the way it’s mounted.
- Practical Gift: A homemade spices racks can be a thoughtful and practical gift for a friend or family member who loves cooking.
Planning Your Spice Rack
1 Size And Capacity
The first step in planning your spices rack is deciding on its size and capacity. This will largely depend on the number of spices jars you have or intend to have. Make sure to measure the spice jars to ensure that the racks will accommodate them. Consider the space available in your kitchen as well. If you’re planning to mount it on the wall or inside a cabinet, measure the area to determine the maximum size your rack scan be. Remember, the goal is to create spice racks that neatly fits into your kitchen without taking up excessive space.
2 Design And Style
The design and style of your spices racks should be A reflection of your personal taste, As well as the overall aesthetic Of your kitchen. You can opt for a rustic, modern, minimalist, or any other style that complements your kitchen. You can also decide whether you want your rack to have open shelves or closed compartments. Choose A design that not only looks good but is also practical And easy To build.
3 Accessibility And Organization
While planning your spices racks, consider how it will improve the accessibility and organization of your spices. Design your racks such that it provides a clear view of all the spices, preferably at a glance. If you use some spices more often than others, plan to place them on the front or at an easily reachable height. Consider labeling the spices or arranging them in alphabetical order for easier identification. If you choose a tiered design, ensure that each row is slightly higher than the one in front, so no jar obscures another.
Materials And Tools
Materials:
- Wood (for the racks structure)
- Wood glue
- Screws or nails
- Paint or wood stain (optional)
- Sandpaper
- Clear wood sealant (optional)
Tools:
- Saw
- Drill
- Screwdriver
- Clamps
- Paintbrush (if painting or staining)
- Tape measure
- Carpenter’s square
- Pencil for marking
- Safety gear (goggles, gloves)
Step-By-Step Instructions
1. Measure And Cut The Wood

The first step in building your spices rack is to measure and cut the wood according to the dimensions you planned in the design phase. Use A tape measure to get the precise measurements for the sides, top, bottom, And shelves of your racks. Mark these measurements on your wood with a pencil. Then, using a saw, carefully cut the wood along these markings. Be sure to cut the wood on a stable surface and use safety equipment, such as goggles and gloves, to protect yourself.
2. Sand The Wood

After cutting the wood, the next step is to sand each piece. This is important to smooth any rough edges and surfaces, making the racks safe to touch and more aesthetically pleasing. You can use sandpaper for this step. Start with a coarser grit to remove larger imperfections, then move to a finer grit for a smoother finish. Remember to sand with the grain of the wood, not against it, to avoid scratching the surface. If you plan to paint or stain the racks, sanding will also help prepare the wood to better absorb the color.
3. Assemble The Rack

Once your wood pieces are cut And sanded, It’s time to assemble your spices racks. Start by attaching the sides to the bottom piece using wood glue and screws or nails for extra strength. Ensure that they form a perfect right angle using a carpenter’s square. Then, attach the top piece in the same manner. Once the basic frame is ready, you can add the shelves at the desired intervals. Use clamps To hold the pieces together while the glue dries. Once everything is assembled and the glue has dried, You can add A clear wood sealant to protect the wood, or paint or stain it as desired. After that, your spice racks are ready to be mounted and used!
4. Optional: Apply Finish
Applying a finish to your spice rack can enhance its appearance and increase its durability. Depending on the look you’re going for, You can paint the racks in A color that matches your kitchen decor Or stain it to bring out the natural beauty of the wood. Apply your chosen finish with a paintbrush, making sure to cover the entire surface. Allow it To dry completely before proceeding To the next step.
5. Mount The Spice Rack

Next, you need to mount your spices racks in the chosen location. If you’re mounting it on A wall, You might need to use wall plugs And screws for added security, depending on the weight of the racks and the type Of wall you have. Make sure to use a level to ensure the rack is straight. If you’re placing it inside A cabinet or on A countertop, ensure it’s stable And secure.
6. Optional: Add Dividers Or Shelves
Depending on the design of your racks and your spices collection, you might want to add dividers or extra shelves. This can help to further organize your spices, especially if you have a large collection. Dividers can be made from thin pieces of wood and can be attached using wood glue. Additional shelves can Be added in the same way As the original ones.
7. Arrange And Label The Spices

Finally, it’s time to fill your spices racks. Arrange your spices in a way that makes sense to you, such as by frequency of use, alphabetical order, or by cuisine. It might be helpful to label your spice jars, especially if they’re not clearly marked or if you’re using homemade spices blends. This will make it easier To find what you need while cooking. Once your spices are arranged, step back and admire your handiwork! You now have a functional, attractive spices racks to enhance your cooking and kitchen space.
Maintenance And Tips For Using Your Spice Rack
Maintaining and efficiently using your spice racks involves some simple practices:
Regular Cleaning: It’s important to clean your spices rack regularly to prevent dust and spilled spices from accumulating. A quick wipe-down with a damp cloth can keep it looking good. If you’ve applied a protective finish, your rack will be easier to clean. Always ensure the rack is dry to avoid moisture damage.
Keep It Organized: Maintain the organization system you established when you first filled your spices rack. This means putting spices back in their designated spots after use. This will save you time searching for spices while cooking.
Check for Expiry: Spices don’t last forever; they lose their potency over time. Regularly check the expiration dates and freshness of your spices. If a spice doesn’t smell As strong As it should, It’s probably time to replace it.
Avoid Direct Sunlight and Heat: Spices should be stored away from direct sunlight and heat sources like the stove or oven, as these can degrade their flavor. Your spice racks should ideally be placed in a cool, dark location.
Rotate Spices: If you have spices that you use less frequently, rotate them towards the front of the rack now and then to remind you to use them before they lose their potency.
Use Clear Labels: Make sure each jar is clearly labeled. This helps you to quickly identify the spices you need. You can use a label maker or write on masking tape with a marker.
Regular Maintenance Checks: Every few months, check the stability of your spices rack, especially if it’s wall-mounted. Ensure the mounting screws are tight and the rack is still level.
By keeping these tips in mind, you can ensure your DIY spices rack continues to be a helpful, organized, and attractive addition to your kitchen.
How Many Spice Jars Can A Standard Spice Rack Hold?
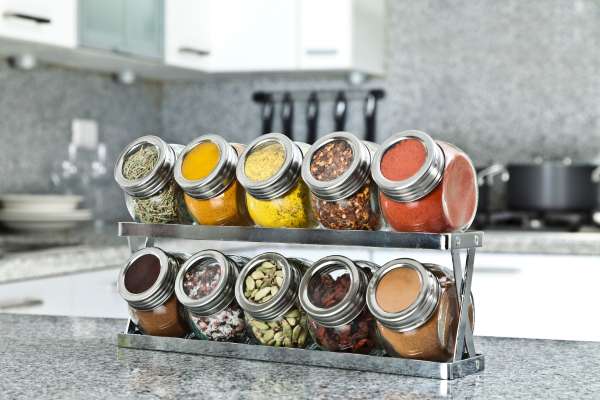
The number of spice jars a standard spice racks can hold greatly depends on the specific design and dimensions of the racks. However, a common countertop spice racks usually holds around 12 to 20 jars, whereas a larger wall-mounted or in-cabinet style spices racks might accommodate anywhere from 24 to 48 jars, or even more. Ultimately, The capacity of A spices rack can Be tailored to individual needs, Which is one of the advantages of building your own. When planning your DIY spice rack, It’s crucial to consider the number and size Of your spices jars to ensure they all fit comfortably.
Can I Customize The Size Of My Spice Rack?
Absolutely! One of the key benefits Of building your own spices rack is the flexibility to customize it To your specific needs and preferences, including the size. When planning your spice racks, You can adjust the dimensions based on how many spice jars you want to store, The size of those jars, And the space available in your kitchen where you plan to mount or place the racks. Customizing the size allows you to maximize kitchen space efficiency and make the racks truly fit your cooking habits and spice collection. So, Whether you have A vast array of spices or just A handful of favorites, you can create a spice rack that’s the perfect size for you.
Should I Stain Or Paint My Spice Racks?
Whether to stain or paint your spice racks depends on your personal preference and the look you want to achieve.
Staining the wood can highlight its natural grain and beauty, and it generally gives a warm, rustic look. It’s a great choice if you want to retain and enhance the natural appearance Of the wood. However, The final look will largely depend on the type of wood you’re using as different woods absorb stains differently.
On the other hand, painting the spice racks allows you to use any color you want, providing flexibility to match your kitchen’s color scheme or to create a pop of color. Paint generally provides a more solid, uniform color and can be more protective against moisture and stains.
Both staining and painting require the wood to be properly prepped (cleaned and sanded) before application. Paint may hide any imperfections in the wood, while stain might highlight them. So, Your decision may also depend on the quality And condition of your wood.
Whichever you choose, both options can help protect the wood and extend the life of your spice racks. And remember, it’s always a good idea to finish with a clear sealant for added protection.
The Final Thoughts
Building your own spice rack is a rewarding DIY project that enhances your kitchen organization, decor, and cooking experience. By measuring and cutting your chosen wood, sanding it smooth, and assembling your racks, you create a custom solution for your spices. Adding a finish, such as paint or stain, and optional features like dividers or additional shelves can further personalize your creation. Once installed, maintaining your spice racks through regular cleaning, organization, and spice rotation will keep it functional and beautiful for years to come. Ultimately, the flexibility in size, design, and capacity offered by building your own spice racks allows it to perfectly match your needs and kitchen aesthetic.