
Making your own spice rack from wood can be a satisfying and functional DIY project. By creating your own spice racks, you can customize the size, style, and finish to perfectly suit your kitchen’s decor and your culinary needs. This project will not only provide An organized space for your spices, making them easily accessible when cooking, But it will also add A personal touch to your kitchen. As an added bonus, This can be A great way to recycle or upcycle some leftover pieces of wood. Whether you’re A novice or experienced with woodworking, With the right materials, tools, And a bit of patience, You can create a wooden spice racks that is both stylish and practical. Let’s get started on creating your own unique, Handmade storage solution.
The Benefits Of Creating A Spice Rack At Home
Creating A spice rack at home brings with it Aa variety of benefits, both practical And personal:
- Customization: One of the primary benefits is the ability To customize the spice racks to your specific needs And preferences. Whether you need a small rack for a few essentials or a large one to house an extensive spice collection, you can design and build it accordingly. You can also tailor the style, color, and finish to fit seamlessly with your kitchen decor.
- Organization: A handmade spice racks can drastically improve the organization Of your kitchen. By giving each spice its own designated place, You’ll find it easier And quicker to locate what you need when you’re cooking, enhancing your efficiency in the kitchen.
- Cost-effective: Building your own spice racks can Be A cost-effective solution, especially if you already have some tools and leftover materials on hand. Even if you buy new materials, It can still be less expensive than purchasing A pre-made spice racks Of similar quality.
- Quality control: When you build your own spice racks, You have control over the quality Of the materials and construction. This often results in A sturdy and durable piece that can last for many years.
- Creative Expression: DIY projects like this allow for personal creative expression. You can choose A design that reflects your personality and taste. It’s also A satisfying way to engage in A productive hobby.
- Sustainability: If you’re using reclaimed Or leftover wood for the project, You’re contributing to sustainability by recycling materials And reducing waste.
- Skill Building: Finally, creating A spice rack is A fantastic opportunity to learn And hone your woodworking skills. It’s a manageable project for beginners and A fun challenge for those more experienced.
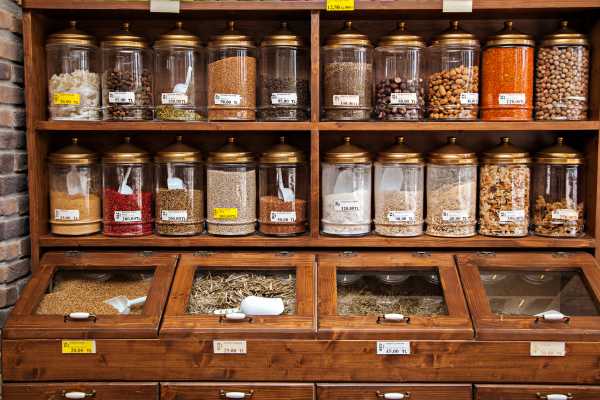
What Is A Spice Rack?
A spice rack is a storage device designed to hold and organize spices, herbs, and other culinary seasonings. They come in a variety of designs, sizes, and materials, ranging from compact, tiered shelves to rotating carousels and magnetic containers. Some can be wall-mounted, placed on a countertop, or tucked inside a cabinet, catering to the available space and aesthetics of different kitchens. The purpose Of a spice rack is to provide easy accessibility and visibility of spices when cooking, As well as to keep them fresh by storing them in A cool, dry place. By organizing spices efficiently, a spice rack can help streamline the cooking process and add a decorative element to kitchen interiors.
Tools And Materials Needed
1. Wood
The primary material you’ll need is wood. Depending on the look you’re going for, You could use plywood, hardwood, Or reclaimed wood. Ensure the wood is in good condition and of an appropriate thickness and strength to hold your spice containers.
2. Measuring Tape
Precision is key in any woodworking project, making a measuring tape essential. It will allow you to determine the exact size and dimensions of your spice racks, ensuring your spices fit perfectly.
3. Saw
A saw will be necessary to cut your wood into the desired dimensions. This could be A hand saw, A jigsaw, Or a table saw, depending on what you have available and the size of the wood pieces you’re working with.
4. Sandpaper
Sandpaper is used to smooth out any rough edges on the wood pieces after they’re cut, And to prepare the wood for painting Or staining. A variety of grits from coarse to fine might be useful.
5. Wood Glue
Wood glue is a strong adhesive designed to bond wood pieces together. This can be particularly useful for securing the shelves of the rack.
6. Clamps
Clamps are used To hold the wood pieces tightly together while the wood glue dries. They can ensure a stronger, more secure bond.
7. Screws And Drill
A drill and screws provide additional strength and stability to the spice racks. The size Of the screws will depend on the thickness Of your wood. A drill will also be useful for making pilot holes, which can prevent the wood from splitting.
8. Paint Or Stain
Finally, paint or stain will give your spice racks its finishing touch. This is where you can get creative and add a color that complements your kitchen decor. Alternatively, a clear wood stain or sealant can enhance the natural beauty of the wood. This not only improves aesthetics but also adds A layer Of protection to the wood.
Building Your Spice Rack Step-By-Step
Step 1: Measure And Cut The Wood
Begin your project by deciding the dimensions of your spice racks. Take into consideration the size and number of spice containers you plan to store. Measure the lengths accurately on your pieces of wood using a measuring tape and mark them with a pencil. Once you have marked your measurements, it’s time to cut the wood. Depending on your comfort And the tools available, You could use a hand saw, A table saw, or a jigsaw. Make sure your cuts are straight and accurate to ensure your pieces fit together correctly.
Step 2: Sand The Edges And Surfaces
After the wood pieces have been cut to the desired size, Use sandpaper to smooth out the rough edges And surfaces. This not only makes the pieces safer To handle but also prepares them for gluing, screwing, And finishing. Start with A coarser grit sandpaper to remove the rougher parts And gradually work your way to A finer grit for a smooth finish. Always remember to sand along the grain Of the wood, not against it.
Step 3: Designing The Spice Rack
Once all your pieces are cut and sanded, lay them out on a flat surface to plan your spice racks design. If you’re making a simple shelf-style rack, you will have a back piece, bottom piece, top piece, and several smaller pieces for the shelves. For a step-style rack, you’ll have larger pieces for the steps and smaller pieces for the sides and back. Once you are happy with your design, use a pencil to mark where each piece will join another, indicating where to apply wood glue or screws in the following steps.
Step 4: Assemble The Spice Racks
Now that your design is laid out, you can begin assembling your spices racks. Apply wood glue to the edges of the pieces that will be connected, align them accurately, and press them together. Use clamps To hold the pieces in place while the glue dries. Ensure the clamps apply pressure evenly to avoid warping the wood. Always wipe off any excess glue immediately to prevent it from hardening and affecting the finish of the rack.
Step 5: Reinforce With Screws
Once the glue has fully dried, It’s time to reinforce the connections with screws. Pre-drill holes where the screws will go using A drill bit that is slightly smaller than the size Of your screws. This helps prevent the wood from splitting. Then, Using the drill, insert the screws into the pre-drilled holes. This step will ensure that your spices racks are robust and can handle the weight of your spice containers.
Step 6: Mounting The Spice Rack
The next step is to mount the spice racks in its designated location. This could be on A wall, inside A cabinet, or even standing on a countertop. If you’re wall-mounting the racks, You’ll need to drill holes into the wall And use suitable wall plugs And screws to secure it. Ensure the rack is level when mounting. If you’re placing it on A countertop, consider attaching rubber pads To the bottom to prevent it from slipping.
Step 7: Finishing Touches
Now it’s time to Add the final touches to your rack. Use paint or stain to give it the desired look. Paint can provide a variety of color options to match your kitchen decor, while stain can enhance the natural beauty of the wood grain. Be sure to apply A sealant or finish to protect the wood from moisture And to make it easy to clean. Once the finish is completely dry, your rack is ready to be filled with your favorite spices, enhancing your kitchen’s organization and efficiency.
Maintaining Your Spice Rack
Maintaining your rack not only ensures its longevity but also helps keep your spices fresh and your kitchen organized.
Here Are Some Tips:
- Regular Cleaning: Dust and clean your rack regularly to keep it looking fresh and tidy. Use a damp cloth to wipe down the surfaces. Avoid using harsh chemical cleaners that could damage the wood or potentially contaminate your spices.
- Monitor the condition of your spices: Regularly check your spices for freshness. Spices don’t last forever; they lose potency over time. A good rule of thumb is to replace whole spices after 4 years, ground spices after 2-3 years, and leafy herbs annually.
- Avoid Overloading: While it might be tempting to cram as many spice jars as you can onto the rack, overloading it could cause strain on the wood over time. Respect the size and weight limitations of your spice rack.
- Location: Keep your rack away from heat, light, and moisture, as these can degrade your spices faster. The ideal location is a cool, dark place, which can also help preserve the condition of the wooden spice rack itself.
- Inspect and Repair: Regularly inspect your rack for any signs of wear or damage. If you notice any loose screws, tighten them. If the wood starts to look dry or worn, consider reapplying a sealant or finish to keep it protected.
- Spice Organization: Keep your spices organized. You might arrange them alphabetically, by frequency of use, or by cuisine. An organized rack will not only look pleasing but also make cooking more efficient.
By properly maintaining your rack, you’ll extend its lifespan, ensure the quality of your spices, and add to the overall functionality and aesthetic of your kitchen.
The Final Thoughts
Creating a wood spice rack at home is a rewarding and practical project that can elevate your kitchen’s organization and style. Starting with the right materials, including quality wood, a saw, sandpaper, wood glue, screws, and your preferred paint or stain, you can design a custom rack that suits your needs. The process includes accurately measuring and cutting the wood, sanding the pieces for smoothness, assembling the rack with glue and screws, and finishing with a coat of paint or stain. The final step is mounting the rack in a suitable location in your kitchen, ready to store your spices. Maintenance is also vital to ensure the longevity of your rack and keep your spices in optimum condition. By undertaking this project, You get to improve your woodworking skills, express your creativity, save money, And create A unique piece that complements your kitchen decor. The end result is a convenient, aesthetically pleasing, And durable rack made by your own hands.