
Cookie cutters can transform the simple process of baking cookies into a fun and creative endeavor. From holiday-themed designs to shapes that spark imagination, these little tools offer endless possibilities to bakers of all skill levels. Cookie cutters can be used to shape cookie dough, fondant, and other baking materials into intricate designs, making the baking process more entertaining and the end results more delightful. Here is A simple step-by-step guide on how to use cookie cutters to bring your desired shapes And themes to life.
What Are Cookie Cutters?
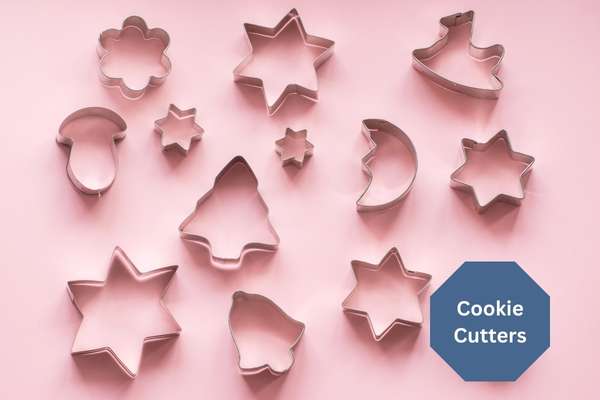
These are kitchen tools designed to cut cookie dough and similar substances into specific shapes before baking. Traditionally made from metal or plastic, they come in A wide variety Of shapes and sizes, from simple circles and squares to complex characters, holiday themes, And intricate designs. Some cookie cutter also have a plunger mechanism to help easily eject the cut dough and imprint detailed patterns onto it. They offer a fun, easy way to add creativity to baking, making them a popular tool for both professional bakers and hobbyists alike.
Why Use Cookie Cutters?
Using cookie cutters offers a multitude of benefits in baking. Firstly, they allow bakers to create uniform shapes quickly and efficiently, which is not only aesthetically pleasing but also ensures even baking. This is particularly important in professional settings where consistency is key. Secondly, they add a level of creativity and fun to the baking process. With countless shapes and sizes available, they provide a simple way to customize cookies for any event, theme, or season – be it Christmas, Halloween, birthdays, or everyday fun. Finally, they’re a great tool for engaging children in baking, allowing them to safely cut dough into various shapes and enjoy a hands-on experience in the kitchen.
Different Types Of Cookie Cutters

1. Plastic Cookie Cutter

Plastic cookie cutters are a popular choice for both casual and serious bakers. They are lightweight, affordable, And available in A multitude of colors and shapes. These cutters are usually safe for children to use due to their smooth edges and unbreakable material. The plastic used is often dishwasher safe, making them easy to clean. However, they might not be as sharp or durable as metal cutters, making it a bit more difficult to cut cleanly through thicker or tougher dough.
2. Metal Cookie Cutters

Metal cookie cutters are another common option. They are typically made from stainless steel Or tin And are known for their durability and sharpness. These cutters easily cut through various types of dough, producing clean, precise shapes. They come in a broad range of designs and sizes, from simple circles to complex holiday themes. On the downside, they can rust if not properly cared for and their sharp edges might not be suitable for young children.
3. 3d Printed Cookie Cutters

With The rise Of 3D printing technology, This has become increasingly popular. These cutters offer virtually limitless design possibilities, As they can Be custom-made in any shape Or size according to the user’s specifications. This allows for the creation of highly personalized or unique cutters that might not be available commercially. They are typically made from food-safe plastic, But they might not be as durable As traditional plastic or metal cutters And may require more delicate handling and care.
How To Use Cookie Cutters
Using a cookie cutter is A straightforward process, But here are detailed steps to ensure you get the best results:
- Prepare Your Dough: Start by preparing your cookie dough according to your recipe. The dough should be firm but malleable. Chill the dough if necessary, as this can make it easier to handle and cut.
- Roll Out the Dough: Dust your work surface and rolling pin with flour to prevent the dough from sticking. Roll out the dough to your desired thickness, typically about 1/4 inch for most cookie recipes.
- Cut Out the Shapes: Press the cookie cutter into the dough with firm, even pressure. Wiggle it slightly to separate the cut shape from the rest of the dough. If your cookie cutter has a plunger or imprinting design, make sure to press that as well.
- Transfer to Baking Sheet: Using A spatula, gently lift the cut cookies And place them onto A baking sheet lined with parchment paper or a silicone baking mat. Make sure to leave enough space between each cookie to allow for spreading during baking.
- Reuse Dough Scraps: Gather up the remaining dough scraps, re-roll and continue cutting out more cookies. Repeat this process until all the dough is used.
- Bake: Follow your recipe’s instructions for baking time and temperature. Keep A close eye on the cookies as baking times can vary depending on the dough thickness And the size Of your cutters.
- Cool and Decorate: Let the cookies cool on the baking sheet for A few minutes before transferring them to A cooling rack. Once completely cool, You can decorate them with icing, sugar, sprinkles, Or any other toppings you like.
While cookie cutters are often used for cookies, They can also be used to cut shapes from other foods like fondant, sandwiches, pancakes, fruits, And more. Happy baking.
Ingredients And Tools
For making cookies using cookie cutter, you will need a variety of ingredients and tools.
Here are the basics:
Ingredients for A Simple Sugar Cookie Dough:
- Flour: This is the base Of your cookie dough. You’ll need about 2 to 3 cups depending on your recipe.
- Sugar: Generally, about 1 cup of granulated sugar is used.
- Butter: This ingredient adds flavor and moisture to your cookies. Usually, 1 cup (or 2 sticks) is enough.
- Eggs: Eggs act as the binding agent in your dough. One egg is typically sufficient for a batch of cookies.
- Vanilla Extract: This adds a hint of sweetness and flavor. Around 1 teaspoon is enough.
- Baking Powder: This helps your cookies rise. You’ll need about 1 to 2 teaspoons.
- Salt: Just a pinch will help to enhance the flavors.
Decorating Ingredients (optional):
- Icing: This can be used to add decorative details to your cookies.
- Food Coloring: To color your icing for more vibrant decorations.
- Sprinkles, Edible Glitter, or Other Toppings: These add texture and visual appeal to your cookies.
Tools:
- Cookie Cutter: These are used to shape your cookies. They come In various shapes And sizes.
- Mixing Bowls: For mixing your dough and icing.
- Rolling Pin: To roll out your dough evenly.
- Baking Sheets: To bake your cookies on.
- Parchment Paper or Silicone Baking Mat: These prevent your cookies from sticking to the baking sheet.
- Spatula: For transferring your cut cookies to the baking sheet and removing them after baking.
- Cooling Racks: To allow your cookies to cool evenly.
- Icing Bags and Tips: If you’re planning on decorating your cookies with icing, these can help you apply them precisely and creatively.
Please note that the above are the basics, and specific recipes may require additional or different ingredients and tools. Always follow the recipe you’re using for the Best results.
Tips And Tricks To Perfect Your Cookies
1. Ensuring Perfect Shapes
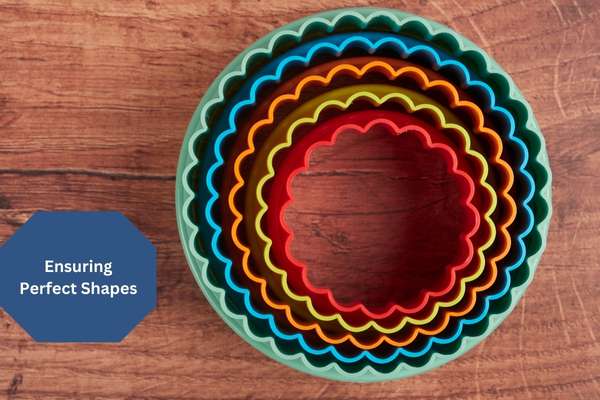
For perfect shapes, start with the well-chilled dough. This helps the dough hold its shape better when cut and during baking. Also, make sure to dust your work surface, rolling pin, and cookie cutter with flour to prevent sticking. When cutting out your shapes, try to minimize the space between cuts to get the most cookies from each roll. After cutting, You can chill the cut cookies On the baking sheet for about 10-15 minutes before baking to help maintain their shape.
2. Removing Dough From Cutters

Sometimes dough can stick inside the cutter, especially with intricate designs. If this happens, gently tap the cutter on the edge of the bowl or lightly wiggle it to release the dough. Using a toothpick can also help with very small areas. If the dough continues to stick, lightly dust the inside of the cutter with flour or dip it in warm water between each cut.
3. Decorating Your Cookies

When it comes to decorating, The sky’s the limit, But here are A few tips. Allow the cookies to cool completely before decorating to prevent icing from melting. If using icing, you can outline the shape first and then “flood” the inside for a neat and clean look. To add more dimension to your cookies, use multiple colors or layers of icing, allowing each layer to dry before applying the next. Sprinkles, edible glitter, or other decorations can be added while the icing is still wet. For precise detailing, consider using icing bags with various tips. Practice makes perfect when it comes to decorating, So don’t Be afraid to experiment with different techniques And designs.
Cleaning And Storing Your Cookie Cutters
Proper cleaning and storage of your cookie cutters are crucial for maintaining their quality and longevity. After each use, gently hand wash them in warm, soapy water. Avoid using harsh cleaning materials like steel wool that can scratch or damage them.
After washing, thoroughly dry your cookie cutter to prevent rust or discoloration, especially for metal ones. Store them in a dry place to further protect against moisture damage. For large collections, consider organizing your cutters by shape, size, or theme in separate containers or compartments for easy access. If you have 3D printed or antique cutters, consult any care instructions provided by the manufacturer or seller, as these may require special handling.
By taking care Of your cookie cutter, You’ll ensure they’re ready for many more baking sessions to come.
The Final Thoughts
Using cookie cutters can significantly enhance your baking experience, allowing you to create cookies with a variety of shapes and themes. The process is quite simple: prepare your dough, roll it out, Press your cookie cutter into the dough, And then bake your cookies according to your recipe. Don’t forget to have fun with it use different shapes, sizes, And styles Of cutters to customize your cookies to your liking. You can even add decorations with icing, sprinkles, and other toppings. Just remember to clean and store your cutters properly to keep them in good condition. With these steps, You’ll be able to use cookie cutters effectively to make your baking more enjoyable and creative.