
Gathering your herbs Is The first essential step In making The most of your Pampered Chef Herb Keeper. Whether You’re just harvested fresh herbs from your garden or bought them from The store, It’s crucial To choose The healthiest sprigs and leaves. Begin by inspecting your herbs And removing any yellowing or wilted leaves. Gently rinse them under cold water To remove any dirt or debris, And then gently pat them dry with A paper towel or A clean kitchen cloth. This ensures that You start with the freshest herbs possible, which will prolong their shelf life inside The Herb Keeper.
How to maintain ideal water levels inside?
To maintain ideal water levels inside The Pampered Chef Herb Keeper, begin by filling The bottom reservoir with cool, clean water up to The “Max Fill” line when first setting it up. Regularly check The water level, ensuring It touches The base of The herb stems, And replenish with cold water As needed To maintain adequate humidity. Be cautious not To overfill, As excess moisture Can lead To herb spoilage. Understanding The moisture preferences of different herbs And periodically cleaning and refreshing The Herb Keeper will help create The perfect environment For preserving The freshness And flavor of your herbs.
Pampered Chef Herb Keeper Using process
1. Gather Your Herbs

Before You start using your Pampered Chef Herb Keeper, the first step Is to gather your herbs. Whether You’re grown them In your garden or bought them from The store, selecting. The freshest herbs Is key To preserving their flavor. Begin by inspecting your herbs and removing any discolored Or wilted leaves. Once You’re sorted your herbs, give them A gentle rinse under cold water To remove any dirt or debris. Pat them dry with A paper towel or A clean kitchen cloth To ensure they are moisture-free.
2. Prepare the Herb Keeper

Now that You have your fresh herbs ready, It’s time To prepare The Herb Keeper. Open The Herb Keeper And take A moment To familiarize yourself with It’s components. The essential aspect Of maintaining ideal water levels Is the bottom reservoir. Fill this reservoir with cool water until It reaches The “Max Fill” line marked inside. Ensuring you have The right water level Is crucial For the herbs’ longevity.
3. Add Water
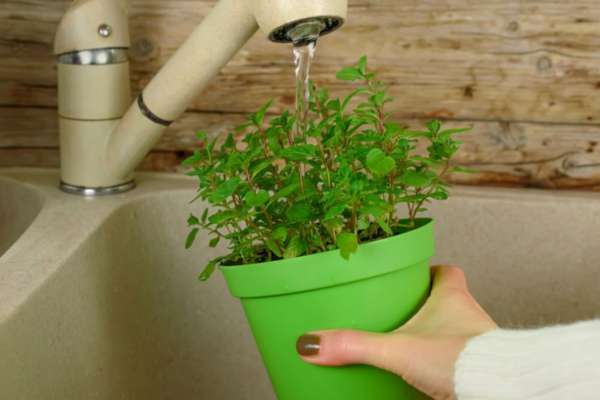
The process of adding water To your Pampered Chef Herb Keeper water Is straightforward but critical to Its effectiveness. When You first set up The Herb Keeper, open It and locate the bottom reservoir. This reservoir Is designed To hold water, creating A humid environment that helps keep your herbs fresh. Fill It with clean, cool water, ensuring You don’t exceed The “Max Fill” line marked inside The container. This initial filling sets The stage For preserving your herbs’ flavor And prolonging their shelf life.
4. Arrange Your Herbs

Arranging your herbs inside The Pampered Chef Herb Keeper Is a critical step In maximizing their freshness And flavor. After washing And drying your herbs, place them with their stems submerged In The water, ensuring they have room To breathe without overcrowding the container. This thoughtful arrangement not only optimizes humidity but also preserves The herbs’ quality, making them readily available To elevate your culinary creations with their vibrant taste and aroma.
5. Position the Lid

Positioning The lid on The Pampered Chef Herb Keeper is the final step To ensure The longevity Of your herbs. Once your herbs are neatly arranged inside And the water reservoir Is filled to. The appropriate level, sealing The container with The lid creates An airtight environment that maintains the desired humidity. This protective seal locks In the freshness, preserving The herbs’ flavor And aroma For An extended period, ready To enhance your culinary endeavors whenever You need them.
6. Label Your Herb Keeper

Labeling your herb keeper Is a practical And organized approach To herb storage. By clearly identifying the herbs You’ve placed inside, You Can easily distinguish between different varieties, making meal preparation more efficient And enjoyable. Use adhesive labels or waterproof markers To write The names or date of harvest on The side or lid of The container. This simple step not only keeps your herb keeper organized but also helps You keep track of freshness. And herb variety, ensuring that your culinary creations are infused with the perfect flavors every time You reach For your herbs.
7. Check the Water Level

Regularly checking The water level within your herb keeper Is a crucial practice To maintain the freshness And vitality of your herbs. Since herbs rely on The humidity created by The water reservoir, It’s essential To ensure that. The water level Is consistently maintained, touching The base of The herb stems. Regular inspections, ideally every few days, allow You to identify And address any water depletion promptly. By doing so, You Can provide A continuous humid environment that keeps your herbs at their peak, ready To enhance your culinary creations with their vibrant flavors And aromas.
8. Replace Wilted Leaves

Replacing wilted leaves Is a key aspect Of herb maintenance In your Pampered Chef Herb Keeper. As your herbs stay In the container, some leaves may naturally begin To wilt or deteriorate. To ensure The overall freshness of your herbs, It’s important To regularly inspect them And remove any wilted Or discolored leaves promptly. By doing so, You not only maintain The aesthetic appeal Of your herbs but also help prevent any potential decay Or mold from affecting The remaining foliage. This simple practice ensures that the herbs inside your Herb Keeper stay vibrant And ready To elevate your culinary creations.
Do I need to change the water in the herb keeper regularly?
Yes, It’s a good practice To change The water In your herb keeper regularly. While the water In the reservoir creates a humid environment that helps keep your herbs fresh, over time, It Can become stagnant and potentially develop impurities. Changing The water every few days or at least once A week Is recommended To maintain. A clean And healthy environment For your herbs. When You change The water, also check the water level To ensure It’s at The right level, touching The base of The herb stems. This routine maintenance helps prolong the freshness And flavor Of your herbs, ensuring they’re at their best when You use them In your culinary dishes.
The Final Thought
The Pampered Chef Herb Keeper Is a valuable tool For preserving the freshness And flavor of your herbs. By following The steps outlined In this guide, from gathering And arranging your herbs to maintaining proper water levels and regular checks, You Can ensure that your herbs remain vibrant and ready To enhance your culinary creations. Don’t forget to label your herb keeper for organization And replace wilted leaves As needed. These simple practices will elevate your cooking experience And make your herb storage A breeze. So, embrace the convenience of The Pampered Chef Herb Keeper, And enjoy the delightful flavors Of fresh herbs In your dishes. Happy cooking!